Wood is a natural and renewable resource that comes from trees. It has been known for many applications due to its flexibility. However, wood may need management as it may deteriorate due to various factors. Fortunately, some available products on the market may seem unusual to use on wood, but they do work. In this guide, you will encounter flexible products that work on filling, painting, and sealing woods.
Product #1: Flex Seal
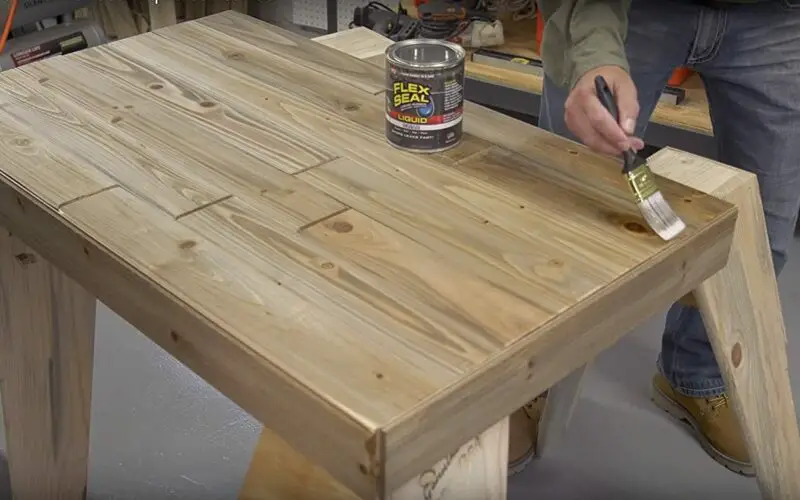
Flex Seal products are usually used on various surfaces, such as metal, tile, concrete, fabric, masonry, plastic, aluminum, drywall, porcelain, and vinyl. Furthermore, they work on wood to provide nourishment and protection from the inside.
A sealer is a mixture of oils and resins. But it is less dense as compared to varnish. There are a lot of creative and practical ways to use Flex Seal. Take a look at some important points below.
How to Apply Flex Seal
Flex seal works better on dry wood than wet wood because it does not adhere well on wet surfaces. It is recommended to apply this product 2-3 times. Depending on the application of the Flex seal, each coating offers differing treatments.
First Application
Flex Seal will penetrate through the wood fibers once the initial coat is applied, defending the wood from the inside out.
Second Application
The wood is sealed by the second Flex Seal layer, which combines with the first coat.
Third Application
The third Flex Seal layer, applied over the second coat, gives the wood water resistance, warmth, and scratch resistance.
Tips and Tricks
For additional points about applying Flex seal products, please refer to the tips below.
- Wiping the paintbrush inside the sealer tin will generate air bubbles, which could ruin the finish of your project. Apply the sealer against the wood grain and leave the edge unfinished for a smoother finish.
- Before starting the job, practice on a scrap piece of wood to feel comfortable. If bugs or dirt are on the moist surface, avoid touching it because it will only grow worse. Wait until the coat is completely dry.
- Later, you can use 240-grit sandpaper or premium steel wool to remove imperfections uniformly.
Product #2. Bondo Body Filler
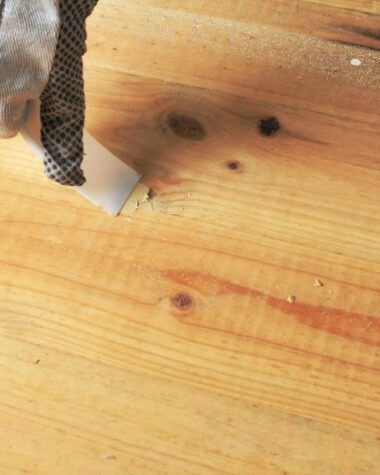
Bondo body filler restores and rebuilds the old surface of the furniture. This product is stainable and paintable, making the furniture look like its original state. Bondo body filler must have a hardener paired with it to harden the formula. Thus, make sure you have these two components.
How to Apply Bondo Body Filler
The guide below will be fun as it is easy and quick. Follow this quick guide, and you’ll never be wrong in applying it.
Step 1. Preparation
It has been a rule of thumb to prepare everything beforehand. Upon preparation, ensure the whole surface is free from dust before applying the body filler. You may use a damp cloth to clean the area.
Step 2. Mix the filler and hardener
Mix in the needed amount of filler and the hardener. Take it easy by adding the hardener with an ample amount to harden the formula.
Step 3. Fill in the Bondo body filler
Apply the body filler to the affected surface. Scrape the filler until it gets even. This is tricky since the formula is easily hardened after 3 minutes, depending on the temperature.
Step 4. Sand the whole surface
Using the sandpaper, grit smoothens the surface to have an even area.
Step 5. Apply the paint
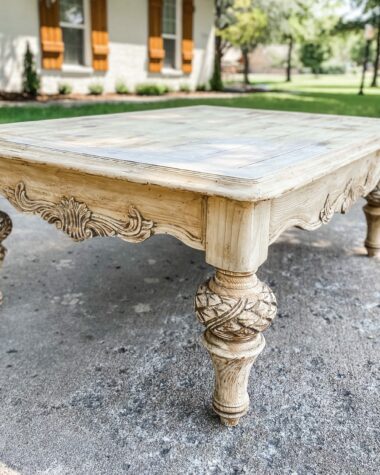
After you dust off the granules from sanding the whole area, you may coat the furniture with paint. You will no longer notice the damaged area. Coat it with an even paint color, and you may use a new color to paint the whole furniture to look even new.
Read: Difference Between Putty and Filler: How and When to Use
Product #3. Rust-Oleum
Rust-Oleum is primarily made of metals, but you can paint wood with it if you properly prep the wood surface. Consider using an oil-based Rust-Oleum product in your clean, sanded, and well-coated wood to achieve the greatest results.
How to Apply Rust-Oleum on Wood
Practice the methods below, and you shall be free to apply Rust-Oleum wood without worrying about ruining your woodwork.
Step 1. Preparation
As said, you need to prepare the wood surface before applying the Rust-Oleum. Use medium-grade sandpaper to smoothen the wood surface. Then, wipe the surface with a wet cloth to remove the sanded dust. The said process is crucial to avoid durability issues with oil-based metal paint.
Step 2. Primer Base Application
Proper surface preparation is crucial if you use Rust=Oleum oil-based paint to cover bare wood. To condition the wood to accept and adhere to paint, you must apply a primer because bare wood is not ideal for paint application.
Use a paintbrush for the application and wait about 2-3 hours for the primer to dry completely.
Step 3. Metal Paint Application (Rust-Oleum)
Here comes the exciting part. Once the wood surface is dry, you may apply the metal paint. Thoroughly stir the paint with a clean wooden stick or shake it well before applying it if you use a sprayer. Stirring or shaking the paint ensures that all the ingredients and pigments are mixed well.
Dip the paintbrush into the can and evenly paint Rust-Oleum on the wood. Remember to get adequate paint to avoid evident brush strokes. Also, please do not overload your paintbrush, as it causes dripping and splashing.
For the sprayer, spatter the paint evenly on the wood surface, and make sure it will not be left tacky.
Step 4. Coating
Apply the initial coating and leave it for several hours until it dries completely. When dried, it’s time to apply the second coat of paint to yield a good finish. Proceed to the third coating if necessary. Additionally, you may need to lightly sand the surface between successive coatings to achieve the desired shining surface.
Conclusion
In this guide, we have introduced three common products that are flexible to use on wood. Follow the above procedures to yield the desired results to your wood surfaces. After all, it is the pleasing wood surface that you wish to see. Fortunately, there are various products out there that will help you on solving issues. For more information like this, feel free to read our wood facts section.


