Does your furniture have dents, scratches, and holes that are unpleasant to see? If so, having the right tools for the right job is necessary to make the repair possible. There are several reasons why the wood you are working on has such unwanted damage. Working with degraded wood can be an eyesore, from splitting due to excess moisture or heat to replacing nail holes.
Wood maintenance and preservation are essential to strengthen and prolong your wooden feature’s lifespan. Furthermore, repairing a sentimental piece of furniture requires fixing dings and dents as it wears down over time. With the help of some woodworking materials, you can make it possible.
Fill Up the Cracks
There are two types of fillers when working with cracked or split wood. And both of these formulas have one thing in common: filling up damages, including cracks and gaps. Wood fillers and wood putty have been every woodworker’s partner for years. But most people need help to differentiate between the two. This can have a devastating effect if left unchecked and even worsen the project’s state, resulting in money loss.
What is Wood Putty?
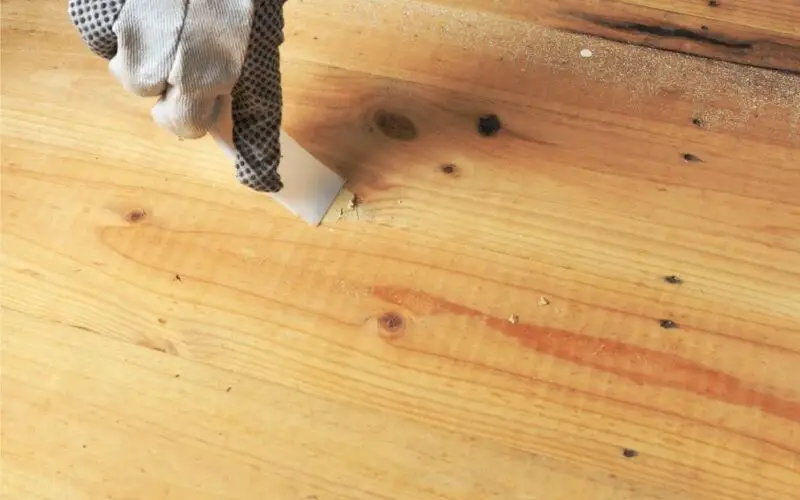
Wood putty is a pliable, soft solvent that adheres to wood to fill gaps. Workers often use a putty knife to spread evenly between cracks and gaps within the wood. Like caulk used in window sills, wood putty combines oil-based solvents and plastic.
Due to this formulation, wood putty does not harden but becomes a flexible solid. Furthermore, wood putty can come in different wood colorations. This makes it an indispensable solution for repairing damaged wood.
When Should I Use Wood Putty?
Due to being flexible and soft, wood putty can be used on exterior and interior woodwork. Here are some repairs you can use wood putty for:
- Small repairs due to splitting and cracking.
- Holes on finished furniture
- Fill up gouges on exterior woodwork, including posts and fences
- Decking boards, railings, and exterior wooden stairs
- Between two trims meet
- Exterior wood sidings
Wood exposed to environmental forces can expand, shrink, or warp. Since wood putty is pliable, it conforms to the wood, making it ideal for exterior woodwork. On the contrary, putty fillers are mainly used for interior repairs, including refined wooden tables.
How To Apply Wood Putty: A Step-by-Step Guide
Restoring your wooden materials at home is fun as the item retains its integrity. But before you get your hands on that wooden feature, you must have the right procedure and tools to do the job.
- Furniture
- Wood Putty
- Putty Knife
- Damp Cloth
- Heat Gun
Wood Putty Application Guide
Make sure to have your gloves and masks on, as you may require sanding before you apply the putty. Work on a clean environment to prevent debris from sticking to the putty.
Preparation
Start with cleaning the wood surface of the damaged area. This ensures you can apply the putty wherever it is needed. A clear line of sight of the damage is necessary to make the repair possible.
Application
Using your putty knife, scoop a hefty amount of putty that can fill up the cracks, scratches, and holes in the wood. Scrap and glide the putty onto the affected area with a smooth motion. Lastly, slowly press the putty into the cracks to ensure complete adhesion.
Curing
Once done, let the wood putty set properly by placing it in a well-ventilated area. This will ensure the putty sticks to the wood and does not deform upon reinstallation.
Note: Wood putty cannot be sanded as it has a soft characteristic due to the formulation of plastic and oil-based solvents.
What is Wood Filler?
When compared to wood putty, wood fillers harden upon application. This type of filler is usually used for interior woodwork repairs where wood is not exposed to harsh environments like rain or moisture. Moreover, wood fillers are a combination of sawdust and resin or glue. With this, most wood filler applications are done to unfinished furniture and require some sanding before stain work.
Unbeknownst to some, you can make your wood filler at home. Using the same type of wood you are working on, get some sawdust and mix in some glue. Mix it up, and you are all set!
When Should I Use Wood Filler?
You can use wood fillers with any woodwork repairs. The only downside to this is that it hardens as it cures. This can pose some problems for wood constantly exposed to wet areas like downspouts, exterior wood features, and decking boards. Here are some repairs on where you can use wood fillers:
- Fill nicks and scratches on unfinished furniture
- Repair wood flooring, including reclaimed wood
- Rot and contorted damages of tabletops and shelves
- Flooring boards
- Hardwood floors
Wood Filler Application Guide
Likewise, ensure your gloves and masks are on, as you may require sanding beforehand after applying the filler. Furthermore, work on a dust-free area to prevent debris from sticking to the filler.
Preparation
Start with cleaning the damaged area’s wood surface free of debris. If you are working with wood with a history of rot, thoroughly clean the chewed-away area. Remove paint or sand from any excess stains that can hinder the application of the wood filler. Additionally, if the wood requires drying, use a heat gun to accelerate the drying process.
Application
Since the wood filler is less dense than putty, it is advisable to apply it slowly on the surface of the affected area. After, slowly glide your knife, spreading out the filler and evenly coating the damaged area.
Curing
Once done, let the wood filler set properly by placing it in a well-ventilated area. The curing process of wood filler takes at least three to four hours. You can place the newly repaired wood piece in a dry place to accelerate the drying process.
Sanding
After the filler has dried, you can sculpt the hardened wood filler. Use 80 grit sandpaper to manually smooth out sharp edges or excess fillers. Lastly, use a sanding block to ensure the item is leveled.
Staining
The last step is to stain your wood piece. Applying a coat of wood stain that matches the panel provides a seamless finish to your project. Also, apply wood preservative agents on your wood to replenish its integrity.
How To Screw Into Wood Filler
Drilling the wood filler requires extra precautions. Wood filler is not the same as actual wood. Wait some time to let it dry and get hard after its application on the wood. Drilling in the wet or partially dry wood filler won’t give the desired result. Thus, follow this guideline to get the required results.
Step 1: Clean the Wood
Ensure that the surface has no bulges because of the wood filler. Use sandpaper to make it flat and even. Don’t begin this procedure just after you apply the wood filler. Please wait for some time and let it dry and become hard. Give it time and let it set properly.
Step 2: Make the Initial Hole in the Wood Filler
The initial hole should be fit enough for the screw’s diameter. If wood is hard and the screw has deep threads, it should be larger than the screw’s minor diameter.
Step 3: Install the screw
The easiest one among all these steps. Use an automatic screwdriver that operates on the screws. It will drive in the screws appropriately in their places. You need to know how to use your hands to hold it.
Frequently Asked Questions
Below are the most commonly raised questions concerning wood putty and filler.
Which is better? Putty or filler?
Let’s clear up the confusion right away. Wood fillers work best on unfinished wood surfaces and can be sanded and stained. Meanwhile, the ideal filler for minor holes and cracks in finished wood is wood putty.
How Long Does Wood Filler and Take to Dry?
It takes wood filler anywhere from 24 hours to 72 hours to dry completely, depending on the type of wood filler and weather conditions.
How Do you Know When the Wood Filler is Dry?
Wood filler is dry when it is no longer tacky to the touch. Depending on the wood filler you are using, it may take a few minutes to a few hours to dry fully. If there’s any doubt, test the paint with a tiny amount of water. If the water beads up and doesn’t soak into the wood filler, then it’s dry.
How to Soften Wood Putty From A Dry State?
If your putty is dried, use canola vegetable cooking oil, canola, corn, or olive oil. Using these types of oils will help in softening the dough.
- Pour two to three drops of your selected oil on the dried wood putty.
- Knead until it starts to soften and start breaking into pieces.
Final Thoughts
Whether repairing an old piece of a rotted wood panel or fixing a dent in your cupboard, filling up the cracks using putty or filler is essential in wood maintenance. Knowing when and how to use them greatly improves preserving the wood. Always remember that wood repair takes time and dedication but is rewarded with a magnificent piece of furnishing at the end of the day.
