Would you like to know how to rehydrate wood furniture to make them look fresh and almost new? Wood furniture gives any home an elegant and sophisticated look. People who like their home to have a bit of antique and unique look prefer to have wood furniture. But keeping wood furniture comes with its challenges. This article on how to rehydrate wood furniture will help you to maintain your old wooden furniture. You should restore them from time to time so that they keep on looking great. We will tell you all about the things you need and what to do. You will be able to rehydrate your furniture without calling for any handyman, carpenter, or painter.
How to rehydrate wood furniture?
It might be that you have brought home a piece of wooden furniture from a second-hand shop. You think it would look beautiful after you rehydrate it, which you can do easily at home using furniture oil and wood cleaner. Why is it important to know how to rehydrate wood furniture? Because the pores of wood open as it ages, much like human skin, and lead to the dissipation of natural oils. This makes the furniture look dry. You must rehydrate wood using oil made for wood. Rehydrating is quite easy. Letting grime and dust settle on wood furniture and letting it look dry is being lazy! Give your old furniture a nice cleaning and then let it soak in furniture oil. The result will surprise you. Cleaning, sanding, and repainting are all you need for a painted wooden piece of furniture.
Tools and materials you need:
- Protective glasses
- Dust mask
- Sandpaper/Fine 0000 gauge Steel wool
- Wood cleaner like lemon oil
- Soft fabric
- Furniture oil
- Drying oil like Tung oil or Linseed oil
- Brush
- Furniture wax
Step-by-step instructions on how to rehydrate wood furniture:
Step 1: Allowing furniture to air dry

It does not take wood a lot of time to become dry. There might be spillages and splashes on your furniture. So wipe it to stop the pores soaking them in and let your furniture air-dry.
Step 2: Cleaning the wood thoroughly

Wear your dust mask and protective glasses. You must use sandpaper to make the surface of the wood smooth, to grade it, and remove all existing outlines like water rings, bubbles, and all marks. Fold the sandpaper you have into half, put a few drops of lemon oil on it, and start rubbing it against the grain in a back and forth manner. Wipe the dust away with a damp towel away when you think necessary and repeat the process until the surface becomes smooth.
Alternatively, you can also use 0000-grade steel wool and add a few drops of your chosen wood cleaner to it. Avoid putting too much pressure or you might remove the stain or finish. This step of using a wood cleaner and sandpaper/steel wool cuts through any wax which has to be built up over the years. Wiping the furniture with the cloth will remove the loosened dirt and grime. Let the furniture dry again.
Step 3: Application of furniture oil

Wear your gloves. Take two pieces of a soft cloth and wet them with the furniture oil. If you are applying linseed oil, you must boil it before application and it gives a natural color. To apply the furniture oil on the wooden furniture, you have to rub the grain back and forth.
You must fold the cloth to be able to cover all the embellishments on the wood surface. Soak a corner of the edge with oil and use it to reach the crevices. This way you will be able to fully cover the furniture with oil, without leaving any spot. Give the furniture about 20 minutes for the oil to soak in it and become dry. If there is any excess oil, use the cloth to wipe it off. You can also distribute the furniture oil evenly with the cloth.
Now you must wait for three days and air-dry the furniture for the oil to soak in. Then take the second piece of cloth and clean any dust that has settled on the surface. It is time for the third coat of oil but does not put a large amount of oil on the cloth. Apply the oil again by wiping the wood back and forth. Let the furniture dry for about twenty minutes. Wipe off excess oil with the cloth and then put the used rags in a metal can filled with water. This will eliminate the used rags from catching fire.
Step 4: Adding a seal coat

A sealer creates a protective layer by piercing through the wood. It creates a barrier and protects the furniture from water splashes. Sealants are increasingly becoming popular because it not only forms a protective shield but also improves the look.
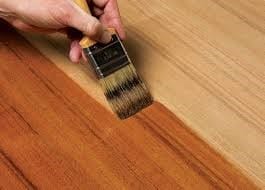
Drying oil like China wood oil (Tung oil) hydrates the wood. If you apply this sealant on the surface, it will create a coat on the wood when it dries. Keep your gloves on and take a brush for this step. Tung oil is a very popular choice but there are different water-based and oil-based sealants.
Oil-based sealants are less expensive but have a pungent smell and are more toxic. Water-based sealants maintain the natural look for a longer time and also dries faster. Though oil-based sealants have a longer curing period, they offer better durability and protection.
You must seal the furniture in a well-ventilated space. You can protect the floor by using paper or cloth. Brush off the dust from the furniture. Dip the brush in the sealant and then apply it to the furniture using gentle strokes. Rub the brush carefully over the entire area. Let the furniture air-dry. A water-based sealant will take 5 hours and an oil-based will take 48 hours to dry.
Step 5: Polishing with paste wax

This step is optional, but we would advise you to go for it. Applying paste wax rejuvenates an old piece of furniture and restores its original look. Even antique ones can maintain their natural look and tone. You will again need two pieces of rag and your gloves. Use the soft cloth to apply the paste wax in a circular motion. After you are done, allow the oil to dry for five minutes. Then with the second piece of rag, wipe off the surface to remove any excess wax.
.


