Have you ever wanted how to create a mortise and tenon joint? Do you find it hard to make a mortise and tenon joint? This type of joint is one of the most widely used and is popular in modern furniture designs to create a seamless and natural connection between two pieces. A mortise and tenon joint seems to look a bit complicated however this is easy when you have the right tools and a good knowledge of how to proceed with the project.
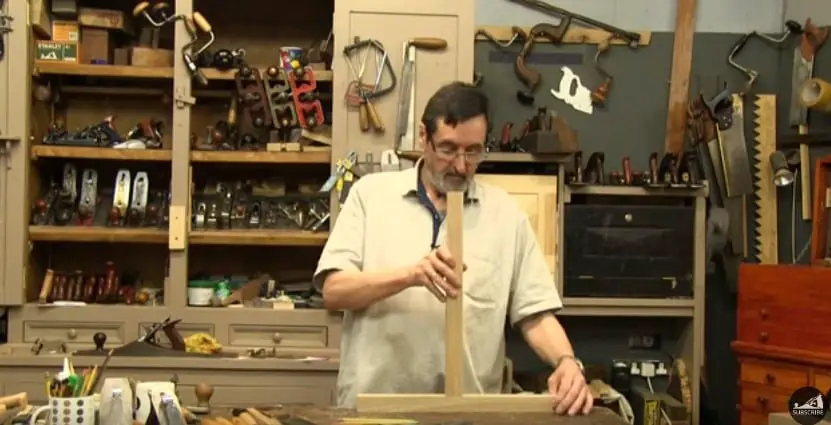
It’s completely natural to worry especially if you have never constructed a mortise and tenon joint before and may have never used the hand tools for this project. With this tutorial you will be able to make a mortise hole and tenon joint confidently and will be able to take on any project using similar joint techniques in the most efficient manner.
Materials Used
2×2 pieces of wood
This is the piece of wood that you will be working on. Choose your wood wisely; select wood according to the type of project that you have in mind. Consider that there are different kinds of wood with each one having their own qualities and good points.
Most furniture or woodworking projects that use a mortise and tenon joint are capable of bearing only minimal to moderate loads. These pieces could be chairs, tables, cabinets, shelves, side tables and small wooden projects like picture frames and toys. And with the mentioned projects, wood that is both strong and pliable should be the ideal wood to use to create a mortise hole and tenon joint.
Square edge
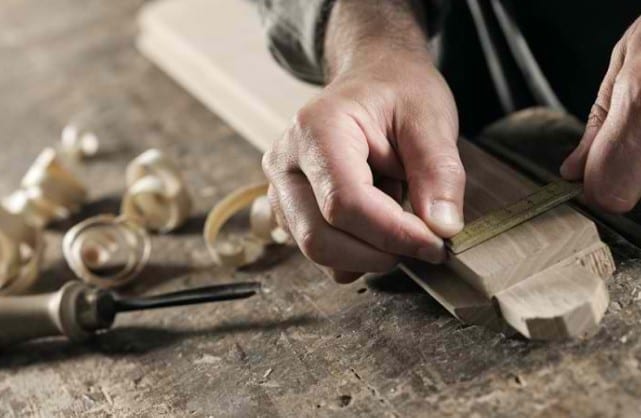
A square edge will let you measure precisely where the mortise hole and tenon joint would be oriented in a 2×2. A square edge will allow you to get precise measurements and let you line up all the important points to create a tenon joint and mortise hole. Remember that these two components fit each other so precision is the key.
A set of chisels
You need a set of chisels measuring ½ and ¾ of an inch for this project and wider chisels if you plan to create a larger mortise hole and tenon joint. A good set of chisels should have a beveled side to be able to scrape off excess wood from a mortise hole.
A mallet or a standard hammer
You need a mallet or a standard hammer to work with a chisel to remove waste wood from the mortise hole. This hand tool should have a good grip and should not be too heavy to strain the arm and wrist. The mortise hole which will be created for this tutorial is about 2” x ½ x 4” and it’s not too hard as to put pressure on the wrist and arms. However having a sturdy, reliable and quality hammer and mallet is essential for other woodworking projects.
Hand saw
You need a basic handsaw to cut the tenon joint. Although a chisel could remove excess wood from the tenon joint a handsaw will make the job a lot easier and faster.
Workbench with vice
You need a sturdy workbench preferably with a large vice to hold your wood together as you work on the mortise hole and tenon joint. Your workbench should be clean and free from debris before you begin with this project.
Pencil and ruler
You need pencil and a ruler to make markings on your wood.
Sandpaper
In the tutorial video, sandpaper was not used to finish the mortise hole and tenon joint and a chisel was used to clean up debris. You may use sandpaper to make a quick clean up or to cut a few millimeters off the tenon joint so it could fit the mortise hole.
Why use a mortise hole and tenon joint?
The mortise and tenon joint is one of the oldest ways to join pieces of wood and is actually one of the most efficient as well. Wooden furniture that use a mortise and tenon could last for a long time and with the latest tools and materials used for woodworking, projects and furniture pieces could become more durable and stronger.
The mortise and tenon joint is also one of the best ways to show how great a woodworker you have become. Aside from the dovetail joint, which also needs expert tutorial to master, the mortise and tenon is one of the most interesting and efficient joining techniques to learn. You will be surprised that after learning how to create a mortise hole and tenon joint, it would be easier to do other joints and joining techniques.
Step – by – Step Instructions
Creating a mortise and tenon joint requires close attention to precision and details. Measuring the wood alone is important as well as making precise markings on the wood and therefore following these steps closely is essential.
1.Prepare all the things you will need for the project.

Make sure that everything you need is at hand and have been carefully maintained. Saws and chisels have to be sharp while mallets and hammers have to be in good shape. Never take for granted your woodworking tools and make sure that these are in tip top shape before you start any project.
2.Mark the wood in close approximation where the mortise hole is going to be placed and where the tenon joint will be.

It is easy to identify where the mortise hole will be oriented and where the tenon joint will be placed however how do you really cut the wood precisely to make sure that each piece aligns with the other? The secret is to use time-tested tools as well as hand tools to do the job.
3.Use a square to make sure that everything lines up

A square is a handy tool to have around since it makes sure that all the lines needed to guide you as you make the mortise hole and tenon joint line up. Use the square to check every time you make markings on the wood with your pencil. For the tenon joint, measure from all sides of the wood including the top to align everything. For the mortise hole, use the square to create markings that will line both ends of the hole of the mortise. Remember that any misaligned marks can affect the outcome of the mortise hole and tenon joint so its best to make precise measurements.
4.Cut the mortise and tenon using the width of a ½ -inch chisel

There are many sizes of mortise and tenon joints but for this tutorial, the width of the mortise is about the width of a ½ -inch chisel. Therefore, this size of beveled chisel will be used to chop off waste wood from the mortise. Your tenon will basically have almost the same with as the mortise but should be a few millimeters larger for a strong and durable fit.
5.Use a marking tool with points to scrape the wood to mark the tenon joint

A unique marking tool, similar to a caliper, is used to precisely create markings on wood. This marking tool will follow the width of the chisel and has two points to create the marks.
Glide the marking tool along the lines that you have created using the square. These marks will make it a lot easier to orient the chisel as you chop off waste wood from inside the mortise. The marking tool will also be useful in marking the edges of the tenon joint. Create the markings very well and make sure that these are precise with the use of a square.
6.Affix the wood on the working table

Now begin working on the mortise first; this is the rule of making mortise holes and tenon joints. This is so because you rarely make adjustments on the mortise while the tenon adjusts to precisely fit the mortise hole.
Use the vice on a workbench to steady the wood in place. Remember that you will be putting a lot of force on wood as you chisel away to create the mortise joint. Therefore you need a working table with a reliable vice to grip the wood securely in place.
Take note: before you start working on the mortise, clear everything from the working table. Make sure that all your tools, especially sharp tools, are in a secure place as you safely work on your project.
7.Cut the mortise hole first use a knife to create the nicks and a knife wall for the mortise hole where the chisel will start

Use a small knife to create a “knife wall” inside along the edges of the mortise hole. The knife will further guide the chisel to create the perfect mortise hole. You don’t have to worry about these marks being seen since these are merely guide marks. These will be completely removed after you have finished creating the mortise hole.
8.Chop off wood to make the mortise hole

Once the wood is ready, take a 1/2 –inch chisel and remove waste wood from the mortise hole. Apply firm strokes on the chisel with the use of a heavy mallet or hammer. Start by removing a few bits of wood in succession and then chop hard to drive the chisel inside the mortise hole around ½ inch through. Continue chopping and move from right to left or left to right all the while using the bevel of the chisel to remove waste wood.
You will find that the beveled edge of a chisel is kind of handy to easily remove waste as you drive the tip of the chisel vertically and push waste wood off the hole. Continue driving the chisel until you are about less than an inch close to the other side of the mortise hole.
9.Remove waste using a small chisel

After you have reached less than an inch close to the other side of the mortise hole, use a smaller size chisel to scrape off excess bits from the inside of the hole. You may also use the ½ -inch chisel to completely remove larger pieces. Remove the wood from the vice and turn it upside down to remove waste. Hold the wood firmly and strike it on the workbench to remove more waste.
10.Turn the wood upside down and chop off the remaining wood for the mortise hole

The mortise hole is half done; turn the wood upside down to reveal the other edge of the mortise hole. Use the ½ – inch chisel to finish the job. Just like working on the opposite side, drive the chisel about ½ inch through the mortise hole and use the beveled edge to remove waste wood. You will now find that this is easier to do since the other side of the hole has been chopped off halfway. All you need to do is to drive the chisel hard into the mortise and after about four to five blows you might already be finished with the mortise hole.
11.Clean the hole with the chisel

You now have a hole that runs through and now you need to clean the hole completely using a small chisel and the ½ – inch chisel. Let the small chisel remove visible chisel marks while the larger chisel can remove more wood along the walls of the mortise. Move the larger chisel back and forth to finally ready the mortise to receive the tenon.
12.Mark the tenon joint wood with a knife

Like what you did on the mortise joint wood to prepare it for chiseling, use a knife to create undulations on the wood so it can be easily worked on. Use the knife to cut the edges of the tenon and make sure that everything is aligned and ready before you proceed. As with the mortise joint the knife marks on wood will be hardly noticeable as you use a saw to cut the waste wood.
13.Cut the tenon joint using a hand saw

Time to cut excess wood on the tenon joint. Place the wood in the vice. Wood has to be in a vertical position so you can work on the tenon joint easily.
Use a hand saw to cut excess wood. A useful tip is to drive the saw hard onto the knife marks on the wood and once you have driven the saw almost halfway its body inside the wood tilt the saw and continue to work. This will make it easier to finish the job and will be less stressful on the wrist. When the saw has eaten a huge chunk of the waste wood, tip the saw on the other edge.
14.Use a chisel to finish the job

You don’t want to drive the saw complete into the body of the tenon joint since this could weaken the joint. The best way to go is to use a chisel to finish the job. Use the ½ -inch chisel to chop off the waste wood and to completely remove it. Do the same thing for the other piece. Be careful in driving the chisel in the tenon to avoid accidentally hitting the joint and ruining the work.
15.Clean the tenon joint to prepare it for fastening

Now you are done creating a tenon joint but not completely done finishing the piece. You still need to make sure that it fits well inside the mortise and the best way to do it is to fit the two pieces together.
Most mortise and tenon joint makers fail to fit the tenon inside the joint at the first try so do not worry about this. The tenon might just need a little cleaning up or a few millimeters of wood removed on either side to help it fit inside the mortise.
As you fit the joint inside the mortise, notice the part of the tenon where a sizeable amount of wood has to be removed. Mark this with a pencil and then use a chisel to remove this part. Cleaning the tenon with sandpaper with a large grain could also help but make sure to fit the two pieces together first before you make any adjustments.
16.Fit the tenon inside the mortise

After carefully evaluating what needs to be done with the tenon so it can fit inside the mortise, join the two pieces together. Place the tenon inside the vice in a vertical manner so it can receive the mortise.
Fit the mortise carefully. You might need to push the mortise in since the tenon was really created to be a bit larger than the mortise. After driving the mortise in, use a mallet or a hammer to join the two completely.
17.Joining techniques

Aside from simple joining the two pieces together, a mortise hole and the tenon joint might need some help in securing the joint perfectly in place. Most woodworkers settle with wood glue; they apply generous amounts of wood glue on the tenon joint before attaching it in the mortise. The glue will harden and fix the two pieces permanently. Larger mortise and tenon joint applications could be fixed with braces or placing a piece of wood diagonally over the two pieces to create a stronger and more efficient fix.
Other woodworkers support the already steady mortise hole and tenon joint with nails or screws especially for furniture pieces that carry heavier weights.
18.Completing the mortise and tenon joint

Now that your mortise and tenon joint project is complete, you might want to consider creating other types of joints like the dovetail which will surely improve your skills as a woodworker and a craftsman.
Consider the different applications of the mortise and tenon joint as you move to another project. You will find that there are larger or smaller mortise and joints and corresponding applications for these as well. These joints can be used in a variety of applications but the same principle of making them stands true. Therefore learning how to make a mortise and tenon joint from scratch is vital in the training of novice woodworkers.
With new and more powerful cutting, rotating and fastening tools for woodworking, it’s easy to do away with manually making a mortise and tenon joint. If you are new to woodworking, take time to learn the basic techniques and then adapt these to modern and automated woodworking techniques. You will find it easier to understand new strategies when you have built a strong basic foundation of woodworking strategies and concepts.
The video “How to make a Mortise and Tenon Joint – The Three Joints” is from Paul Sellers. The video has received more than 1,200,000 views in YouTube and is one of the many videos Sellers has made over the years about a variety of woodworking techniques. Paul Sellers is an avid woodworker and he rarely uses power tools. His YouTube channel is https://www.youtube.com/channel/UCc3EpWncNq5QL0QhwUNQb7w and his videos teach basic woodworking along with using the right tools and how to care for these tools. The link for “How to make a Mortise and Tenon Joint – The Three Joints” is .
Conclusion
A mortise and tenon joint is a joint that has been used for centuries and in fact it is one of the most basic techniques used in woodworking. Anyone who wants to become a professional woodworker has to learn how to create a mortise and tenon and to construct one in the most efficient manner.
In creating this kind of joint, a woodworker has to use the most efficient tools and use timeless techniques to create a mortise and tenon. Manual manipulation of wood should be learned before using power tools. A novice woodworker has to learn how to accurately measure, cut wood and how to remove waste wood from the mortise or tenon joint.

