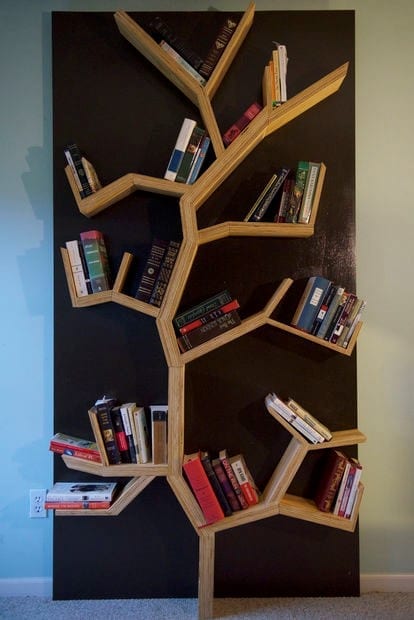
Are you tired of seeing the unorganized books in your home? And want some storage place to place them? What can be a great idea rather than building a Bookshelf? A wall tree Bookshelf!
Keeping your room well-sorted and clean is probably one of the trickiest things to do, especially when you are the one who has more books and other tiny items combined. Yours every book is priceless and you want to preserve all books in the best condition possible. But it is not that easy if you don’t have a proper Bookshelf.
Buying bookshelves for your room are always expensive. You can build it by yourself. We have also included different bookshelves DIY ideas in various posts/articles. Build one of these Bookshelf plans and get a nice space to store and place these books and other tiny things in your room.
Bookshelf building is also a low-cost project, I will suggest you build them by yourself instead of buying from the market. You can also modify the Bookshelf with different colors, designs, and assemble it, that is only if you want to do so.
DIY Tree Book Shelf
If you are looking for some stunning and awesome book storage spaces you will need to check out this project. We have this Bookshelf plan for you that will get you a beautiful tree Bookshelf. Basically, I was inspired to build this project while searching the internet for some storage plans.
Building a tree Bookshelf is a pretty simple woodworking plan to do and you can get it done in just a day not more than that. Or possibly it can take a day and a half or two if you do take breaks during the project building. It’s a difficult task, but it never ever means that you need to be a professional woodworker to build this project, anyone with some basic woodworking skills and knowledge can build these Tree Bool Shelves.
If you are up for some challenges and also willing to build some bookcases for your room or home. Do check this tree Bookshelf plan to build an awesome storage space. This Bookshelf plan includes step by step details of the process with diagrams and images. Project Guidelines & Step By Step InstructionsItems Needed for this ProjectStep 1: Cutting and Gluing PlywoodPro TipsStep 2: Measuring and Cutting the Branches Pro TipsStep 3: Background Plywood and Attaching the BrachesPro Tips Youtube Video
Items Needed for this Project
Every woodworking project needs some tools and materials to get built. In this project you also need some materials and tools, the necessary tools and materials are listed below.
- 3 Sheets of 4×8 foot plywood
- 1 bottle of wood glue
- 1 box of 2″ Deckmate screws
- 1 cane of Brown Paint
- 1 cane of Paint Primer
- 1 pint of Polyurethane
- Table Saw (optional)
- Miter Saw or a chop saw
- Sander or Sanding box
- Wood Pencil
- Measuring Tape
- Drill
- Countersink Bit
- Pre-drill bit
- 8 Clamps
- Disposable Brushes
- Paint Brush or Roller
Step 1: Cutting and Gluing Plywood
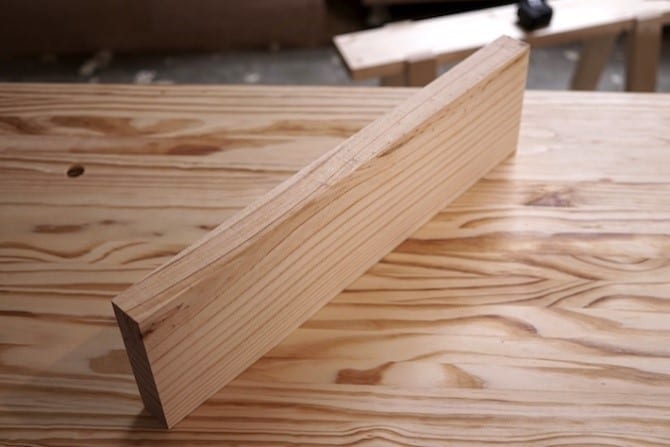
Take a plywood and cut it with respect measurements that are mentioned below. Take it to the table saw and cut these pieces.
Cutting Measurements of Plywood
- 2 Sheets of 7″ X 96″ strips
- Glue two strips together to form one 1.5″ X 7″ X 96″ strip
- Glue three strips together to form one 2.25″ X 7″ X 96″ strip
- Leave one sheet of plywood for the background of the shelf. Cut other two pieces into 7″X 8″ foot long pieces. The reason for cutting 7 inches wide pieces is that most books are 5″-7″ wide.
Your tree branches are now divided into three different thicknesses:
- 2 1/4 inch – three strips of 7″ X 96″ glued together
- 1 1/2 inch – two strips of 7″ X 96″ glued together
- 3/4 inch – single strip of 7″ X 96″ piece

You need to glue a few of the plywood sheets together to make branches of different thicknesses. Glue two strips of plywood together and place them to dry. Similarly, take some more strips and glue them together with respect to the thicknesses that you want for it. The main stem needs to be made up of three strips that are glued together.

Pro Tips
- You should use white glue while working on any woodworking project. Because it dries clear.
- Wet both surfaces, while gluing.
- Hold the board on the table while cutting when using the table saw.
Step 2: Measuring and Cutting the Branches

Cut and miter the strips for branches according to the measurements and angles mentioned in the image above. The numbers that are in blue color are for miter angles and the red ones are the branch numbers. The length of every branch is given below in inches.
- 12
- 10
- 16
- 7.5
- 12
- 6.5
- 19
- 10
- 17
- 14.5
- 8
- 7.75
- 9.75
- 6.5
- 8.5
- 8
- 5.5
- 9
- 6
- 9.75
- 9
- 7
- 10
- 10.5
- 6.5
- 11
- 9
- 8
- 14
- 6.5
- 12.75
- 5.5
- 5
- 12.5
- 9
- 14.75
- 7
Pro Tips
- Always follow the saying ’Measure twice before cutting’.
- Make sure your miter saw’s bit is sharp, smooth and clean.
- Don’t make the saw fall at once on the board, wait till it gets to its full speed.
Step 3: Background Plywood and Attaching the Braches
After preparing the branches of the shelf, now you need to prepare the background sheet of the shelf. Sand the sheet by using the sander or sanding blocks. Then wipe down the sheet, now apply a thick coat of primer to seal the wood to make it act as a base for the finish coat. After it gets dry, apply two coats of brown paint on it and place it to dry.


Glue up the branches together and Attach them to the board by screwing them from the background with the help of a screwdriver and drill.


Sand and stain the Bookshelf now and leave it to dry.


Pro Tips
- Use clamps after gluing for applying sufficient pressure.
- You can also paint the background plywood before attaching it to the branches.
Youtube Video
Now you have a tree Bookshelf for attaching it to the wall in your room or somewhere else in the home or office.

Awesome! Isn’t it? What an amazing add to the décor of your room.
If you want to watch a video tutorial of this project, check the link below. The YouTube video tutorial in that link will help you in a better way to illustrate the step by step process.
If you have built this project or if you are going to, feel free to share the images of the final products you have. Also, if you have any question related to this project, you can ask us in the comment section of this post below.
