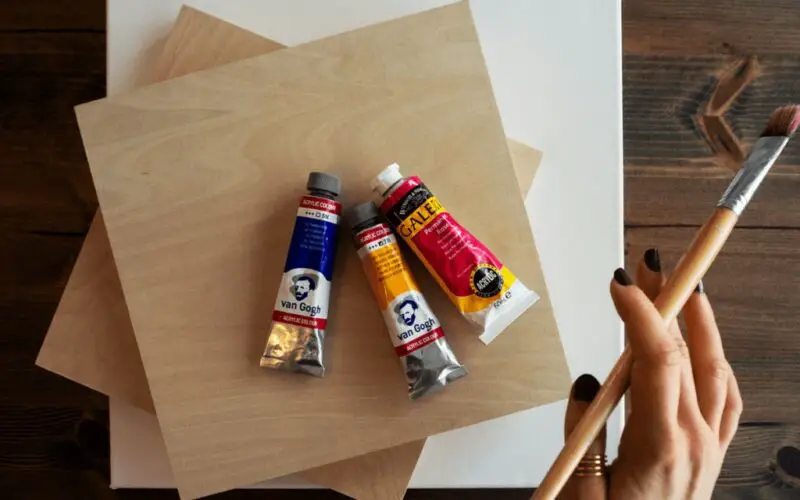
Can acrylic paint be used on wood? For a quick answer, you can use acrylic paint on wood, but painting it can be challenging. Fortunately, with this article, you will know everything about the use of acrylic paint on wood. Let’s start.
How to Paint on Wood Using Acrylics
It’s simpler than you imagine using a little paint to turn an old piece of wood into something lovely. We recommend elevating your artwork and guaranteeing a cleaner, longer-lasting finish.
Step 1. Preparation
When painting a wooden surface with acrylic paint, prepare first the wood in a well-ventilated area like outdoors or a work area with plenty of windows because it has a strong odor that can cause a headache.
For small craft projects, it is helpful using an easel to prop up the wood piece once it’s time to begin painting. No easel is needed for larger surfaces like paneling.
Smoothen the wood to even out the surface by using sandpaper. It’s best to use 140-grit to 180-grit sandpaper, sanding along the wood grain until the surface is nicely smoothened, and then rub the wooden surface using a tack cloth to remove any dirt, dust, and debris before painting.
Step 2. Primer Application
Your project will likely turn out differently than you had hoped when acrylic paint is applied to wood without primer. A light coat of wood primer applied to the wood will help seal it, making acrylic paint application simpler.
The appearance of lighter colors will likewise be more brilliant once the primer has been applied. Before continuing, let the primer completely dry. Repeat the sanding and priming procedure to achieve the desired texture if you want an even smoother finish.
Step 3. Background Color
Starting with a basic layer is wise. Please choose your preferred color for the background and dab a little of it onto a palette. Considering how rapidly acrylic paint dries, only pour out your background color at this point. For painting on wood, you can choose whatever kind of acrylic you like.
Related Post: Paint Colors that Compliment with Dark-colored Woods
To paint the wood, use a broad, flat paintbrush. If you want to paint the back, let the paint dry completely before adding a second layer. The majority of acrylic paints typically dry in 20 minutes or less. However, this will change according to the type of paint you choose and how many layers you apply.
Step 4. Adding the Details
When the background layer has dried, begin adding the details. To do this, choose a soft brush, and be cautious when applying the acrylic. If you maintain the bristles of your paintbrush clean and supple, frequently dip it into water. Even if you only use one color, it is still crucial to do this. After you’ve finished, let your artwork completely dry.
Step 5. Sealant Application
It is crucial to apply a sealer since it will prevent your artwork from flaking or chipping. Choose a sealer from the many different available finishes. Several different finishes are available, including matte, gloss, satin, and many others.
You can use either spray-on or brush-on sealer; while each application differs from the other, the outcomes are the same. You must adhere to the correct procedures when sealing acrylic paint on wood. Apply a light coat, then let it dry.
Since paint application can be a challenging task, acrylic paint might land on your wooden furniture in a wrong way due to someone’s carelessness while painting. Whatever the reason may be, acrylic paints are not expected to sit there on your wooden accessory. Remove it immediately and repeat the above process thoroughly.
What is Acrylic Paint?
Since the 1960s, acrylic paint has been a popular water-based, quick-drying paint among painters. Depending on how much water is added, it can be applied thickly or thinly. Today’s artists utilize acrylic paint extensively due to its popularity as a painting medium and the fact that it dries quickly. Acrylic paint was first embraced by artist David Hockney, who used it to produce some of his most well-known paintings in the 1960s.
Types of Acrylic Paint
It is a great experience exploring and playing with acrylic paints, even for a newbie artist or a young child who is eager to learn to engage with art. The end result is very satisfying. Thus, as part of your acrylic experiment, you need to know its types which will help you to be creative.
Gouache
Gouache is similar to typical watercolors with greater color intensity and excellent opaque and reflective qualities.
Fluorescent Acrylics
Fluorescent acrylics have bright colors with a glow effect achieved by using a black light.
Craft Acrylics
Craft acrylics tend to run but are generally versatile and inexpensive.
Student-grade Acrylics
Student-grade acrylics are least expensive and tend to have lesser pigment as compared to other paints.
Acrylic Paint Drying Time on Wood
Like other types of paint, acrylic paint also dries at varying rates depending on the surface. On wood, acrylic paint typically dries in an hour. However, drying times might go up to 48 hours if you apply a very thick layer of paint, as in the case of acrylic pouring.
Bonus Tips
We bring more information on achieving a successful acrylic painting on wood. Below is a list of the things to remember while engaging in acrylic painting.
- After each sanding, wipe the wood surface with a slightly damp cloth.
- Brush the flat brush over the surface very carefully to minimize brush strokes after applying your entire layer of gel media or gesso.
- Elevate your wood pieces on a few small blocks or objects to keep their edges from the surface while allowing them to remain level.
- You will save time and materials by assembly-line-style prepping a few surfaces at a time, increasing your likelihood of producing more paintings.
- Press lightly with the pencil if you intend to draw on your board before painting.
Ideas for Acrylic Paint on Wood Crafts
Given the basic information regarding acrylic painting, we assume that you are now wondering about specific ideas where your paintings can be more creative. Do not worry because we have prepared everything for you. Read the list below and be inspired by using acrylic in your existing wood projects.
Halloween Decors
Everyone appreciates the autumn season and the way the leaves change color. Thus, you may create tiny wooden pumpkins painted vibrant orange or wooden leaves painted in all autumnal hues. These can be hung to celebrate the season on your doorstep or in your foyer. Like Christmas decorations, you can use them year after year.
Christmas Decors
Speaking of Christmas, why not give each family member a personalized ornament for the tree? They might not have much experience painting, but their ornaments might become the most prized ones on the tree this time. Since they are made of wood, they will survive a long time and can be displayed every Christmas.
Conclusion
Yes, you can use acrylic paint on wood, and it is a fact about wood that you should know and execute. It might be challenging to do, but with proper procedure, it will become a success. It is very important to prepare the wood in order to land a successful result. Also, sealing after painting is also crucial for a long-lasting effect. Truly, acrylic paint is versatile and will beautifully stick to almost anything, including wood.


