Chamfering is the process of removing the 90-degree edge on any material, using various tools and techniques. This process usually involves a cut carved out at an angle of 45 degrees to round off the protruding edges of different objects. This cut is known as a chamfer or bevel. In other words, a chamfer can also be defined as the edge transitioning between the two faces of an object. Chamfers have wide uses ranging from carpentry and furniture to machining, mirrors, printed circuit boards, and also in the facilitation of several mechanical engineering designs.
In this article we will discuss how to chamfer wood. In furniture, chamfers are mostly used on table tops and counters to smoothen their corners. Once the corners are eased, the smooth edges are then called bullnose or round overs. A chamfer can have multiple uses. They can protect people from hurting or bruising themselves along the sharp edges of those furniture pieces and also help in preventing damage to the wooden corners. Chamfers may help in enhancing the appearance of your furniture, by adding visual details to them. They may give your furniture a clean and crisp look. Chamfers can even make your heavy looking furniture appear lighter.
Tools used for chamfering
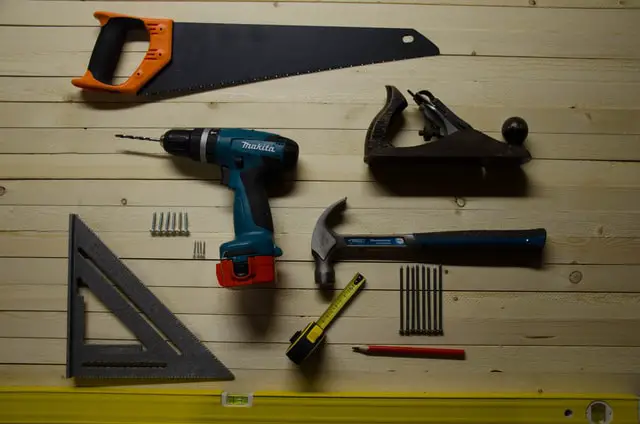
Chamfering is a process that applies to almost any wooden project. It is as important as basic milling or preparing the wooden surface for getting your work started. There are different ways in which this process can be executed. Let us look at the tools you will need to begin the process of breaking the edges of your furniture to give them a clean and uncluttered appearance.
The tools are as follows:
Sandpaper – Sandpaper can be used to relieve virtually every edge of a wooden piece, and you can also get the work done quickly. But it must be done systematically.
Table Saw – You can also create a chamfer using a table saw by setting it up at an angle. Then, depending on the depth and the width of the cut, you can adjust the table saw using rip fence. But using a table saw requires a bit of preparation.
Hand Plane – Using a hand plane is perhaps the most challenging of all. It can make a 45-degree cut. But sliding the plane along the edge of the wooden object removes only a small amount of wood with each pass. So whenever you have to make long passes, it becomes difficult to keep the plane steady and level along the entire perimeter of the cut.
Chamfer router bit – Chamfer router bit is designed specially for this purpose, and does not need much set up. It is easy to use and provides the most effective results.
Not all furniture should get the same chamfer design. While contemporary furniture demand crisp edges, decorative wooden items mostly call for bold designs. Depending on your needs, you can customize the chamfer designs, taking the help of the above tools.
How to chamfer wood
We will drill down below to check out how to chamfer wood using both hand plane and router bits in more detail.
How to chamfer wood using block plane
We know this method is slightly tricky. But we will still talk about the steps on how to chamfer wood with a hand or block plane because this is one of the most commonly used methods. Block planes are more useful than routers when it comes to creating light chamfers. A block plane is also easy to operate with one hand, works well in tight corners and provides a crisp, polished cut.

Step – 1
If you are looking to use it for long passes, then use both hands to grip the plane. Now, align the body of the block plane lengthwise with the edge you are about to chamfer. To prevent the plane from slipping out of grip, you can ride a knuckle or place the tip of your thumb on the stock. This will help the plane keep steady at a consistent angle.
When using a hand plane, go for a one that is about 1/32 inches (0.81 m) in width. Any hand plane with a narrow throat opening is perfect for a light cut. A well set up plane is competent enough to shave off the wooden edges immaculately irrespective of the grain direction. In case, you are encountering resistance, you may turn the plane around for better execution.

Step – 2
Twist your hand to skew the plane’s iron to its line of travel. This helps in lowering the cutting angle and also pushes the fibers downward. This results in a cleaner chamfer which is aesthetically pleasing and also goes well with contemporary designs.
How to chamfer wood using router bits
To work with a router, you need to first set it up. This depends on which company’s router you are using for the job. The instruction manual of the product will guide you on how to set up the tool. So once you have set up the router, follow the below steps:

Step – 1
Bring your router close to the workpiece and then switch it on. To chamfer the edges, run the tool flush carefully along the edge of the workpiece and rout the required area in the opposite direction. Since the machine is electric powered, if you pause at a particular place for long, it may leave burn marks on your project. To avoid this, guide the router uniformly along the side of the item up to the end. After the required profile has been routed, you may now switch off the machine.

Step – 2
You can use the tool horizontally or vertically for smoothing out the wooden edges. While executing the task, make sure the tool is seated securely if you want to achieve a glitch-free finish.
Conclusion
All the above methods are effective in some way or the other. You can choose the one, based on your time, availability, convenience, budget and skill sets. But it goes without saying that practice makes one perfect. Your willingness to learn something new is shaped largely by the intensity of your need and desire. If you are agreeable to the idea of devoting adequate time to learning new skills, then the guide on how to chamfer wood is going to prove useful. So learn the techniques quickly and give vent to your imagination to come up with inviting designs on the wood.
