Drying wood, whether, for woodworking, construction or carving has amazing benefits to wood. However, because you will be using wood for delicate purposes you don’t just dry it but you also need to keep the wood from splitting.
Splits are usually due to over-drying. This guide will help you dry wood minus splitting for any woodworking project.
Drying wood basics
Wood loses moisture faster from its ends rather than its sides. Once the wood is cut and processed, you can never stop it from losing moisture and this can lead to splitting and breaking if you are not careful.
There are ways to prevent splitting and slow drying enough to prevent splits and cracks. The trick is to seal the ends of the boards before the wood is dried.
Things you’ll need
- Aluminum paint
- Spar Varnish
- 2 plastic buckets
- White wood glue
- 2 disposable 2-inch paintbrushes
- Rubber gloves
Steps
Step #1
Combine equal parts aluminum paint and spar varnish in a plastic bucket. This would be enough to seal the end grains of large slabs or logs. Coat all the ends at the same time. If you cover only a part of the wood and then do the other part next time, this can result in an even dry rate.

Source: https://www.bottompaintstore.com/aluma-hawk-boat-paint-by-sea-hawk-paints-p-28288.html
Step #2
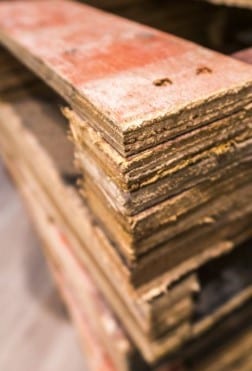
Paint the solution on the ends of the large lumber or logs using a 2-inch brush. Use rubber gloves to prevent aluminum paint from getting on your hands. Cover the ends completely. If the solution soaks into the end grain, keep adding more paint. Use two coats at least on each end.
Source: https://www.thesprucecrafts.com/plywood-edge-treatments-3536439
Step #3
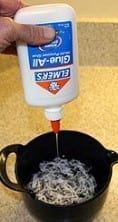
For smaller ends of boards and small pieces of wood, mix a solution of equal parts white wood glue and warm water in a plastic bucket. This will soak into the ends a lot more, so apply a lot or better yet, dip the ends into the bucket. You may use a clean 2-inch disposable brush into the glue solution. Paint each end; keep painting until the solution stops soaking in.
Source: https://www.pinterest.com/pin/192247477821434868/?lp=true
Periodically check if the wood is dry
Radial checking
A thorough check of the body of the wood would determine if it has been dried well. Look for cracks that radiate out from the heartwood to the sapwood. You must do radial checking while air drying and using other methods to prevent over-drying which could result in cracking and splitting.
Check for color
The color of the wood can help determine if it has been efficiently dried. Wood fades and darkens as it seasons, changing its color from white to yellow or gray. Different species have different colors but it’s easy to say that wood with a brightly colored surface is still green.
Check for loose bark
As wood starts to dry up, its bark starts separate from the body of the wood and then cracks then separates completely. If the bark is still attached to the wood, use a sharp knife and peel it. If the cambrium is green then it is not yet well-seasoned. Check for overdrying signs from the bark itself.
Check for well-seasoned sound
Take two pieces of wood and bang these together. Dry wood sounds hollow while wood with moisture will sound dull. Periodically check this to ensure that wood is not too dry and will not split.
Check for the weight of wood
Because moisture has been removed, seasoned wood will weigh lesser than green wood of the same type and size. As soon as wood starts to weigh lighter, you must check for any signs of overdrying and splitting.
Purchase a handy moisture meter to help you monitor the moisture levels of wood in a more efficient manner. These are very easy to use and are mostly electronic and will work on all types of wood. This is a good investment if you work with wood or work on many projects made from wood.
Conclusion
Wood can take a very long time to season and how long it takes is an ongoing debate in woodworking groups. To prevent splitting, cover the end grain to avoid excessive drying. Season wood depending on its species and always check signs of wood drying on a regular manner to monitor wood closely.
