All woodworkers know how important sanding is to achieve the ‘wow factor’ in their woodworking projects. Whether restoring wood or working with new wood, you just can’t skip this step! Sanding is not only critical while preparing wood for paint, but also often during finishing. While preparing wood for paint and other finishes, sanding helps in removing old finishes, roughs up the surface for the paint to adhere better, and also smooths out bumps between coats. Pressure-treated wood is preferred for outdoor uses due to its long-lasting quality, durability, fungi, decoy, and pest resistance. But can you sand pressure treated wood?
When turning raw wood into furniture, deck, post, shed, fence, or a dock you first need to prepare it for various finishes. Nothing works better than sanding when it comes to removing the nicks and scratches, and eliminating any unwanted glaze on the wood. Without the process of sanding, your painting or staining job will not get the superior look that you expect. A commonly asked question is can you sand pressure treated wood and is it safe?
Can you sand pressure treated wood?
The answer to this question is yes! Not only that but pressure treated wood needs less preparation than untreated wood. Pressure treated wood is lumber that has undergone special pressure treatment with chemicals to make it mold, insect, decay, water, and fire-resistant. There are different kinds of chemicals like copper quat, arsenic, etc., to treat wood in order to give it the desirable qualities.
Is sanding pressure treated wood safe?
This is the tricky part! As the chemicals used for the wood treatment are not always safe, the question arises is it safe to sand pressure treated wood? Can you sand pressure treated wood, and the answer is affirmative. But, remember the dust released by the pressure treated wood while sanding can be toxic and harmful to health. Therefore, it is extremely important to focus on safety measures while sanding these kinds of wood. Due to the chemicals present in pressure treated wood, these types of wood are mostly used in outdoor applications like decks, docks, posts, etc.
Somethings to keep in mind when sanding pressure treated wood
- Overdoing the sanding job will remove part of the protective coating fortified by the pressure treatment
- Sanding may leave the treated-wood surface look ugly
- The level of toxicity in treated wood is high
- The dust generated while sanding may cause bronchitis, eye irritation, and other health issues like upper respiratory infections, and asthma. Prolonged inhalation may result in cancer.
Things you will need
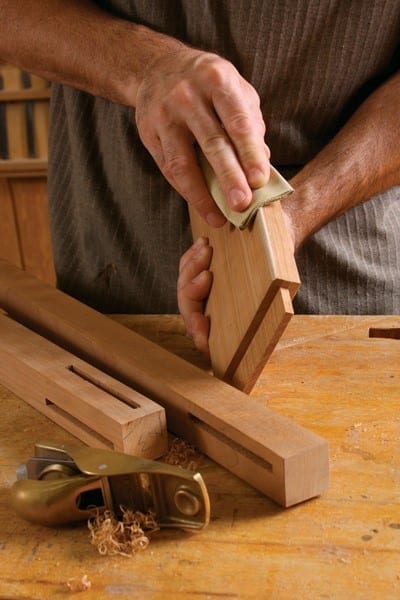
When you have a DIY project in hand that involves sanding pressure treated wood, you just can’t ignore it. To tackle the standing task you need the right tools to achieve the desired results. Electric sanders are the fastest and easiest way of sanding a wood surface, but for those small parts, and intricate, hard-to-reach corners you will need the good old sandpaper. Remember to protect yourself with goggles, gloves, and a dust mask.
If you are an avid DIYer or not, it is advantageous to know what kind of sanding abrasive works well for what kind of project.
- Sanding belts allow quicker removal of stock
- Flexible sanding sponges are ideal for sanding contoured wood surfaces
- Sanding discs are convenient for smoothing flat surfaces
- Sanding blocks work well for flat surfaces
- Sandpaper sheets are time-tested tools for hand sanding
Gather things that you will need
- Rag
- Gloves
- Goggles
- Respirator
- Sandpaper
Step -1

Sanding wood is not an easy job. Be ready for the mess! There’s going to be loads of sawdust. The best workspace is outdoors or any place that’s well ventilated and easy to clean. Work on a flat table to get a good sanding experience.
Step – 2

Wear your protective goggles, gloves, and respirator. Fine sawdust can get into your eyes and lungs, so it is extremely important to take safety measures seriously.
Step – 3

Clean the wood with a rag to remove dust and grime from the surface. You want to keep the surface even and sand-free when starting the sanding process.
Step – 4

Choose the right sandpaper grit. Sandpaper of lower grits indicates coarser grains and the higher grits represent smoother grains. If you are not sanding a wooden floor, you can work with sandpaper grits between 40, 180, and 220 grit, depending on the type of wood you are dealing with. Higher grit sandpaper creates finer sawdust and tends to clog pores, which in turn may affect your staining process. So choose wisely according to what kind of finish you need.
Step – 5

Start sanding with a rough/lower grit sandpaper to get rid of the rough things from the wood. This step will take the longest time. After the rough stuff is removed, move up with the grit gradually to get a smoother finish.
As you progress with your sanding, you will see a noticeable difference and the wood will appear smoother. The grain and color of the wood will become more visible and all bumps and blemishes will be removed.
Step – 6

When you are happy with the result, the final step is to remove the sawdust from the wood. First, brush off the bulk of sawdust from the wood. Then use a damp cloth or a vacuum cleaner to remove the finer dust. Another good way to ensure the complete removal of sawdust from the wood surface is to use a tack cloth. The dust will stick to the adhesive giving you a dust-free surface.
Step – 7

Now your wood is ready for painting, staining, and any other finish that you want to give it.
Sanding is the very first step you will need to prepare your wood for painting or staining. Now you not only know the answer to ‘can you sand pressure treated wood’ but also how to do it step by step. So, prep properly, remove imperfections and give your treated wood a neat sanded finish.
