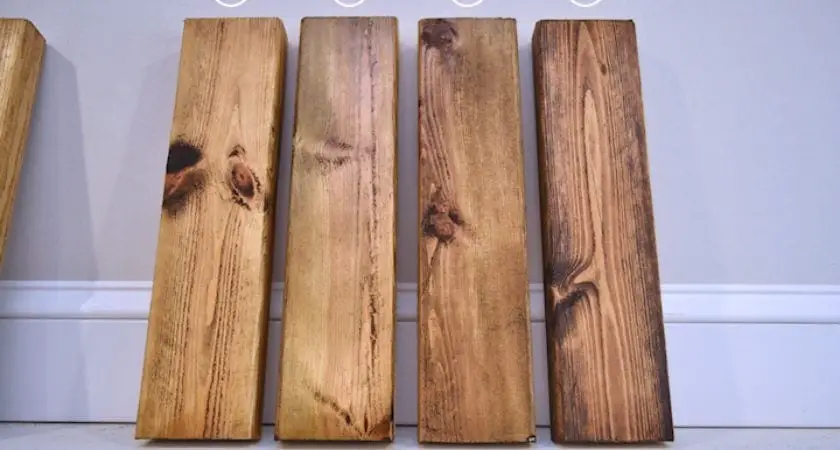
Working with pinewood is easy, as well as affordable. However, the hardest part comes when you are trying to figure out how to stain pine wood. That’s for a couple of reasons.
Above all, the grain of pine is unusually dense. Thus, most stains cannot possibly penetrate fully, which causes undesirable hues of orange, yellow, and/or red to remain visible and tough-to-get-rid-of.
After being faced with multiple trials and errors before I discovered the best-working method for staining pine wood, I made a promise to myself. I embraced the mission to share what I have learned in order to help other DIYers cope with the tricky pine wood.
Are you ready to turn your pinewood project into a masterpiece? Read on and by the end of this tutorial, you’ll be ready to stain pine like a pro.
What You Will Need To Follow This Tutorial
- Steel wool and vinegar solution
- Wood conditioner
- Paintbrush
- Scrap pieces of pine wood
- Wood stain
- Separate containers (for the wood stain, as well as the wood conditioner)
- Wooden stirrer
- Drop cloth
- Sealer (optional)
- Medium-grit sandpaper (optional) (150-grit)
- Fine-grit sandpaper (220-grit)
Pro Tips
1 – Upgrade your steel wool and vinegar solution
The steel wool and vinegar solution are effortless to make and apply. Just place 2 #0000 steel wool pads in a clean glass jar and add 2 cups of white vinegar (enough to cover the steel wool). Seal the mixture with a lid and leave it away in a dark room for 2-3 days.
By applying this solution on pine wood first, you’ll get naturally darker, deep colors as a base to stain on. To upgrade this solution and create even more spectacularly saturated nuances, add 2 tablespoons of coffee grounds to the solution before you seal the jar.
The more you let the steel wool and vinegar solution age, the darker colors you will get (the solution can be stored for a full year).
2 – Look for wood stain test samples
If you are as picky as me when it comes to picking a suitable nuance of wood stain to match the surroundings, then my best advice is to ask for wood stain test samples. These can be found at most paint stores at a very reasonable price. However, you may also get lucky to get these samples for free. Mix 2 or 3 stains to get the perfect color, depending on your personal preferences.
Step by Step Instructions for Staining Pine Wood
Step 1 – Start with testing the wood stain on a scrap piece of pine wood
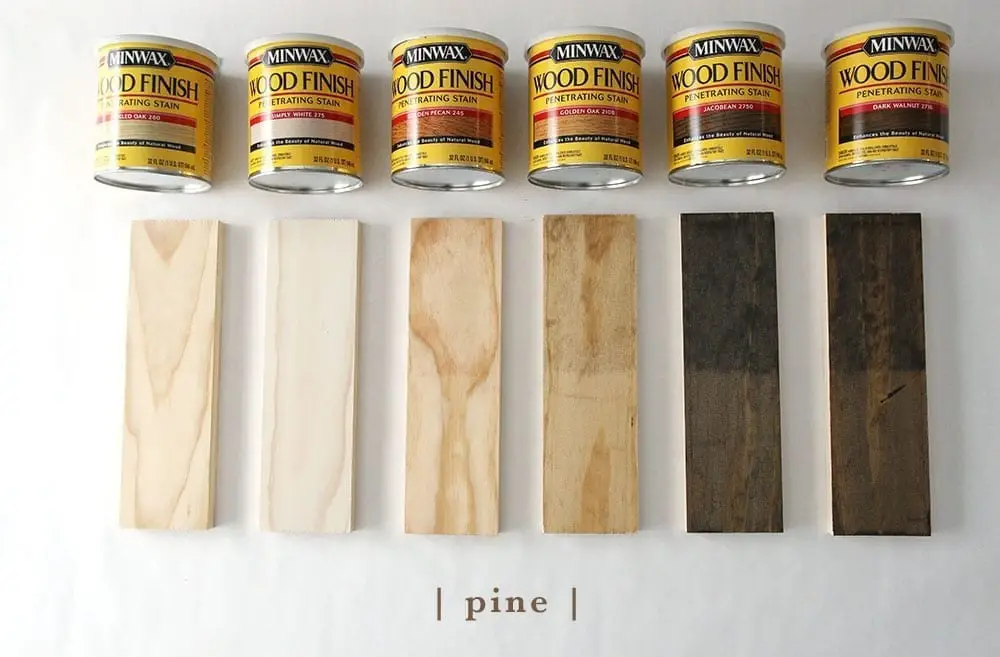
Image Credit: chrislovesjulia.com
As stain doesn’t show off the final color immediately, it’s best to avoid unpleasant surprises by testing the wood stain on a scrap piece of wood. However, you also need to make sure the scrap piece of pine has been sanded off properly because this also affects the saturation, as well as the coverage of the stain.
If you’re about to stain finished pine, you will need to sand off any existing finish with medium-grit sandpaper. If you are working with new pine, then fine-grit sandpaper will do just fine.
Cover the work area with a drop cloth to ease yourself from having to clean all the dust left behind from sanding, as well as the possible blotchy spots of stain. When sanding, you want to follow the grain. Remove any dust particles with a tack cloth and proceed to test the wood stains.
Step 2 – Apply wood primer and stain the pine wood
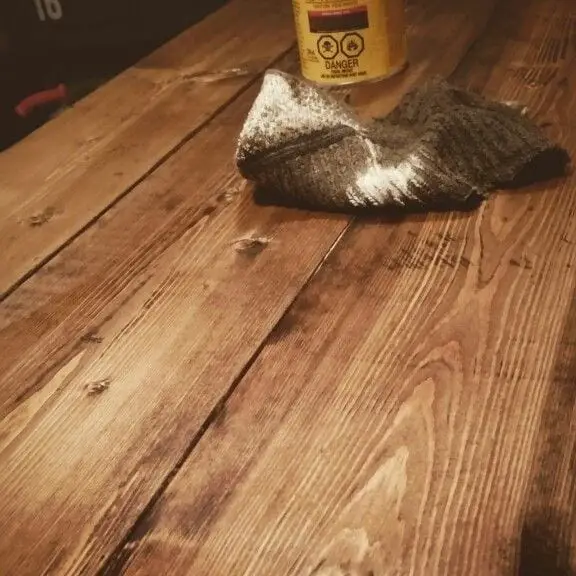
Image Credit: pinterest.com
If you are using the steel wool and vinegar solution, you want to apply it 1 day before you proceed with priming and staining. If not, you can get straight to priming. Let the primer dry out (it typically takes less than 30 minutes).
All that’s left to do is to stain the pine wood with a paint brush. You may restain it to get the color you want, and you may also seal the stain with a protective layer of polyurethane for best results.
Ultimately, I am positive that anyone can learn how to stain pine wood. In order to get the best results, though, you need to be patient. Even though staining alone does not take long, the time you spend testing the stains’ colors, mixing your solutions and being precise at what you do truly matters.
Did we manage to be of your assistance with this tutorial? You can show some love by liking, sharing, and commenting on this article. We appreciate your support!
