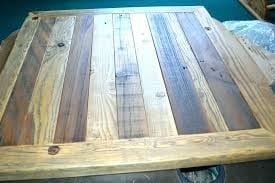
If you want to lighten the color of wood to match your light interiors then you might as well whitewash your wood. Whitewashing wooden furniture can be done even at home using simple woodworking items.
Whitewashing wood is a very straightforward way to change the color of the surface of the wood. It uses very common bleaching materials and easy to follow woodworking techniques as well. This guide will show you how it’s done.
Whitewashing wood basics
Whether you are treating wooden furniture, flooring or walls, whitewashing takes several stages. You must remove, strip the old varnish and prepare wood first before you can perform the actual whitewashing procedure.
What you’ll need
- Protective gear (mask, gloves, and goggles)
- Drop cloth or newspapers
- Chemical stripper
- Vinegar and water
- Whitewash stain
- Clear, water-based sealant
- Paintbrush
- Steel wool
- Sandpaper
Basic whitewashing technique (using paint and water)
Step 1: Preparing the surface to be whitewashed
Source: http://keepingupincanberra.blogspot.com/2015/04/project-refinishing-our-dining-table.html
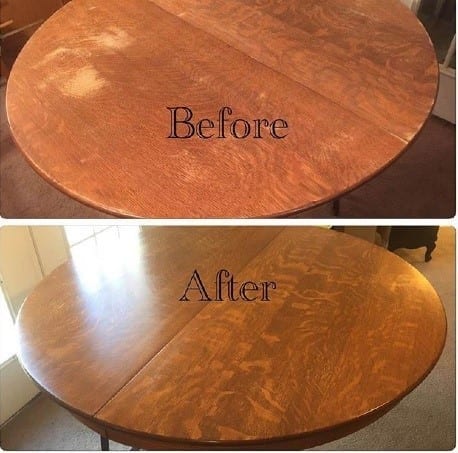
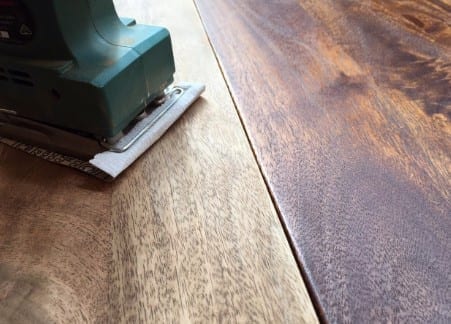
For any whitewashing technique to work, you must clean the surface of the furniture that must be treated. This means that you will remove any stickers, nails, and caulking on wood. If the wood is dirty then wash it with regular soap and water.
If the wood has a very rough grain, use sandpaper to remove the rough parts. The smoother and the cleaner the surface it, the better it would be to apply the whitewash. If you are going to wash wood, make sure that it is completely dry before applying a whitewashing treatment. Leave the wood for at least a day to dry.
Stain the wood before whitewashing so that the natural grain, knots and other natural imperfections will shine through the whitewash procedure.
The paint and water technique is a whitewashing technique that will work perfectly on new lumber or on a smooth surface. Staining can enhance the appearance of the final product; it will make it look aged and weathered, it this is the look that you want to achieve. Keep in mind that the darker the stain you use, the visible the wood will be underneath the whitewashed surface.
The stain will take time to completely dry and you must wait for this before you start to whitewash the wood. Read instructions found on the stain’s label to find out how much time you need to wait for the stain to work.
Step 2: Preparing and applying the stain
Source: https://www.familyhandyman.com/woodworking/staining-wood/how-to-whitewash-wood-3-simple-techniques/view-all/
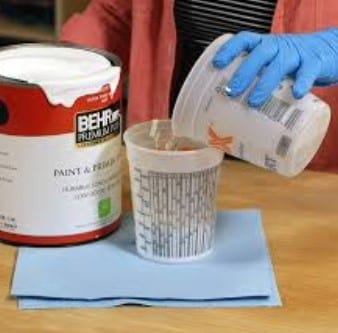
Mix a part of water and part of the paint. Mix this until you get a semi-transparent mixture. You may add more water if the paint is too thick. Thinning the paint will let the lovely natural appearance of the wood grain to show through after you apply the white paint. The best paint to choose is a latex or water-based paint. You can purchase cans of latex or water-based paints from a local hardware store.
You can change the ratio of paint to water depending on how transparent you want the whitewash is. If you want a large section of the wood to show through the whitewash, mix 2 parts of water to 1 part of latex paint. You may start with a 1:1 ratio, and then add more water if you find that the paint is not as transparent as you want it to be.
There are many ways to apply a whitewash. You may use a clean rag, foam roller, or paint brush. To apply it evenly, use long, even strokes on the wood. The whitewash will dry quickly because it has been diluted with water. If you are treating a large piece of furniture or a large surface, work on the small sections of the piece rather than attempting to treat the entire area in one time.
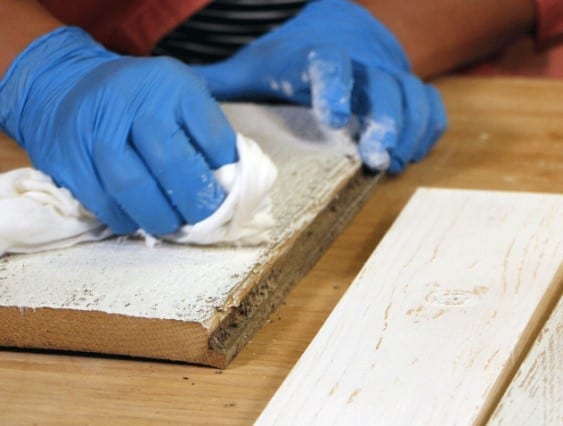
Remove the excess whitewash using a paper towel or clean rag. Let the whitewash remain on the wood for 3-5 minutes and wipe the excess paint. You applied the whitewash using a brush in the direction of the grain and you should also wipe the excess in the direction of the grain as well. Use long and even wiping motions to remove the paint.
Step 3: Drying the surface
Source: https://www.familyhandyman.com/woodworking/staining-wood/how-to-whitewash-wood-3-simple-techniques/view-all/
Since you are whitening wood, take note that the longer you leave the paint on wood before wiping the excess off, the whiter the surface will be. If you want the surface to be mostly white with just a small portion of the wood showing then you must leave the paint on the wood longer than 3-4 minutes.
How long does paint dry on wood? This may vary according to the type of wood; the age of the wood and what the weather or climate is from where you are located. Follow the 3-4 minutes as a guide but be sure to check the surface regularly.
Once the paint is dry, you may add additional layers. Let each layer dry completely, before adding another layer. The number of coats of the whitewash depends on how much coverage you want.
For a bright and very white end result, you may need to add up to 5 coats of paint. If you want more wood to be seen from the surface, about 1-3 coats will suffice.
Using paint and wax as a whitewashing technique
Step 1: Preparing the surface

Source: http://keepingupincanberra.blogspot.com/2015/04/project-refinishing-our-dining-table.html
The result of paint and wax whitewashing is a lovely vintage look. You will apply wax to certain areas of the wood before you add coats of paint. Because you have applied wax on some areas, the paint will not adhere to these areas. This is a good way to create shabby chic furniture like cabinets, chairs, dressers and more.
Step 2: Applying the wax
Source: https://www.familyhandyman.com/woodworking/staining-wood/how-to-whitewash-wood-3-simple-techniques/view-all/
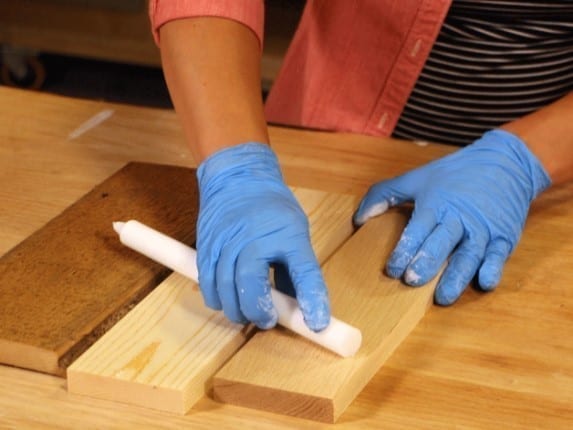
You may use candle wax; simply melt the wax in a hot water bath or just use the candle to write a figure or pattern on the wood. Aside from wax from a candle, you may use petroleum jelly.
Sand the surface especially if there are rough patches on the surface of the wood. Sanding is a good way to create that distressed look on wood. You can distress the wood further by creating gouges, dents, and marks before applying wax.
Use a white candle to rub wax on the wood. Rub the candle along the surface of the wood. The wax will prevent the paint from working on the wood. If there is a knot on the grain that you want to highlight, place candle wax over it by rubbing the candle or melting it.
Rub the wax over the wood. Create a pattern or look that the wood has aged. You don’t need to place the wax perfectly on wood. Just create random marks.
Step 3: Painting and finishing the wood
Source: https://www.familyhandyman.com/woodworking/staining-wood/how-to-whitewash-wood-3-simple-techniques/view-all/
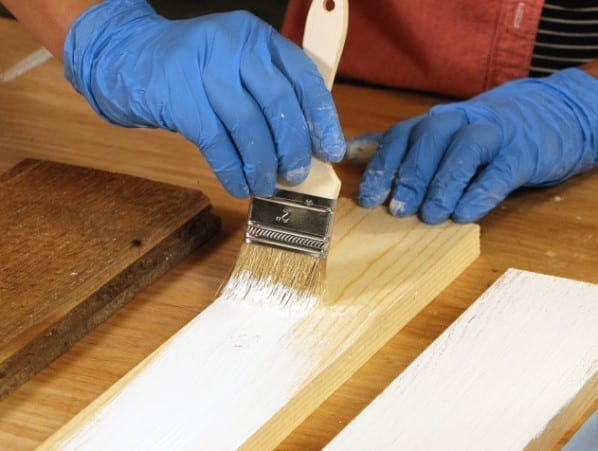
Paint the wood with white latex paint in the direction of the wood grain. Apply paint using long, even strokes.
You may also use spray paint depending on the size of the project you are working on. However, spray paint is not ideal for whitewashing walls, flooring or for larger pieces of furniture. But if you are whitewashing a small piece of wood, you can use spray paint so you can easily reach the nooks and crannies of small wooden pieces.
Before the paint dries, wipe the wood to remove the paint on the areas where there is wax. Use a rag and wipe the wood. You will find that the paint that has covered the waxed areas will easily come off.
Use 220 grit sandpaper to rub over the treated surface especially on the areas where there was wax applied. Rub the surface lightly to remove the paint. This can also add to the distressed look you are trying to achieve.
Remove dust and residue on your working area before you proceed with applying a sealant or stain on the surface.
Apply the sealant in long even strokes. Apply towards the grain and let this dry for a few hours.
Dry brushing to create a whitewashed appearance
Step 1: Preparing the surface

Source: http://keepingupincanberra.blogspot.com/2015/04/project-refinishing-our-dining-table.html
Clean the wood that you will be working on. This will allow the paint or the whitewashing paint to adhere better. Because you will be applying paint you do not need to completely remove the old finish unless this is flaking off or a part of the old finish is already flaking away. If this is the condition of your wood, use chemical strippers and sand the area to make it smooth.
Step 2: Applying paint and finishing wood
Source: https://www.familyhandyman.com/woodworking/staining-wood/how-to-whitewash-wood-3-simple-techniques/view-all/
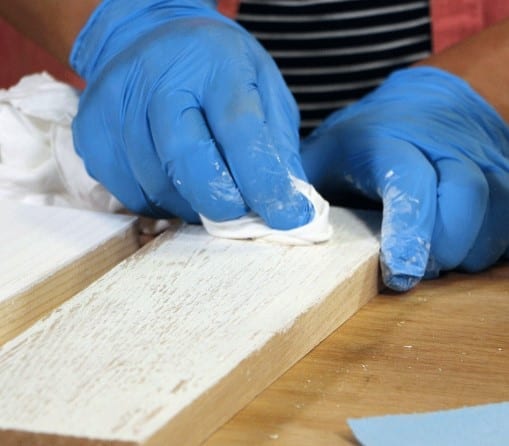
Use undiluted latex paint for this technique. Dip the brush very lightly and apply this on the surface. The goal is to apply barely enough paint so your brush should have very little paint as much as possible. In case of excess paint, wipe it off with a clean rag.
You may also shake your brush after dipping it in the paint. Shake it in a pan or anywhere but not on the wood you are treating. This will make sure that you are only applying a very small amount of paint.
Lightly brushwood. If you stopped during the painting or the paint is too heavy then the result would be uneven blotches of paint. Move as lightly but as rapidly as you can.
Avoid brush strokes marks on the surface. Make your strokes as long and as even as possible. Maintain your quick and light movements. If you spot uneven spots, remove these with a rag or sponge at once. Look for uneven or overly thick spots and use your brush to brush these to the surrounding painted area.
Let the paint dry. Because this is undiluted paint, you may have to wait for a day to completely dry the piece. A day’s wait would be enough to make sure that the surface is dry and perfect for sealing.
Apply one or two coats of a water-based sealant. This will preserve the whitewashed furniture without changing its color or characteristics. You must make sure that the wood has completely dried before applying sealant.
Painting furniture white
Step 1: Preparing the furniture
Source: https://www.wikihow.life/Paint-Wooden-Furniture
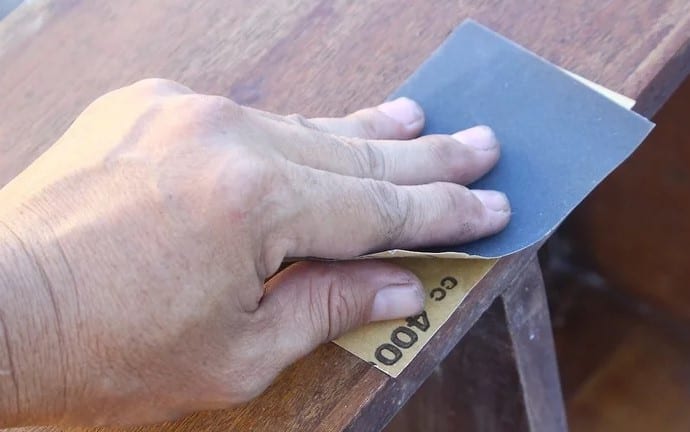
As always, wash the furniture piece clean by using detergent soap and water. Dry this completely before sanding. Usually, you need to wait a day for the piece to completely dry.
Sand gently using medium-grit sandpaper. Compared to using a whitewashed stain, this technique will hire the wood grain and make the piece completely white. Over-sanding can cause tannins to appear through the paint and can change the color of the piece from white to yellow.
You don’t need to strip the wooden furniture piece unless the surface already has flaking paint. If you need to sand the finish because the paint is flaking off, apply chemical stripping product on the surface and then sand it afterwards.
Step 2: Brush on primer paint and sanding
Source: https://www.wikihow.life/Paint-Wooden-Furniture
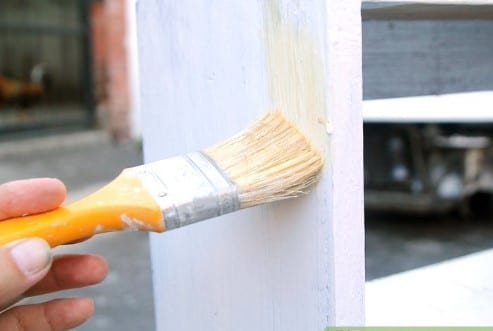
Brush a coat of white primer paint and let this dry completely before continuing to the next step. If the surface is shiny or glossy, you may have to use a gripping primer instead of ordinary primer paint. Use water-based primers if the surface you are treating is covered with water-based paint. Use oil-based primers for oil-based paints.
Let the primer dry for a few hours. Check the drying time for the primer you used. Use fine grit sandpaper. You must sand between each primer coats or before the final layer of primer paint is applied. Remove excess primer that has dried in the uneven surface of the wood.
Brush more coats of primer but each one should be very thin before painting. Let each primer coat dry before applying the next coat. The primer is just here to improve the area where paint will adhere therefore it does not need to hide the color underneath.
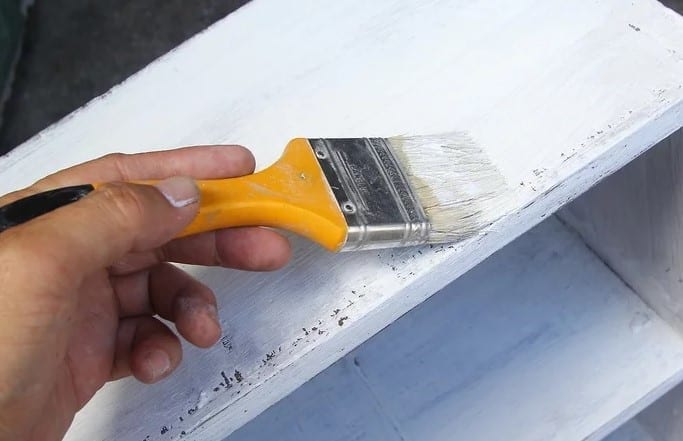
After the last coat of primer paint has dried, apply several thin coats of top coat paint. Use a clean brush to apply paint and let each coat dry before applying the next coat. Take note that two thin coats of paint will create a durable and shiny result.
Step 3: Brush on a top coat of paint
Source: https://www.wikihow.life/Paint-Wooden-Furniture
Use a roller to brush Paint with a roller or use long, even brush strokes to apply an even coat of paint to a large flat surface. If you are working on detailed or curving pieces use a small craft brush which is available from an art supply store.
Apply sealant after 24 hours. This will give enough time for the piece to dry. You can use any type of sealant to protect your whitewashed work.
Conclusion
Whitewashing wooden pieces can be done to improve the color and shade of the furniture piece. There are several techniques that you can use; find the one that will suit your needs. And finally, always stain or seal your wood to protect your work.

