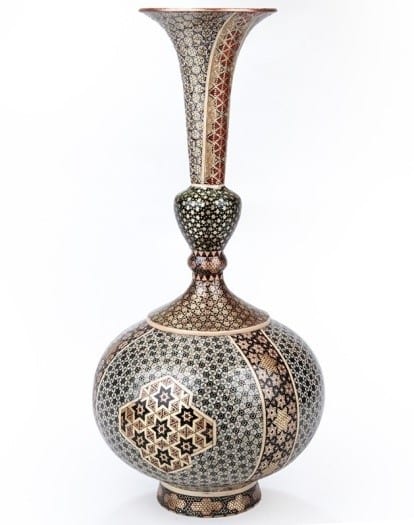
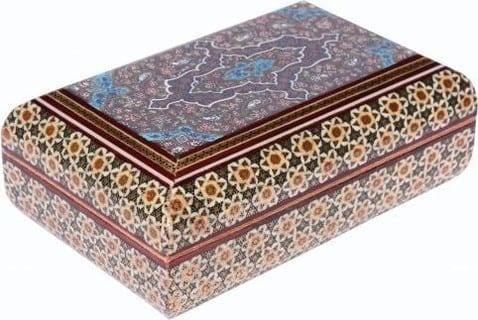
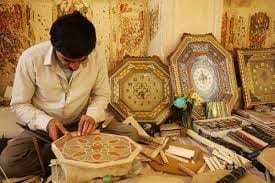
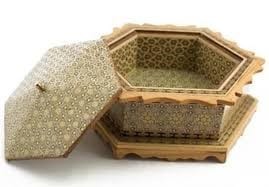
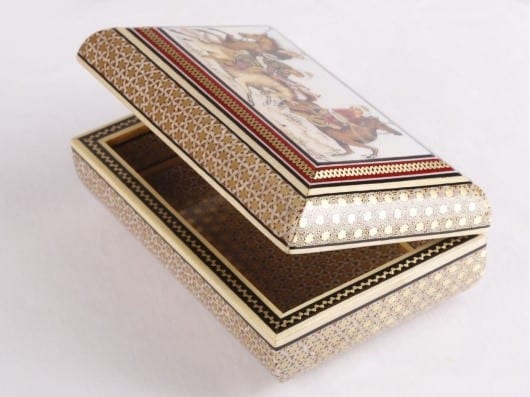
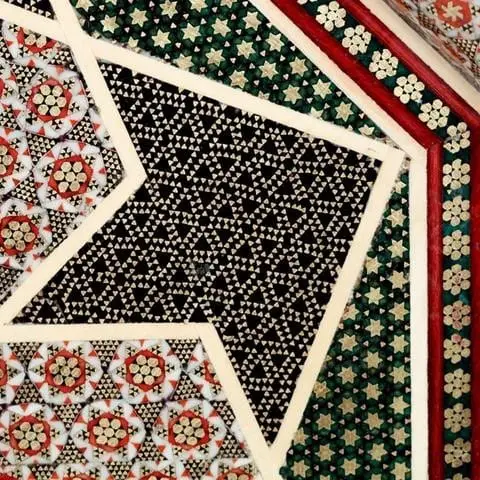
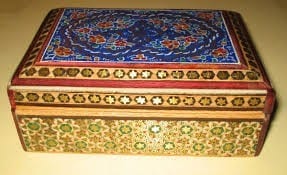
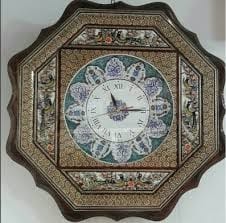
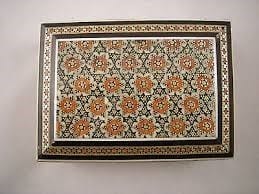
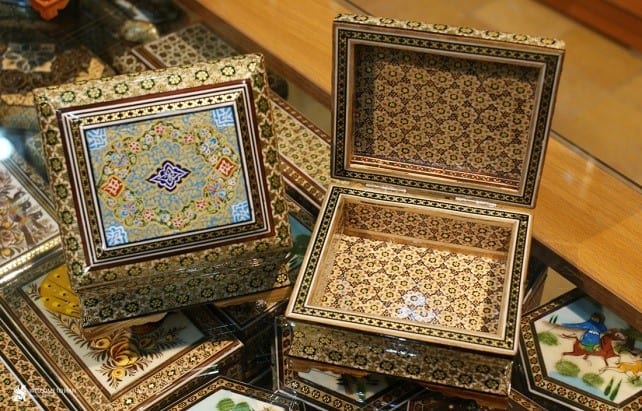
“Khatam” is also called “Khatamkari”, and is a native Iranian woodworking method. Khatam looks like a collage; but instead of using paper and cloth, craftsmen make their projects out of wood, shells, bones, and wires.
Possibly the most common designs used in making Khatam is using the tiniest triangles. These were seen initially in the 17th century.
The triangles were glued together in geometrical shapes and assembled on the surface of the material. Before the 17th century, the shapes used were squares. But after the Mongol invasion, Iranians learned the Chinese inlay method.
The Chinese used very simple and clean black and white triangles. These lovely pieces inspired Iranian artists and added these to what they already knew with the Chinese triangle method.
The result of this combination was breath-taking art that was better than what they had before. Through the years, Iranian artists have made so many amazing and valuable Khatamkari artworks.
You will find vases, picture frames, bowls, jewelry boxes, wine pitchers and trays that are made and sold in and outside the country. Nowadays, these are prized ornamental items while some are even museum-type pieces.
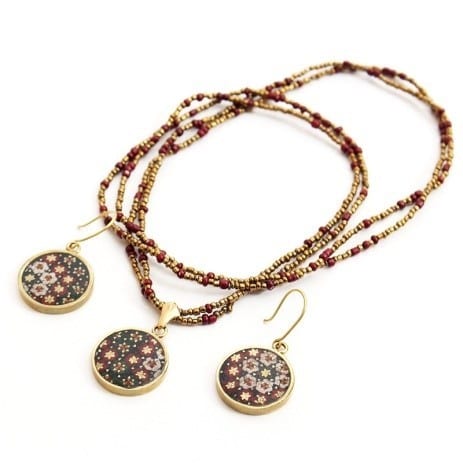
Some modern artists also combined this traditional art with modern artistic techniques to create Khatam jewelry.
You can find fantastic Khatam pieces being sold from local shops while some are exported to cater to the demands of customers abroad.
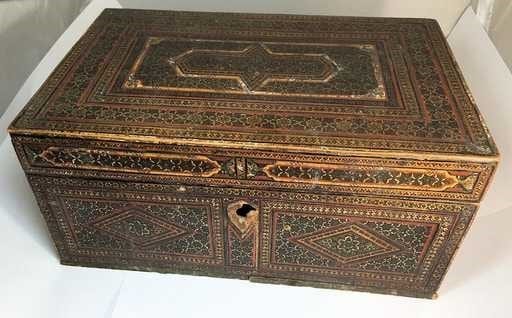
Impressive khatam chests were placed near the tombs of very important people in the region. There were many imams that had wood chests inlaid with Khatamkari designs.
There is no evidence that the more extravagant the khatam chest was, the more prominent the person was. The relatives of the dead placed different items that belonged to the dead inside the chests.
A Minbar is a special tribune that you will find in any mosque. This ornament was an important part of the mosque itself which is why artists tried hard to decorate this is the best way that they can.
The minbar is part of the mosque and will remain for thousands of years. Some masters have even decorated a whole ceiling with Khatam making mosques look more glamorous than ever!
History of Khatam
There is no exact date when Khatam was first used. The oldest available items of Persian Khatam art were during the Safavid period.
Inlaid articles during this era had special significance. Artist used this artistic technique on doors, mirror frames, windows, boxes, pens, penholders, tombs, and lanterns.
How Khatam was used
The application of Khatam on doors of temples and various holy places were made of inlaid motifs. These may be observed in Mashland, Qom, Shiraz, and Rey.
A priceless case found in Imam Ali’s shrine is a masterpiece of Khatam art made by Shiraz masters. This was placed inside the shrine from the Safavid age.
Some parts of the Monabat Case of Sheikh Safi al-Din’s Shrine in Ardebil were also Khatam art.
During the Safavid area, the art of marquetry also gradually become famous in the cities found in the southern regions of Iran especially in Kerman, Isfahan, and Shiraz.
Persian Khatam is one of the most impressive masterpieces. A desk made from Khatam was awarded the first prize and gold medal in the art in Brussels.
Khatam furniture is also found in royal buildings, doors, windows and countless items that were inlaid.
You will find inlaid rooms inside the Sa’dabad and Marble Palace in Tehran. It was in the 18th and 19th century when the art declined.
This was resurrected under the rule of Reza Shah. During this time new art schools in Tehran, Isfahan, and Shiraz were built.
The artwork lasted for more than 700 years and it is still being practiced till today in the regions of Shiraz and Isfahan.
Khatam Kari artworks unveiled
The art of Khatam was passed on from one generation to another. Bagher Hakim- Elahi was one of the masters of Khatam art and he learned his skills from Master Sanee Persian Khatam in Shiraz.
Bagher Hakim-Elahi moved to Tehran and this is where he made Khatam pieces which are now found in museums in the city.
And just like tradition, Bagher Hakim-Elahi passed it on to his younger brother Asadolah Hakim-Elahi.
How basic Khatam is made
Khatam requires the right tools, the best type of wood or any material that you wish to use and the knowledge of Khatam techniques.
Creating Khatam projects also require patience as well as skills. Most Khatam experts may take years to complete a small project because of the very intricate details of this artwork.
The best materials to make Khatam art
Khatamkars (the artists that make Khatam art) may use different types of wood. Usually, the most readily available types were used.
The most common are cypress, betel, ebony, teak, logwood, walnut, orange, pistachio, aspen or jujube. Metals that may be used are brass, gold, silver, and aluminum.
The bones commonly used for Khatam were bones of camel and cow. Modern khatam art also made use of these materials.
The look and the patterning of Khatam Kari are linked to the technique that was used to make it. Thin rods of bone, wood, and metal are cut around 2 mm or less, thick and about 30 cm long.
These are bound together initially with string and then firmly bound with glue. You will be able to see the pattern that the artist is trying to make from one end of the bundle.
1 mm slices are cut and then arranged. When the artist is satisfied with the pattern, glue is added so that the pieces stick to the surface.
The completed item may be made up of more than 250 pieces per cubic centimeter.
Cutting the Khatam artwork
A Khatam artwork starts with cutting the type of wood to be used along with a bone in very long and narrow pieces. These are the base materials for making Khatam Kari art.
The very small and slim pieces made of wood and bone can be 30 cm of long and 2 cm wide but are only 1-2.5 mm thick.
It is not so easy to saw or cut wood into these very small pieces but cutting wood is another very hard thing to do.
With wood, very sharp and very efficient saws and knives were used to make long cuts. But with bones, these were soaked in limewater so that these will become soft.
Bone soaked in limewater will not just make them soft and but also bendable as well. As long as the bones are wet, these can be cut without much problem.
A khatamkar uses a variety of wood but they were also very particular about wood that was very valuable like ebony and aspen.
When it comes to the kinds of bones that they use on their art, they usually come from camels, horses and even from elephants.
There are precious Khatam artworks and pieces that are made from ivory. But of course, nowadays, it is not good to use real ivory on Khatam art or any artwork for that matter.
It’s best to use bones and materials that are readily available which is many use cow or horse bones instead.
So these bones were dried and then softened to be cut into very small and long pieces. A single Khatam art piece may be made from different types of bones and wood.
Shaping the Khatam
Now that the wood and bones were cut in very small pieces, these will have to be shaped into triangular prisms and then placed inside a mold-like board.
The board will help get all the small pieces in their precise positions so that these may be easily sanded.
A triangle is a basic unit in Khatamkari and everything is made from triangles. Khatam is simply loads and loads of tiny triangles that are arranged and then glued together.
After the wood and bone are set, the wire is used to bind this together. The wire can also be used as a part of the triangle unit.
As mentioned, glue is added to the pieces to harden and make a prism. Different types of glue may be used and a number of applications may be done.
It could also take days to weeks for a piece to harden completely and afterwards, these can be used to design a Khatam pattern for a particular item.
Designing a Khatam pattern
After every material to be used has been “triangularized”, a pattern has to be made. A pattern is a geometrical drawing of what the final piece would look like. This is a guide of what has to be done.
Most artists and craftsmen take special care during this step because it could make or break the overall appearance of the Khatam piece.
This is probably the reason why most craftsmen decide on making Khatam art on flat surfaces like frames, chests, and plates.
It is a challenge to create patterns from very intricate objects like pitchers, goblets, and jewelry.
Forming geometrical shapes out of Khatam
Now, this is the part when patience really counts. Khatam artists now place four triangular prisms together and glue these to each other to create a bigger triangle.
Each pair of these bigger triangles is glued together to form a diamond. The diamond shape now becomes basic pieces of the Khatam. This shape allows Khatamkars to make so many shapes.
Craftsmen used their imagination or take inspiration from nature when it comes to creating different designs.
From five-pointed stars to hexagons, pentagons, octagons, and decagons, the task of a Khatamkar is far from over.
He carefully forms different geometrical shapes and patterns until the entire surface has been covered.
Pressing the Khatam pieces
Khatam geometrical pieces will then be glued and then pressed so that these will remain in place.
To prevent the shapes from moving and detaching each diamond should be pressed tightly to the surface for at least 24 hours.
Can you imagine how long a large Khatam piece had to be prepared? This may be the reason why most artists take years to create a small project!
Pressing does more than just prevent the pieces from moving and detaching. This will fill the tiny gaps that might exist between the two triangles or diamond piece.
Every diamond piece must also go through this process. And when the work is done, the completed item will surely stand an amount of pressure.
Usually, Khatam masters use a small tool to keep the pieces in place. They may use a tool similar to a clamp while some use wire instead.
Creating a perfect Khatam
If you think that the Khatam project is done, you are wrong. You are still yet to place the pieces on the surface of the item you want to design.
When each piece is in the desired size and forms a final rectangle, it’s time to add Astar. This is a thin layer of wood which is usually poplar and this is glued to the final shape to enhance its durability.
Not all Khatam art uses Astar, but the best Khatam artworks usually always do. According to an expert in Khatam art form, this is one of the signs of a good Khatam.
Now that the prisms (the bound wood, bone, and wire) are ready, these must be cut in 1mm to 1.5 mm thicknesses. The initial shapes will be prisms, but when these are cut, these will become triangles.
Assembling the pieces on the surface
When your prism has been cut into thin tint triangle pieces, these will now be placed on the surface of the item or object that you want to decorate.
Many craftsmen agree that this is the most painstaking part but some compare this to solving a jigsaw puzzle. This is also the part when Khatam, Marquetry, and Intarsia become similar.
Each piece is then placed carefully over the item or object. It does not matter where you want to start.
Some start from the bottom going up while some start from top to bottom. There are also craftsmen who start from the middle which is good if your piece has an irregular shape.
Strong glue is used to attach the pieces. Compared to inlaying where a groove similar to the inlay piece has to be created on the surface, Khatam art is simply placing the pieces on the surface.
Just like carefully creating a prism, each piece is given a considerable amount of force to stay in place. Pressing with a tool is usually the best practice and then another wait until the glue has dried completely.
Sanding the surface of the Khatam piece
After all the surface area of the piece or object has been covered, and the glue has been dried in a considerable amount of time, it is now important to sand the surface.
The surface of the Khatam must be gently sanded to remove even minor roughness. Usually, medium-grit sandpaper is the ideal choice for this project.
Make sure to sand firmly and carefully and to keep your pace. This is very important for achieving a fine, good quality Khatam.
Oiling the Khatam surface
One of the most distinguishing qualities of very fine Khatam is the shine. You will find chests, furniture, ornaments and other objects with Khatam art that are very shiny.
This is because these pieces were carefully oiled. Oiling lets the surface become smooth and shiny, like adding finish or a protective coat on the wood floor.
Oiling also helps protect the surface from scratches, marks, and stains plus will also prevent mold growth because the small pieces contain wood.
Oiling also seals the Khatam, protects it from the air and enhances its lifespan. There are different natural oils that are used but some Khatam artists may also apply a decent coat of wax.
A sponge, soft cloth or a soft paintbrush is used to apply oil. It takes more than a day to a week for a single coat to completely dry.
Several layers of oil may also be applied and this is done after the layer before it has completely dried.
The different kinds of Khatam art
Do you know that it can take an average design Khatam Kari 400 stages to be completed? Teeny tiny pieces were indeed very hard to stick to the surface and it took a considerable amount of time to dry every piece.
Along with Khatamkari in Iran, there is also marquetry, folk Lath art, and Intarsia. Learning all these different kinds of Khatam art will help you distinguish each one from the other.
Marquetry
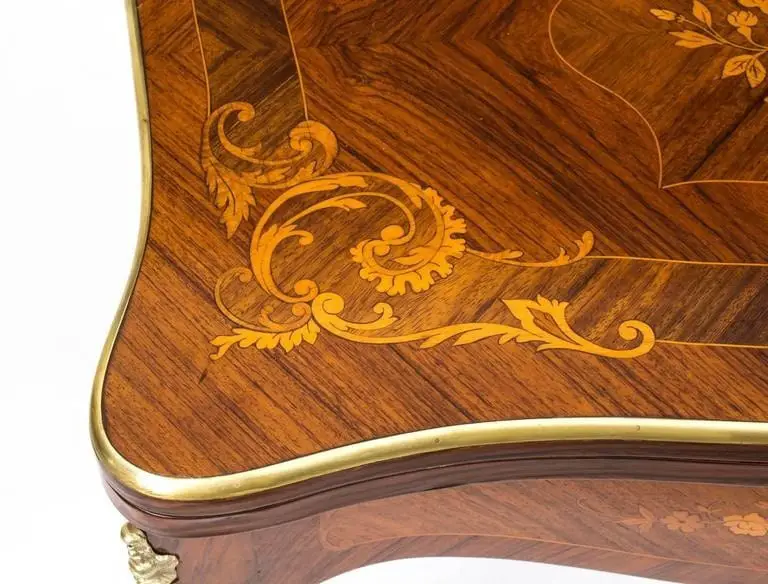
Marquetry or marqueterie is creating a picture or a geometric shape with thin layers of wood called veneers.
Veneers are available in different kinds, which give different colors to the final piece. The first step is deciding what kind of wood for each part of the picture.
This part will be cut from the veneer. After cutting the veneer is done the pieces will be assembled together and glued.
Just like making traditional khatam, sanding is quite important for removing rough surfaces and achieving a smooth and elegant look.
Afterwards backboard is added. Polishing, sanding, and oiling are the final steps and again, just like traditional khatam; you need to dry the piece completely before this is used or displayed.
Intarsia
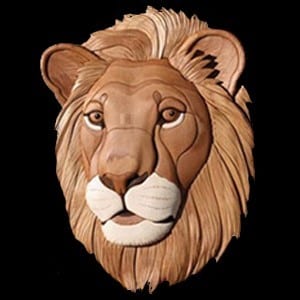
Intarsia is another technique which is very similar to marquetry. These two basically have the same process but with Intarsia, thicker pieces of wood are used rather than veneer.
The thicker and fatter pieces add the 3rd dimension of “depth” to the final piece. Picture marquetry usually has a rectangle frame and this is not used in Intarsia because it has a 3-dimensional look.
Comparing khatam, marquetry, and intarsia
Khatam, marquetry, and intarsia are all clever works of art that were started by ancient people but are still put in good use today.
These three are quite similar but very different in some ways. All these starts with creating a pattern or picture, which lets you create each part separately.
Then the piece is montaged and sanded, polished and oiled. These three have almost the same material. Marquetry and intarsia are not entirely from wood and might also include some bone, shells, and ivory.
But khatam art makes use of bones and wires more sparingly. Khatam also differs in the shape of its pieces.
These aren’t just one layer of wood, but a combination of many smaller pieces. This makes khatam art a longer and more difficult technique compared to marquetry or intarsia.
Some important points that you must consider when making Khatam
A Khatam art takes its beauty from carefully built geometric shapes. Khatam should be symmetrical from every angle.
The amount of work put into making a Khatam is very important as well. More triangles that you use the more precious work you create.
The smaller the triangles you use, the more valuable a Khatam is. You must make sure to check if all parts of the surface are flat and even.
You must also make sure that there is no empty space. These are the keys for the perfect Khatam artwork.
If you were to make any repairs on the piece, it should not be visible at all. Use the same triangle or diamond to make repairs.
When applying oil, the coat you will apply should be smooth and flawless. There shouldn’t be any place where oil accumulates or appear in lumps.
Use Astar to mimic fine Khatam. Astar makes artworks more durable. And if you were to buy Khatam never buy a Khatam with a paper Astar. This is a poor quality Khatam piece.
The usual glue in fine Khatam is isinglass. This may not be available from local hardware or crafts store but you can purchase these from online stores.
The best Khatam makers used natural colors to dye their materials. But nowadays, chemical colors are now being used in Khatam workshops.
Experts agree that fine Khatam uses natural colors while low-quality ones are dyed using chemical colors.
