While doing your DIY projects, did you ever wonder how long to clamp wood glue? You might have gone by your basic estimation; however, it is always a good idea to know the technicalities when you are doing a DIY project. The success of your project and the longevity of your wooden furniture will depend on it.
You can leave the clamps for about thirty minutes if the bonds are done with woodworking glue (like Titebond in the U.S). However, you should wait for at least twenty-four hours before you start with the next step of furniture making.
Step 1- Select the right wood glue
Wood glues like Titebond II are useful for exterior projects. These water-resistant glues are fine for making furniture that you will keep outside your house and will be subjected to harsh sunlight, rains, sleet, hailstorm, and snow. However, these are not meant for wood which will be always submerged in water.
There are glues like probond which are meant for interior use. You can glue your furniture like beds, tables, chairs, etc. which you will keep inside the house and they will not be subjected to harsh weather conditions.
If you are not making furniture from the scratch and just need it for repairs, then liquid hide glue like Titebond is adequate. This glue needs about thirty minutes to make the bond strong.
Polyurethane glue is perfect for those furniture that will be submerged in water. Gorilla glue is one such brand that manufactures these types of glue. It takes about fifteen to forty-five minutes to cure.
Epoxy glue is perfect when you need to fill gaps in the wood, or if some part of the wood has cracked, you can fill in epoxy. It is waterproof and lasts for a very long time.

Step 2- Use a masking tape
If you are going to apply wood stain or varnish to a piece of wood first, use masking tape to hide the areas which you will glue later. Later remove the masking tape and apply glue to those areas which you need to apply glue and add a clamp to make the bond strong. Remove the clamp after thirty minutes, but do not stress the wood after that. If you are making some heavy furniture like a bed, you may leave the clamps on for about twenty-four hours.

Step 3- Use a flux brush
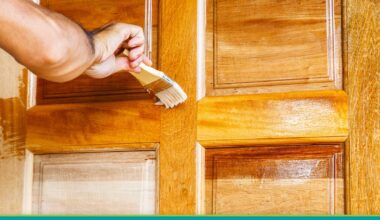
Always use a flux brush to apply wood glue. They are perfect for joining intricate joints and the strands do not come off and remain stuck to the glue. It is quite difficult to remove those standalone strands of brush hair, and if you leave it unattended, it will remain stuck to your furniture.

Step 4- Use wax paper to cover the bar clamps
If you are using steel/iron bar clamps, then you have to be very careful. The moisture in the glue can impact the steel/iron bar clamp and it might leave a spot on the wood. In order to protect your wood from that ugly dark spot, use a sheet of wax paper. The wax paper will hold the glue drips and your wood will be safe from any kind of spots.

Step 5- Rub the joint
Apply glue on the edges of both pieces of wood and rub it thoroughly. This will ensure that the glue spreads evenly and the wood pieces are joined proportionately. After that apply a clamp to keep the wood pieces together. How long to clamp wood glue? It will be the same, about thirty minutes.

Step 6- Glue one board at a time
If you have multiple boards to glue, then do not hurry and apply glue to all of them and start joining them. Add one board at a time and clamp it. It will take a longer time to glue all the boards one after the other. You will have to wait for thirty minutes for the glue to cure before you attach the next board. But all the surfaces will be perfectly aligned if you follow this method.

Step 7- Use super glue to attach small pieces
If you are creating a design using smaller pieces of wood, use super glue to attach them. Apply three to four drops of super glue, and let it set for thirty to forty-five minutes. You can use the bigger board now for creating the actual furniture.

Step 8- Use a notched trowel to spread the glue
If you need to spread glue on a big surface like a plyboard and attach a veneer to it, use a notched trowel to do that job. The glue will be spread evenly and your veneer will stick to the wooden block properly at all places. If this step is not followed, then later, you will see the veneer coming off from the places it did not come in contact with the glue.

Step 9- Remove dried glue
While doing any kind of woodwork, even the most experienced carpenters will face the problem of glue falling off on the good surface of the wood. To remove that glue squeeze-out, you will need a sharp chisel. Just scrape off after 30-60 minutes when the glue gels up a bit. It will not leave any glue stain behind and can be easily removed.
You can even use a synthetic abrasive pad which we use to wash the dishes to remove the excess glue. A rag or cloth might leave some part of the glue behind, but the abrasive pad is capable of scraping off the entire mass. You just need to apply a bit of pressure but be careful, do not rub very vigorously. Then it might leave scratches on the surface of the wood.

Step 10- Wood filler
To cover the small gaps and cracks, mix some fine sawdust with glue and create a paste. Use that paste with a flex brush to fill the gaps in your wooden planks and boards. If you use the sawdust from the same type of wood that you have used for your project, it will match the color perfectly.

Conclusion
Now you must have got an answer to your question – How long to clamp wood glue? So what are you waiting for? Use the vacation time for your children and involve them in these DIY projects. They will pick up a new skill that will help them as they grow up. Once they start living on their own, they can use these techniques to build their own furniture and save a good amount of money.

