Introduction
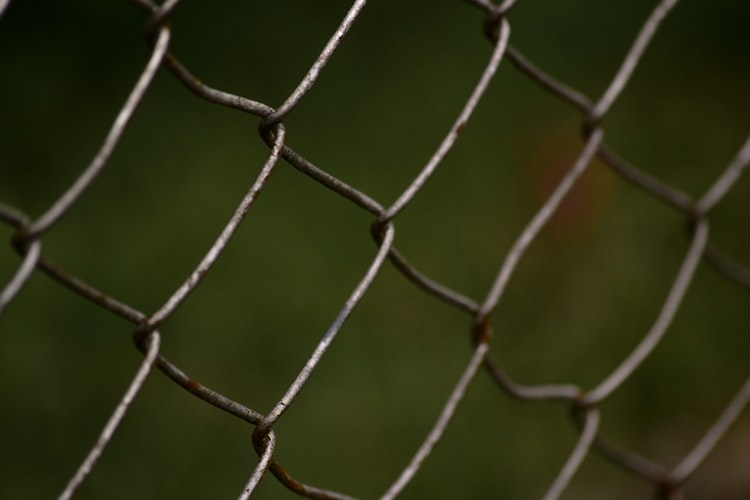
Chicken fence or chicken wire as it is popularly known as is a versatile product which can be used for many purposes. It is used to keep chicken, pigeons, rabbits and other small animals and birds in one place and is also very useful as plant supports.
This material is also known as poultry netting and poultry wire and it is a good idea to learn the technique of how to attach chicken wire to wood. Since the poultry netting is quite strong, the livestock will not be able to break it and come out. However, since it is flexible, it can be easily moulded and attached to wooden pillars, wooden frames, metal pillars, cement pillars, or cement walls.
The holes in the chicken wire are small and hence rodents can’t pass through them and harm the hens and cocks. They are extremely useful even for garden fencing and fencing in any other area where animals are kept. They are inexpensive and are easily available in any hardware or home requirements store. You can carry and manoeuvre it as per your requirements.
Things Needed to Attach Chicken Wire to Wood
The technique of how to attach chicken wire to wood is not complicated and anyone with some basic DIY skills can master it. It does not require any expensive ingredients either. You can make a permanent structure using the chicken wire and rear your poultry there.
You will need some basic ingredients like nails, shovel, work gloves, wire cutters, chicken wire rolls, pliers, heavy-duty staples, staple gun to erect a proper farmhouse for your poultry. You will also need hinges and screws to attach the wooden frames. If you need to cement the wire structure to the ground, you will need cement, sand, or plaster-of-Paris. If you want to paint your chicken wire shed, then buy separate paints for wood and metal. Also do not forget to add measuring tapes and measuring scales to your list.
Step-by-Step Instruction- How to Attach Chicken Wire to Wood
Step 1- Build a Frame
Build an appropriate wooden frame first. You need to take the measurements as per the space you have. If you are going to make a four-sided structure, then you will need four frames. If you have cement walls and need to cover only one or two sides, you need to design accordingly. By now you might have an idea of how to attach chicken wire to wood. As you progress in the project, you will learn further.
You also need to keep in mind that you need to create a door too. This door will be used to take out the poultry or put in new stock. Even to feed your chickens, you need to open the door. Create a separate frame for the door which will be smaller in size compared to the main structural frame.

Step 2- Unroll the Chicken Wire Roll
Put on your work gloves the ends of the poultry wire are sharp and might hurt your palms and fingers. Then unroll three to four feet wire. The end of the wire should be folded into a hem-like folding so that the finish is smooth, and it does not hurt anyone.
You will need to use the pliers to hem the edges of the chicken wire sheet.

Step 3- Attaching the Chicken Wire to the Wooden Frame
After unrolling the chicken wire roll, attach the poultry netting to a starting point in your frame. You might need the help of another person to hold the poultry netting when you are attaching it to the wooden frame. To attach the poultry wire to the wooden frame, use the heavy-duty staple gun. You may also use nails and a hammer to fasten the wires to the frame. After securing the edge of one side of the fencing wire, you will have to secure the other three sides.
You have to repeat the same process for the other three frames and the extra frame which is done for the door.

Step 4- Erecting the Structure
Now you have all four frames along with the small frame which will be used as the door. Now you need to attach them and make a rectangle box. If the final chicken shade is small in size, then you may create a simple 10 feet by 10 feet box using the four sides. However, if it is a bigger frame, then it is better to dig a rectangle periphery on the ground of the same size. After the rectangle box is ready, you will have to fit it into the ground. So now you have learned the process of how to attach chicken wire to wood.
You also will need to join the four frames to create a rectangle box. You may use hinges and screws for this purpose. It will be three to four hinges needed per set of frames. If you use metal wire to attach the frame, it will not look neat. The purpose will be served as you will have a shed for your poultry, but it will not be sturdy or good-looking.
After putting the rectangular frame within the ground, you have to either use a cement mixture or plaster-of-Paris mixture to secure it to the ground.

Step 5- Fitting the Door
Now you need to cut a square in the chicken wire as per the measurement of the door which you have created and fit it in. It is better to use a staple gun for this purpose as fixing nails will be a little cumbersome if you are not familiar with this kind of work. The skills required for how to attach chicken wire to wood might not be very high, but you need to be extremely careful while working with poultry wire. After cutting the poultry wire, the edges are wiry and can cause hurt.

Step 6- Attach Extra Support
To add more stability and strength to a poultry wire panel that is stapled to a wooden post, you can nail a wooden plank or lumber horizontally. If you have created a big frame, then try to put support after every 12 to 15 inches of chicken wire panel.

Step 7- Cover the Roof
Now the main structure of the chicken wire panels is ready. You can put a tin shade to cover the top. Fasten the tin sheet properly to the edges of the wood with clamps. If that is not done, the roof will fly away if there is a storm.

Step 8- Paint the Wood
If you want your chicken shed to look colorful and welcoming, you can think about colouring the wood and the wire mesh in different colors. You can give multi colour effects by horizontal zebra lines paint. You need to be careful to buy the correct paint for metal and wood.

Multiple uses of chicken wire in your garden/farm-
To Keep Small Animals Away
If you are creating the chicken wire fencing to keep the pests at bay, you have to keep in mind that there are small animals like rabbits or groundhogs. These animals may eat up the produce. Hence to keep out the small animals that can dig, you will have to bury a portion of the chicken wire in the ground. You have to do it along the entire length and breadth of the perimeter of your garden to keep it completely safe.
To Create A Fence in a Garden
You can use the same technique over metal poles if you are trying to put a fence in your garden. It is a good idea to use metal poles for fencing as they are subjected to rainwater and direct sunlight all the time. You will have to dig holes and insert the metal poles. Then cover the perimeter of your farm using chicken wire. Use galvanised wire to secure the chicken wire with the metal pole properly.
Use Chicken Wire Horizontally
Poultry wire is not always installed vertically. If you install it as a horizontal plank, it works very well as a cat repellent. Cats do not like to walk on wired planks as it hurts their sensitive paws. If you want to safeguard your produce or fishes or poultry from cats, create an enclosure with horizontal chicken wireframes.
These kinds of horizontal chicken wireframes also are good to keep squirrels away from your produce. They are often a nuisance in small gardens as they end up digging the ground and spoiling the fruits and vegetables grown on the farm.
Privacy Screens
Even if you are not growing much produce or rearing livestock, you still can use chicken wires for fencing your garden. It will create a privacy screen between the passers-by and your main home unit. Privacy is of utmost importance to most people and hence this inexpensive screen can be used readily.
Conclusion
So now you are familiar with the process of how to attach chicken wire to wood. You can take it up as a summer DIY project along with your children. They will get an opportunity to come out of the world of video games and create something substantial with their hands.
You can even use chicken wire and create support for the plants in your garden. You can even let the climbing vines take the support of the chicken wire on the fence and grow. It will look very nice and green everywhere. So happy gardening and rearing poultry!!!
