Most woodworking projects require straight lumber however, some need curved wood. There are beauty and flair in bent wood. You can see this in intricate furniture, musical instruments and more. Curved wood is unique and it could be a challenge to do. There are several different methods that can be used with a number of advantages and disadvantages to consider.
Find out which is the best technique for you and you will surely be able to bend any wood to your bidding.
Basic bending wood techniques
Bending wood should be done safely. It is not as easy as you may think! You must give wood time to comfortably curve on its own otherwise it can chip, crack and split if you force it. Here are some of the most common ways to bend wood. Study each one and decide which one is the best for your woodworking needs.
Things you will need
- Wood you will be working on
- Steam box
- Steam-making machine or appliance
- Form
- Clamps
- Laminate (epoxy or glue)
Bending wood using the steam box method
Set up your steam box
The steam box method to curve wood may be the most widely used and the earliest method as well. It is basically placing wood inside a box or container (sometimes even as large a room!) where temperature and humidity are controlled.
1) Constructing a steam box
Source: https://www.pinterest.ph/pin/427419820866308986/?lp=true
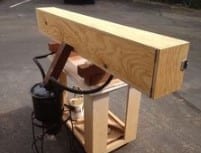
If you don’t have a steam box yet, you can construct one using a wooden or metal box with a suitable cover that can be tightly shut. You can use this to bend wood and even a piece of pipe or PVC. Place a hole where you can pump in the steam. You must also place an exit hole for the steam pressure to get out of the box.
The exit hole should be turned to the ground to easily remove the hot air and pressure inside the box. Place the box near the steamer or any equipment that you will use to direct steam inside the box. Make sure that the power button or cord is also accessible.
2) Set up your form
Source: https://www.pinterest.com/pin/1266706116355200/
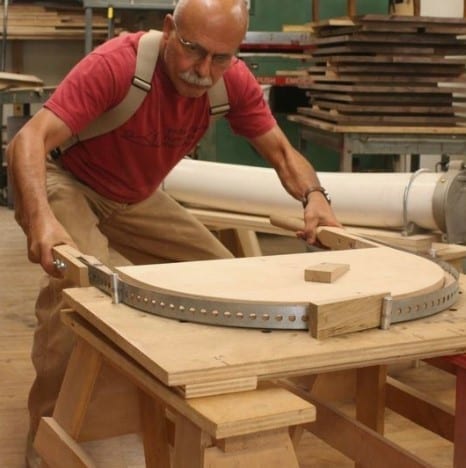
Time to set the form for the wood. This is the holder that will receive the steamed wood. As the wood dies, it will remain in shape of the form. Use clamps to clasp down the wood. You can purchase clamps or make your own. Make some circle offcuts where you will drill an off-center hole. Pass a bolt through this and drill another hole through the side where you use a lever to shut.
3) Steam the wood
Source: https://www.rockler.com/steam-bending-kit-w-free-bentwood-carryall-plan-download
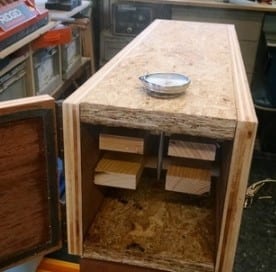
Turn on the heat. Power up the steamer and let steam accumulate inside the box before placing the wood in. Place your wood inside the steaming chamber. The wood must not touch the sides of the steamer or the doors so that it can soften wood evenly. The wood should be steamed one hour for each inch of thickness.
After the allotted time, remove wood from the box. Place the steamed wood in the form. You must place it on the form ASAP after removing it from the steam box because it can start to harden in a minute. Let the wood remain in the form until it is completely dry.
Handle wood with care, bend it gently and carefully. Keep in mind that different kinds of wood are softer and springier than others. Different kinds of cuts may also withstand more force. Forcing your wood to bend to your will only crack it.
4) Clamping the wood
Source: http://www.leevalley.com/us/HARDWARE/page.aspx?p=45866
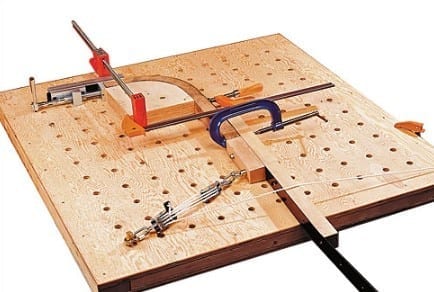
Clamp your wood down once it is set in place. Not all people clamp wood at this stage but it is useful especially if the wood you are working on is harder or less flexible.
Bending wood with the lamination method
This technique uses a laminate or glue to bend wood. The laminate will force the glue to remain in a particular shape or form without the need to use heat or steam. Lamination method may only be used for bending wood that is not very hard and not very large. To ensure success, you need to use the right kind of glue. Good glue is a two-part urea-formaldehyde glue. This glue is very hard but also works slowly.
You may also use an epoxy however, it is expensive. Never use standard wood glue because this won’t be as strong to for bent laminations. Normal wood glue sets soft and quickly and therefore not good for this kind of project.
1) Prepare the wood to be bent
Source: https://www.popularwoodworking.com/projects/aw-extra-11713-bent-wood-lamination-basics/
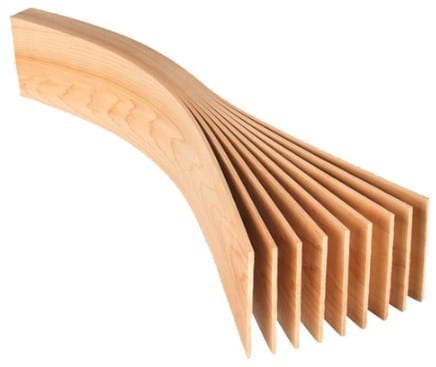
Cut the length of your wood strips longer than your necessary final measurement. This is because the lamination process will shorten its length.
Create a diagonal line with a pencil and a ruler across the bottom of the stock. Should the wood strips get dropped or rearranged, you will be able to find out which order the strips are in. Cut the wood strips through a straight-grained edge, never on the face-grain side. This will let you put back the strips together with very little interruption.
Use a cork liner to line your form. The cork will anchor the lamination to its form and even out any irregularities when the wood is in the sawn form. With the cork, you will have a crispier wood that is easier to work with.
2) Spreading the glue or laminate
Source: https://www.popularwoodworking.com/projects/aw-extra-11713-bent-wood-lamination-basics/
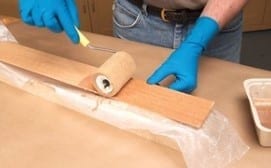
Spread glue on top of the wood strips. The strips will hold the wood in the new bent shape.
Use a disposable paint roller to apply the glue all over the wood. Place this in the form as soon as possible before the glue has set. Top this with another strip lined with glue.
Repeat this process until you have the right thickness. Clamp the wooden pieces together. Once the glue is dry, cut the ends according to your desired measurement.
Bending wood with the kerf-cutting method
The kerf cutting method is another popular way to bend wood and is also very effective. It will also use a laminate to keep wood in its new form.
1) Prepare your wood
Source: https://www.theartofdoingstuff.com/kerf-cutting-how-to-bend-wood-with-your-mind-i-mean-saw/
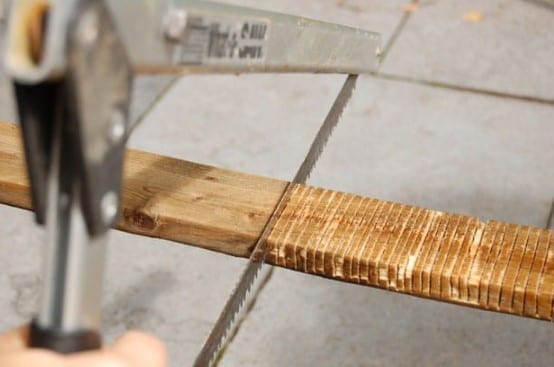
Cut notches, or curves 2/3 of the thickness of the wood. The kerfs are on the inside of the curve you want to bend. If the kerfs are too deep, these may break the wood so you need to be very careful.
Evenly space all your kerfs. Try to get the kerfs about 1⁄2 inch (1.3 cm) apart. Cut across the grain. The chance that your wood splits are much higher if you cut the kerfs towards the grain.
2) Remove any gaps
Source: https://www.youtube.com/watch?v=g49H35ie2eQ
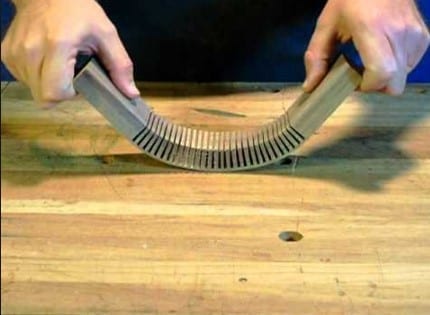
Compress the ends of the wood to get rid of the gaps made by the notches together. This will be the final shape of the wood when it is done.
3) Apply the laminate
Source: https://www.youtube.com/watch?v=g49H35ie2eQ
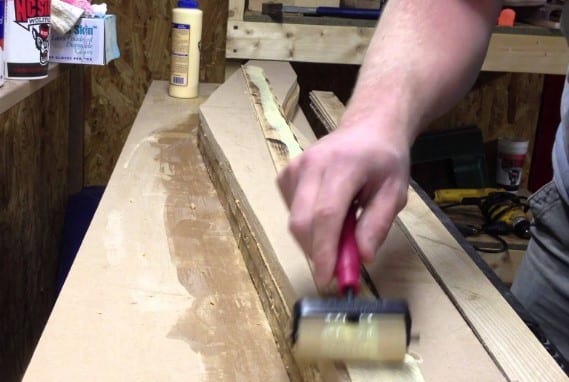
Fix the bend by using a laminate. Face the front side of the wood with a veneer or laminate. This will fix, or set, the bend and will also hide any cuts that were made during the process. To disguise the kerfing, mix together glue and sawdust and fill the spaces left in the bent wood.
4) Using hardwood that can bend
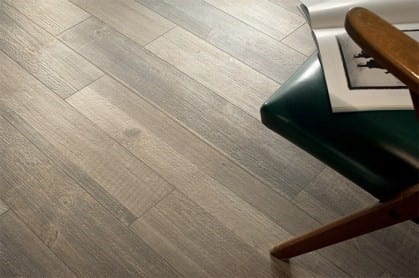
Source: https://www.baptistatile.com/be-inspired/hardwood-floors/
A form of hardwood is Cold-Bend. This is appropriately called cold-bend because it can stretch out as it is bent. This wood will be able to bend in any direction and can even twist! But despite this, it is not that easy to work with Cold-Bend hardwood. There is a learning curve when using this unique form of building material.
There are special tools to use with Cold-Bend and how you use these tools will help you accomplish the bend much faster. You must also learn how it would look after it is bent and dried as well as how you will surface it to fit components. You must be able to learn how to avoid or control shrinkage and cupping which is possible with this very flexible material.
Prepping Cold—Bend is easy. The first thing you could do with this flexible hardwood is to re-saw a piece to about 3/8 inch x ½ inch square and shape it into a ring. Go to the extreme and tie it into a knot, then keep reducing the radius to about 1:5. A thick Cold-Bend at about 1 inch thick can be shaped to a 5″ radius while a 1/2″ thick board may be bent to a 2.5″ radius and so on. Once you have finally achieved a tight knot, wrap the remaining strip around the ring that you have created.
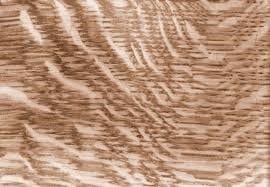
Bending coarse-grained hardwood
Source: http://workshopcompanion.com/KnowHow/Design/Nature_of_Wood/1_Wood_Grain/1_Wood_Grain.htm
Ash and oak are two most common hardwood species with very coarse grains and with the use of efficient bending techniques, you can bend these further beyond the recommended 1:5 thickness: radius ratio.
However, you need to be very careful and check frequently for any failure, cracks, and splits. If a failure shows up because of over-bending, you will usually see it during the initial bending and not really when the wood is subjected to drying (or at the later stage of the bending process). If you are trying to bend a thick piece and it seems to resist bending then you may have not broken it. Probably you just didn’t have enough leverage on the wood yet.
Working with Cold-Bend hardwood
Cold-Bend is a flexible kind of hardwood but it is actually just like any kind of wood when it comes to prepping before bending. To get the best results, sanding the surface is needed. Sanding is easier when wood is flat than when it is all bent up. You don’t need to worry about Cold-Bend wood springing back to its original shape because it will hold its curved shape as long as it is dried properly.
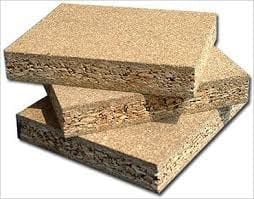
Using and bending compressed wood
Source: https://www.wfm.co.in/what-is-compressed-wood-made-of/
Compressed wood is a type of wood that is not meant for gentle bends unless you have full support during drying. The wood is eager to bend therefore if you want a gentle bend then it is very hard to keep it from moving when you are in the drying stage.
There is no need to support the outside curve, but if you want absolute precision in size, and you don’t plan on surfacing after drying then you may use clamps to provide even clamping pressure. This will make sure that the wood is supported evenly.
If you are working on difficult curves or small radius curves a pneumatic and hydraulic press may be used. You may also use hand clamps for all kinds of bends. A popular clamp for bending and holding the form of bent wood is the Irwin XP500. This clamp grabs on to odd angles and has amazing strength. Another good idea is a ratchet strap for large wood pieces.
Five times the bend target of board thickness is a minimum radius target for extreme bends in most wood species. However, you can use different techniques to exceed these limits. A 1/2″ board can usually be bent to a 2.5-inch radius while a 1″ thick part can potentially be bent to a 5″ radius and so on
Compressed wood may also be hand bent. The middle of long strips may be bent easier compared to the ends but only because you have more leverage on it. This is also because it is harder to place leverage at the ends of lumber but you can also make use of the ends efficiently if you can get some leverage.
This is true for 1″ and thicker parts. Under 1/2″ these pieces are very easy to bend all the way to the ends. You should expect a few inches of waste wood at the end. You can always trim and clean these up later. You must also expect a little shrinkage after drying during drying as wood starts to contract
Compressed wood does not need to be heated or steamed before bending. Steaming compressed wood actually removes its compressive abilities and it bends to extreme radii even at room temperature. As the wood ages and dries, it will be less flexible.
You must re-wrap your unused compressed wood in kitchen stretch wrap after re-sawing to retain the moisture of the remaining wood. For a piece of compressed wood that has dried out, you can make it somewhat flexible again by soaking in warm water provided it has not already been kiln dried. For small pieces of compressed wood, place it in the microwave to warm it first.
Give the pieces just enough time in the microwave to warm and not so much that these will dry out and crack. When placing wood in a microwave, it’ll dry the inside first and this is impossible to tell with the naked eye.
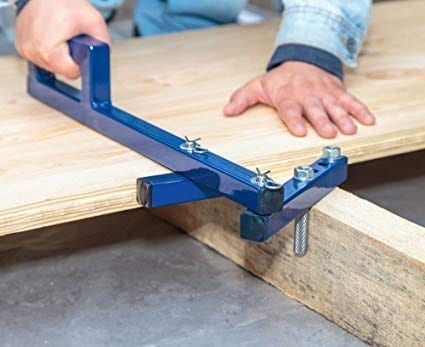
Straightening wood
Source: https://www.amazon.com/DrDeck-Floor-Decking-Board-Bender/dp/B07CL4DH3S
It’s kind of weird that you have techniques to straighten warped wood in a guide on how to bend wood. Straightening wood is possible when moisture is applied to wood. It is also similar to applying steam on wood to change its shape. In this case, you are applying moisture so that warped wood returns to its original appearance.
Soak wood in water. This is a good idea if you are working on small pieces of wood which can be submerged in a bucket or even a tube of water. If you are working on a large piece of wood like a door or a table then you can apply wet cloth on the piece instead of submerging it. Let the warped area soaked with water until it can be straightened out.
Once the wood is straight, switch the water formula to Elmer’s white glue or the wood glue with water mixture. Water will dissipate and permeate the glue into the grains of wood where the sap has been dried out. When the water and glue mixture is left, it will help save the original form of the wood. The capillary action also helps cracks to soak shut and seal stronger.
The wood will soon dry after the final soaking and changing from water to a water and glue formula. It will not only stay straight but the wood is now stronger than it ever was before because the wood glue is far more resilient than the sap which was there before.
Well-glued wood pieces will never break along a good wood glue boundary the second time. At that point, it will create a stain as the glue is soaking into the wood. It’s best to experiment on the ideal viscosity of the glue and water mixture before you use one on your newly straightened wood.
Now that the wood is finally straight, seal the grain against future water damage. The wood glue will remain in the wood and will never warp again. It will be stronger than the original piece as well. This technique will restore not only warped wood but also rotted wood, weak wood, broken wood, raw and weathered wood. This can help restore wooden items or things that have wood parts like yard tools, furniture, and wooden toys.
Conclusion
Bending wood will create a fantastic effect. The techniques provided here will be able to help you achieve that curved wood effect. You just have to find the ideal technique that will work best for your woodworking needs.
