Introduction
Craftsmen who like to experiment with different kind of items, come across these situations quite often. Now, here you are pondering upon how to glue ceramic tile to wood. We have the answer to your problem.
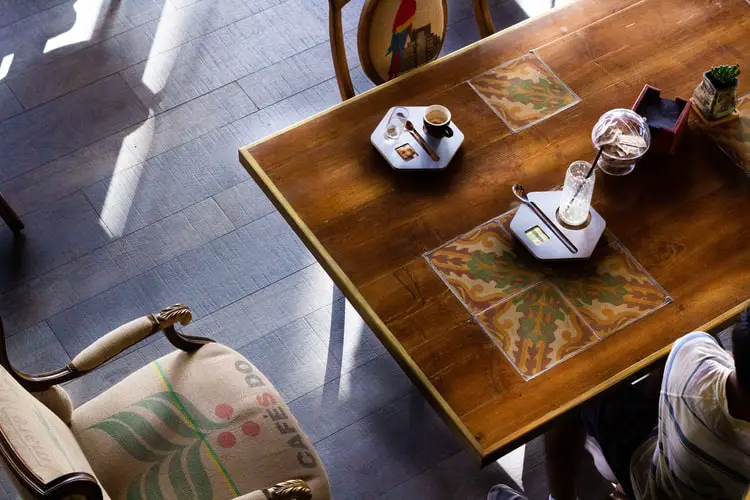
Whether you are designing a table, a kitchen or bathroom countertop and you want to add some color to it by using ceramic tiles, here you go. You will get answers to all your questions in this article. You need to keep in mind that plywood, oak, birch, or any kind of wood expands, or contracts based on the weather. Since wood is a natural produce, it shrinks or stretches with the humidity and heat. However, ceramic tiles are synthetic products and hardly stretch or shrink. Hence, when you glue mosaic tiles to wood, there are chances that the artifact will be completely spoiled.
When the wood will move, it might develop cracks, or in the process might even exert pressure on the tiles and make them chip or crack. However, if you have a perfectly seasoned wood furniture and you want to cover it partially with ceramic tiles, that can be a good idea.
Materials Needed
There is a glue, known as mastic, that is considered the most affordable method for gluing tiles to wood. Mastic fixes the tile onto a piece of plywood with ease. It is also perfect for attaching tiles to a sub-floor made of wood.
You can lay mosaic designs with ease using mastic glue. You need to be quick in sticking the tiles to the wooden board as the glue dries up fast. Purchase water-resistant mastic glue if you are going to use it in high humidity installation regions. Use of spacers between each tile is a must during installation. This will help you to maintain even joints between them.
This glue mastic is not suitable for outdoor tiling as it is subjected to rough weather conditions like rains, hailstorms, sleet, bright sunlight, etc.
Some of the items needed for completing the process of gluing ceramic tile to wood are as follows-
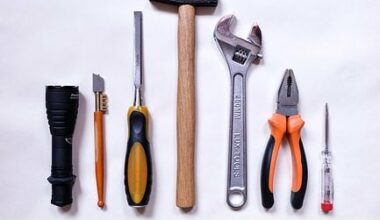
Screwdriver, wood filler, measuring tape, chalk line tool, pencil, mastic glue, V-notched trowel, scraper, mastic remover, level, rubber mallet, tile cutter, grout, rubber grout float, sponge, crack isolation membrane. You will need wood primer, wood paint and wooden brushes to paint the wooden structure.
Step-by-Step Instruction: How to Glue Ceramic Tile to Wood
Step 1: Level Wood Surface with Wood Filler
Before you start working on the main procedure, the primary thing is to smoothen the surface of the wood. Wood filler is a great option to do that. Look for all the large gaps, cracks, and holes on the wooden surface using the wood filler. If this step is not performed, then later it will pose a lot of problems. Appropriate gluing of the tiles will be prevented by these gaps. After applying the filler, you need to wait till it has completely dried up.
It is always a good idea to have the tile gluing as the last step. If you want to affix the tiles to a table, first complete making that.
If the tile is too high, it might cause damage to the furniture in the long run. Hence, if anyone in the family slides something heavy like a heavy book onto the table from the sides, it might even chip the edges of the tile. Select thin and sturdy tiles for this project, or you will have to cut them into the wood to create a surface where you can embed the tiles.

Step 2: Take Measurements
It is also a good idea to include a piece of crack isolation membrane in your ingredients. It will create a buffer between the wood and the tile. When the wood tries to shrink or stretch and the tiles don’t do the same, this ingredient will create harmony between them. Now the process of how to glue ceramic tile to wood must be getting clearer for you.
Now use a chalk line tool and create the design on the wooden surface. If it is a simple mosaic or just some scattered tiles on the table, create the marking first.

Step 3: Spread the Glue
Spread the mastic glue on the wooden surface where you intend to stick the tiles. The layer should be thick as the tiles.

Step 4: Scrape off Spillage
Do not allow the excess mastic glue to remain on your wooden board as it will be difficult to remove it once dried. Follow the chalk mark and scrape off the drips or spills immediately. Remove it gently using a mastic remover if the mastic glue dried on the surface. Let the mastic glue remain on the wooden surface for the set time which is mentioned in the instruction manual of the box.

Step 5: Set the Tiles
This is the most important step, and any mistake here will spoil the entire effort. Now arrange the chosen tiles into the mastic glue on the wooden board. Follow the chalk marks of your design. One by one, push the tiles softly to ensure they are setting on the wooden board properly.
After setting a couple of ceramic tiles in about one square-foot area, adjust a level on the upper portion of the tiles. You will get to see if the tiles are evenly spread, and you are not going to get a bumpy countertop or table. Use a level or rubber mallet and tap down uneven tiles. Repeat this process and fill up the entire wooden area as per your design.

Step 6: Install Cut Tiles
At any place, if the tiles are crossing the edges of the wooden area, then use the tile cutter and cut the extra inches off the tile. If there are any small gaps, use those cut tiles to fill them up.

Step 7: Prepare a Mixture of Grout Powder
Grout is a mixture of water, cement, and sand which is used as a filler. You will need this mixture to fill the gaps in your design now. The consistency of the dough should be uniform and thick. Lift a big scoop of grout using a rubber grout float and inspect the consistency. If it looks fine, then apply it between the joints where the gaps are showing up.

Step 8: Sponge off Excess Grout
Now since the group powder mixture is applied in the gaps between the tiles, sponge off the excess grout wherever there is a spillage. The upper side of the tiles should be clean and if the grout mixture sets in, it will be a humungous task to remove it.

Step 9: Let the Grout Cure for 24 hours
Continue the process of sponging after twenty minutes to ensure all the excess mixture is removed from the wooden slab. You need to ensure the mixture has set in properly between the gaps. Once you feel that the grout mixture is not oozing out of the joints anymore, leave it for twenty-four hours to set in. As you can see in the picture, a ceramic sink was attached to a wooden chest of drawers. You can use the same process to find solutions to such practical problems.
Use a good quality wax to clean off the tiles and wooden surface.

Step 10: Prepare the Wood for Painting
Now once the complete furniture is ready, the wooden surfaces will not look good unless painted. Start with sanding the wooden surfaces first. Then use a vacuum cleaner to remove all the dust, fine particles, and sawdust.
After you have finished vacuuming the surfaces of the wood, use a tack cloth to clean the wood further. This step will remove the fine dust particles which were hidden in the pores of the wooden plank.
Tack cloth is quite a game-changer in the entire process. Unless you use it, you will not realize how many dust particles it picks up from a seemingly clean-looking wooden board. This process also helps in identifying any spots that need additional sanding. If there is a rough spot on the wooden surface, the tack cloth will snag on.

Step 11: Paint the Wood
First, apply two coats of wooden primer and allow it to dry. Then select the right wooden paint which complements the color of your ceramic tiles. If you have chosen colorful tiles, you can always paint the legs of the table in white, beige, or cream. You can experiment with different colors here as per your home décor.
It is recommended to use a sprayer compared to a paintbrush. The time consumed is much lesser and the final outcome is much better. There will be no bristles of the brush stuck to the painted wood either. You might need a paint thinner depending on the type of paint you have chosen.
Allow the first coat of paint to dry and after 1-2 days, apply the second coat. If needed apply a third or fourth coat and follow the process of vacuuming and using the tack cloth after every coat of paint. To protect the final finish, use sealing wax. It will give a nice sheen to the surface and a professional look.

Conclusion
It is an enjoyable DIY project to create furniture using ceramic tiles which are usable in daily life. You can pick this up as a secondary source of income too, and start selling them on your portal. If you master the art of how to glue ceramic tile to wood, you will be able to use this skill in other objects too. Attaching Plexiglass or marble to wood might need a little different skill, however, they are quite similar in nature. Happy Crafting!!!
