When working on wood, you may have to bond together different pieces. The bonding can be done with glue, clever woodcraft, or using screws, nails, or clamps. The pieces that need to be put together may be of different materials like wood, ply, or metal. Traditional woodwork employed wooden nails and screws to fix two pieces together. However, metal screws are easier to use and strong. It is recommended by experienced carpenters to use metal screws to fasten metal with wood. At the same time, many are trying to find out
There are different types of metal screws depending upon their structure and the material used. There are both wood screws and sheet metal screws. Wood screws are designed especially to use on wood as the name implies. Sheet metal screws are meant to be used on sheet metal works. Can you use metal screws in wood if a necessity arises?
The Differences in Design
Both the screws may be manufactured using the same material. At the same time, they can be easily identified. While both can have very similar heads shaped either flat, round, or oval. The most visible difference that can be observed at first glance is the distinct threading pattern.
The threads on sheet metal screws are quite distinctive due to covering the entire length of the body. Tightly spaced threads on a sheet metal screw are sharper than those on a wood screw.
The depth of the threads seen on a wood screw is medium, and they are spaced wider. Some wood screws have a shank on top which is thread-less.
Can You Use Sheet Metal Screws in Wood?
The screws cannot actually be swapped. It is never advisable to use a wood screw on sheet metal. A wood screw cannot structure a tight enough coupling on sheet metal. However, while in an emergency, people are known to use sheet metal screws on wood.
The usual methods employed to work with sheet metal screws on metal are as follows:
i. Using a socket head screwdriver.
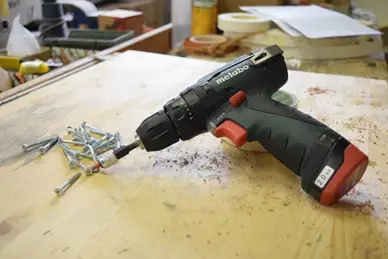
ii. Using a socket bit on a drill to screw it into the wood.
A common technique used by experienced workers is employing screws that are longer than the width of the material into which the screw should go. Drilling at maximum speed is highly effective to prevent the wood from splitting.
Are Special Tools Needed to Use Sheet Metal Screws on Wood?
We need to have a clear understanding of the purpose of screwing two pieces together. When two pieces of any material are joined the end-user should get a durable and solid joint. A good joint is achieved depending on the following factors:
i. Quality of the materials joined.
ii. The screws used to join them.
iii. The tools used on the screws.
iv. Experience of the worker.
Let us look at some tools recommended by experienced carpenters.
Heavy Duty Drills: There are many types of drilling machines. However, a heavy-duty drilling machine is easy to use and does not damage the wood.
The Correct Bit: The bits used on the drill vary according to the surface to be drilled. There are different drills for concrete, wood, and metal. The correct bits for use on wood should be obtained first. The next thing to be considered is the size of the bit. That is one matter which is very easy to find out. Each nail or screw has a size. Similarly, each drill bit too has a corresponding size. This means that if you know the size of your screw, use the bit with the same size. For example, if the screw size is 8 mm, use an 8 mm bit on the heavy-duty drill.
Tip: Making a pilot hole before screwing gives a sturdy joint. If you have a pilot hole, the screw threads get firmly embedded into the walls of the hole. When you screw without a pilot hole, the threads go into the fiber ending up with a weak joint.
Clamps: Even if you use a great and the correct bit, the wood may still split. This is due to the pressure exerted on the wood due to the high speed of the drill. Use appropriate clamps on the piece to be drilled to prevent unwanted splitting.
Hole Saws: You need to use a hole saw only when you need to drill large holes. The purpose again is to prevent the wood from splitting.
How to Drill Pilot Holes: The diameter of the pilot hole should be lesser than that of the screw that shall be going in. This can be achieved by using bits a size smaller than the screw size. A hole drilled like this shall aid the screws to pass straight into their intended spots and shall act as channels.
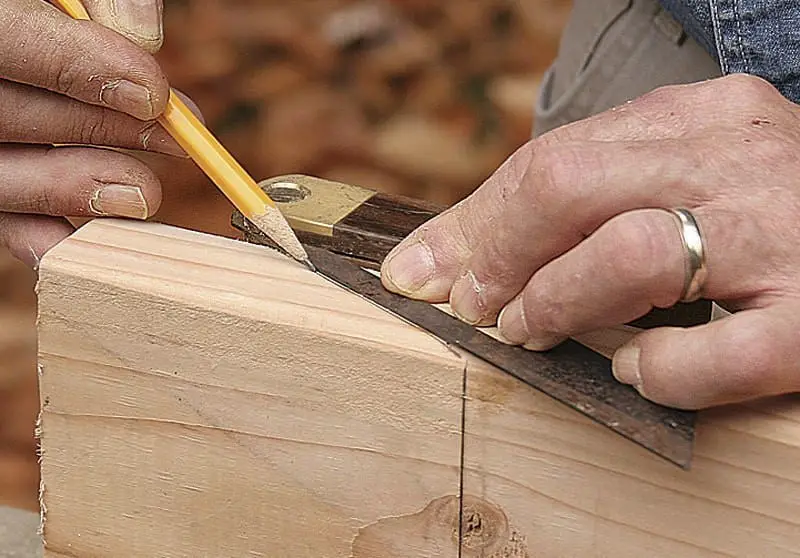
Tip: Mark the areas where the screws shall be going in. Tag each spot with the size of the screws to help you select the correct bit.
Now let us have a look at the whole procedure of screwing in a sheet metal screw into wood.
Step-By-Step Procedure for Using Sheet Metal Screws on Wood
We need to have a comprehensive understanding of the project before selecting the materials and tools to accomplish it. At the same time, it is worth noting that we are trying to find out whether you can use sheet metal screws in wood.
1. Understanding the Project
Whether it is a DIY project or part of a vocation, you need to have a clear understanding of the below:
i. The end product.
ii. Raw materials available.
iii. Tools required and available tools.
iv. Time at hand to complete.
v. Proper design.

2. Taking Stock of the Raw Materials and tools
Once you have the design and the materials required to complete the project, carefully inspect the raw materials. Quality, as well as quantity, is important. Make provisions for replacement or additional materials as per your scrutiny.
Make a list of all the tools required for the successful implementation of the job at hand. Make sure that the requirement for more tools or other equipment has been met before beginning the project.

3. Get the Drill Ready
You must be aware by now that the drill is the piece that gets the work done. So let us understand the drill and use the correct settings for each part of the job.
Torque and Speed: Torque in a drill is the equivalent of the clutch in an automobile. The drill will stop spinning when it touches a certain amount of resistance. You can set the appropriate torque depending upon the nature of the materials.
The speed selector allows the user to shift from low speed to high speed or vice versa depending on the nature of the job.
Driving and Drilling: Although most drills are equipped to drilling holes and to be followed up by driving screws into the holes, some bits are designed to perform only one of the functions. The right bit should be selected depending upon the function.
Bits: The most commonly used drill bits are named below:
i. Helical.
ii. Spade.
iii. Forstner.
iv. Hole saw.
v. Countersink.
The names of driving bits are given below:
i. Slot.
ii. Robertson.
iii. Phillips.
iv. Torx.
v. Allen.
Understanding the project and design well shall help the user to select the appropriate drill.
Pilot Holes: Proper markings and tags before you begin work shall enable you to drill pilot holes with the correct sizes.

4. Preventing Tear Outs
The ripped exit holes found in some works are known as tear-outs. This spoils the look of the finished project. Providing support at the exit point of the drill or any other tool will prevent tear outs. Placing another piece or board of wood beneath the piece to drilled is practical support.

5. Hole Saws
The usual sizes of hole saws typically range in the diameters between ⅛” and ¼”. At the same time, special hole saws are also available that will fit any diameter.

6. Straight Drilling
Check the squareness of the drill and bit by moving a scrap piece of wood around the bit which is placed on the spot to be drilled. The proper perpendicular placing of the drill enables you to drill straight holes without any tilt.

The Depth Guide
This is a simple trick that will enable you to drill only up to the desired depth. Stick a small piece of tape on the bit at the point which should stop going further in. The spot at which the tape should be stuck can be obtained by measuring from the tip of the drill.
Safe Drilling Practices for Using Sheet Metal Screws on Wood
i. Keep a note of all the steps to be followed till finishing the project.
ii. Keep all materials and tools at hand.
iii. Maintain the work area clean and tidy.
iv. Use safety wear.
v. Do not work if you are tired, sleepy, or intoxicated.
