There are times that we will need to join two pieces of wood together. This can happen especially when you are making photo frames or table tops. You need to see to it that you will do this process perfectly to ensure that it will have the strongest form end to end. Once you are also able to do it right then you will not have any scrap as well.
This process though is not advisable since they do t have the right strength and it will not be fixing them upright. Aired from this process that there are still many ways on how to join two boards side by side. You need to have the right tools though to achieve this one.
What you need
- Straps or plywood strips
- Pocket hole jig
- Splines
- Wood glue
- Dowel Jig
- Clamp
Different ways on how you can join boards side by side
Using straps or plywood strips
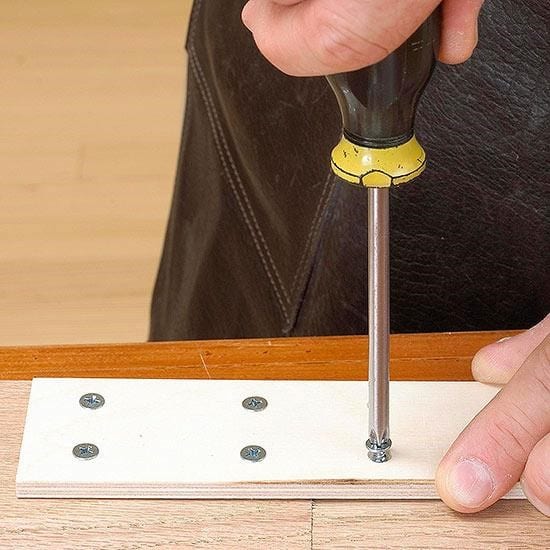
Image Source: https://www.woodmagazine.com/woodworking-tips/techniques/joinery/end-to-end
This process is very easy to install and it can provide a simple and strong solution of joining two boards together. You can either use plywood strips or metals straps to be able to do this one. You can place them in areas where the appearance of the joint is too important. You can do this one at the back of the molding for example. This process will help you save money to a great extent.
- You can do this by first gluing and scoring the one side of the wood where you need the joint.
- Once the glue completely dries, you need to apply glue to the other side of the wood.
- You now need to assemble them both to the workpiece. When you are fixing the screws then you will need to press down on both of the pieces while you are fixing the screws.
- Let the glue dry first before starting to screw the two pieces.
Using a pocket hole screws to join the joints
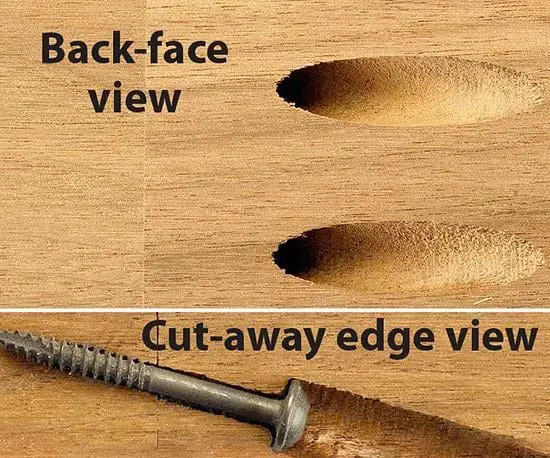
Image Source: https://www.woodmagazine.com/woodworking-tips/techniques/joinery/end-to-end
A very easy to install is what the pocket hole screws are. This should be done once you will be joining joints that receive less tress. You need to make sure though that you will have a pocket hole jig in order to join the joints together. You will need this tool for you to be able to drill angle house from one wood to the other. You also need to see to it that you will be working with half an inch thick pieces for easy joining.
It is important to make sure that you will drill them from the back and they should be visible from the front end. The screws that you will insert afterward is the one that will pull back the pieces together.
Using splines to join the joints
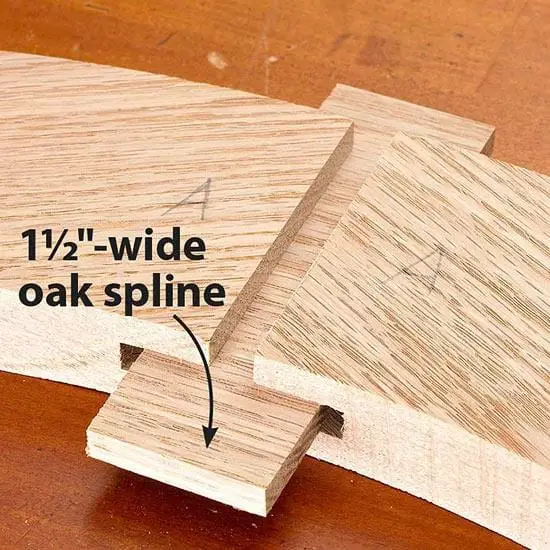
Image Source: https://www.woodmagazine.com/woodworking-tips/techniques/joinery/end-to-end
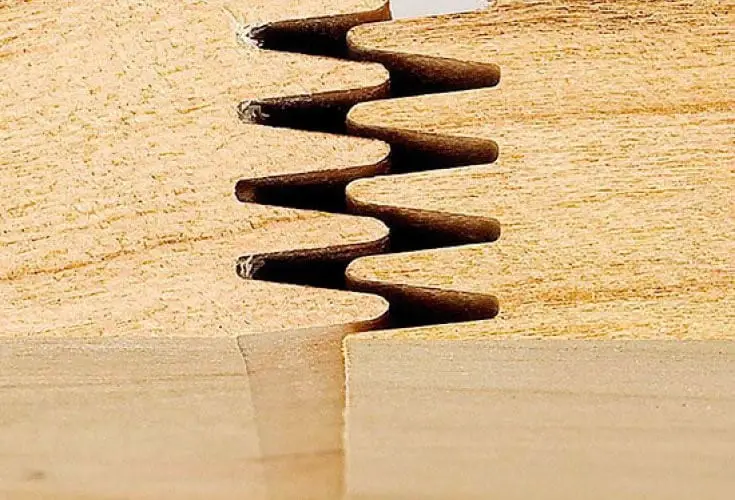
If you are looking for a strong way to join pieces of wood then you need to use the spline technique. This technique also creates a visible and customized workpiece. If you are also using splines then it is also possible for you to create a glue surface that is able to resist flexing. You can do this by creating a concealed spline.
This process will help you reduce the steps that you will be doing. This will also help conceal it once the joints will be assembled together. Set the bit height about half the width of the splines. You then need to adjust the router table fence to the center.
The drilling and dowel wood-joining technique
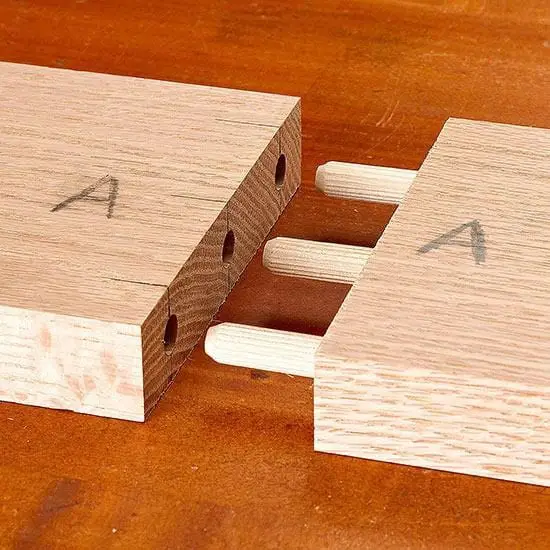
Image Source: https://www.woodmagazine.com/woodworking-tips/techniques/joinery/end-to-end
This process is one of the simplest and strongest ways on how you are able to join joints together.
- The first thing that you need to do is to mark the dowel positions on both the faces.
- You now need to position the dowel jig over the mark and drill holes deep into the dowel marks.
- Once you have done that then you now need to place glue on one of the pieces.
- Insert the dowels in it and then clamp it together.
- Once done, you also need to place glue on the other part and then clamp both of the pieces together and leave it to dry. By making use of the glued surface then there will be a strong connection around the dowel. You can also do this if you want to assemble the pieces in the most beautiful way possible. You need to remember though to places the dowel at equal distance to avoid difficulty when joining them later.
Conclusion
There are many ways on how you are able to join two boards together. You just need to find the one that will be easy for you. You also need to consider the application as there is a process that can make the boards stronger. This will, of course, depend on what your end goal is.
