Don’t you just adore the smell of fresh tomatoes in your garden? And what about those gorgeous meals you can prepare with your all-natural, homegrown, superbly delicious tomatoes?
Ah, how I wish to unwind, daydreaming of tasty tomatoes, just picked before a happy get-together family lunch in the weekend. But at some point, the winter season comes and puts an end to your tomato growing journey.
However, before this period kicks in, you have plenty of time to make the most out of your garden. Do you know how to make tomato cages from wood? Have you ever considered the benefits of tomato cages for your sake as a gardener?
Tomato vine plants will grow healthy and strong thanks to the tomato cages which will support the branches and prevent damage caused by rain, wind and/or handling.
Making tomato cages is easy. What’s more, it is worth the time you will invest (even though the process is also relatively fast).
What You Will Need To Follow This Tutorial
- 1x2x18-inches – 16 pieces (that’s 1×2 lumber cut at 18-inches in length)
- 2x2x60-inches – 4 pieces (that’s 2×2 lumber cut at 5 feet in length)
- Saw
- Screwdriver
- Electric drill
- 2-inch deck screws (36 pieces)
- Sander/ sandpaper (optional)
- Measuring tape
- Pencil/Marker
- Wood Stain/ Paint
- Paintbrush
- Drill bit (for predrilling holes)
Quick Pro Tip
Pressure-treated lumber is more durable
As a rule of thumbs, both untreated, as well as pressure-treated lumber can work just fine for building tomato cages. However, pressure-treated lumber is more resistant to wrapping and/or possible twisting. Anyways, since untreated lumber is more affordable, you’ll just need to screw it in place well which will help to increase the tomato cages’ durability.
Step by Step Instructions for Making Tomato Cages from Wood
Step 1 – Cut the wood and construct the 2 main rails first
After getting the lumber cut into suitable pieces, it’s time to construct 2 rails. Each of these rails will be made out of 2 vertically positioned 2x2x60-inch pieces along with 4 horizontally positioned 1x12x18-inch pieces.

Image Courtesy of empressofdirt.net
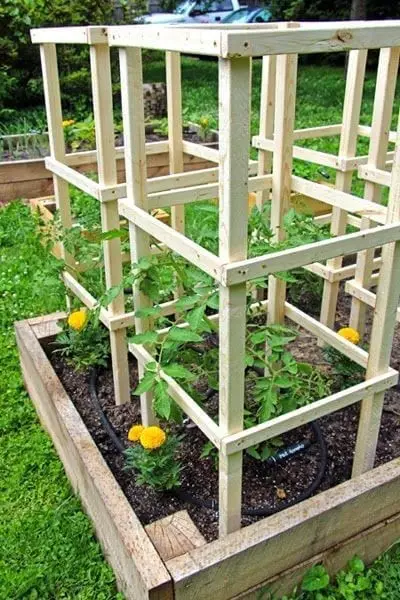
The picture below shows a tomato cage made with 3 horizontal rails instead of 4.

Image Credit: Pinterest
Start by predrilling the holes to avoid splitting the wood. Next, attach the 1st 1x12x18-inch piece at the top and proceed with attaching the rest of the horizontally at 14.25-inch space in between each of the 4 pieces.
Step 2 – Assemble your tomato cage

Image Credit: bhg.com
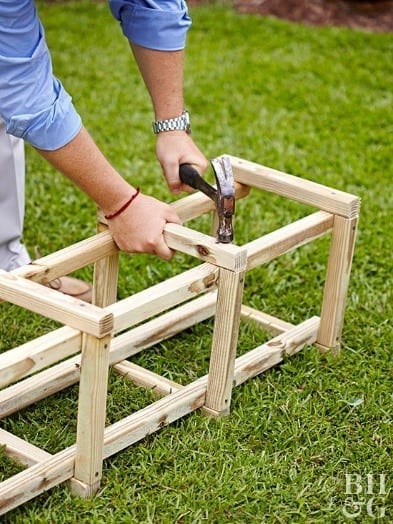
You are almost done constructing the tomato cage! All you have to do now is to attach the 2 main rails with the help of the rest 1x2x18-inch pieces. Start with attaching 1 to the top. Afterward, attach 1 to the bottom and proceed with adding the middle 2 at a 14.25-inch distance each. Finally, repeat the same process for the other side of the tomato cage until you have used all of the 16 pieces of 1x2x18-inch cut lumber.
Step 3 – Protect the wood with a coat of paint or stain

Image Credit: Pinterest.com
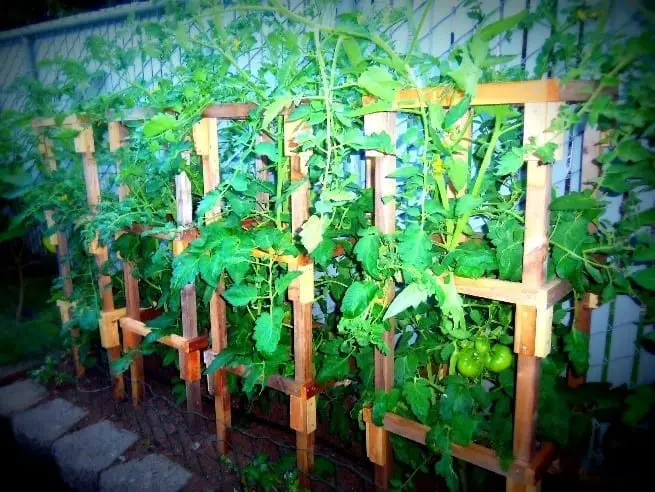
You can’t leave the tomato wood cage unpainted (or unstained) as it will be vulnerable when exposed to the unpredictable weather outside.
Personally, I love using paint because I can add more colors to my garden. Anyways, that’s only a matter of personal choice. More importantly, these wood tomato cages can be used for supporting other plants, too.
We hope that we have managed to inspire you to get down to work with this comprehensive tutorial on making tomato cages from wood. My best advice is that you don’t delay building those fantastic cages for your tomatoes. You will be amazed at how helpful these durable constructions can be (and you will enjoy an excellent harvest!).
If you find this article useful, we’d love to feel your support. By liking and sharing our step by step instructions you will help us spread the easily accessible guidelines to more of our friends DIYers. If you want to add your impressions, ideas or any questions, we’d also love to hear from you in the comment section below.


