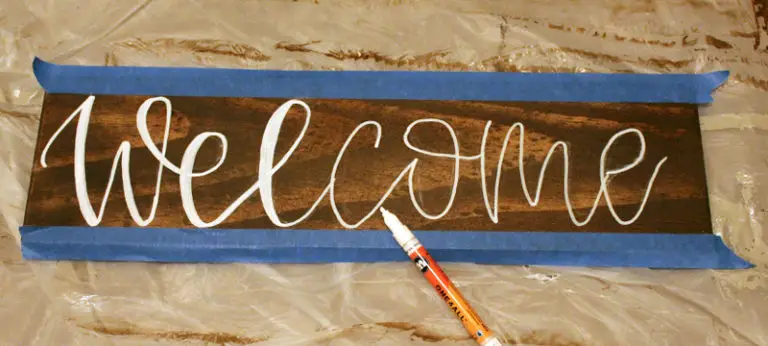
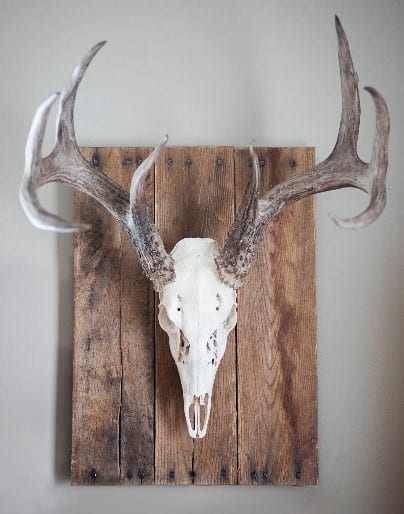
Do you want to make a wooden nameplate or want to decorate your wood blanks with letters? If yes, then here we are with a step-by-step guide on how to write on wood. Follow the steps, and you will know what to do. All the best!
How to Write on Wood – 3 Effective Methods
1. Pyrography

Step 1: Gather wood that is suited for burning. Linden, Birch, poplar, chestnut are all good choices. In addition, plain plywood may be used as a basis.
Step 2: Before the burning technique, the surface of the wood must be prepared by sanding it. This method requires very dry wood.
Step 3: Then, apply s sketch, drawing, or pattern to the board’s surface. You can do this with carbon paper.
Step 4: You can also use a specific Pyrography pen. The device’s pen is often held in the palm in the same manner as a traditional pen for writing. Before beginning work, the temperature controller allows you to set the needed degree of light of the pen itself.
Step 5: To make the words thinner, drive fast with the pen. Do not push the feather too hard on a wooden surface, since this may impede its movement.
Step 6: Use fine-grit sandpaper before painting the letters. Finally, polish the wood for a better visual effect.
2. Painting Wood with Watercolours

This method involves rapid painting on the wood surface. Some wood owners worry that watercolors may damage or wet their wood. However, with an accurate watercolor application, you don’t have to worry about seeping the wetness in your hardwood.
Step 1: Beginners should practice with wooden planks to get better at painting with watercolors.
Step 2: Once you are confident, start painting words on wood.
Step 3: For better adhesion, strike the brush twice for each word.
Step 4: Fill colors in letters and let them dry.
Advantages of Watercolour Painting Method
- With watercolors, you can create airy and light words or even images. You can also show shadows with color transitions. You won’t have to limit your creativity in this method.
- You can blend colors to make your writing colorful and unique.
- You can paint words on large wooden surfaces too.
How to Transfer The Letters to a Base?
Beginners can draw words on other surfaces and transfer them to the wood. Here is how you can do it:
- Tracing Paper
Use tracing paper for words with beautiful borders. Place it on the letters or drawings and circle along the edges to accomplish it. Flip the sheet over and smeared it with graphite. Then, place the tracing paper on wood and circle around to shift those drawings. The best part of using this technique is that you can draw intricate designs.
- Carbon Paper
That’s the most basic way; it only requires the presence of regular dark or black carbon paper. The printed sheet is layered on carbon paper, which is put beneath a wooden blank. The design is thoroughly sketched with the help of a pen. As a consequence, an image that can be painted is produced on the blank.
- Soap
The procedure is identical to the last technique, but it works better when the painting templates are transferred to a black surface. Repeat the previous steps, but rub the tracing paper with soap rather than graphite.
3. Using Markers and Paint Pens for Wood Writing

Step 1: The first step is to activate the pen. It means you need to get the paint flowing through the pen’s tip. You can press down the tip and the flow will begin.
Step 2: Press the pen down on a paper or any other flat surface to check the pain flow. Continue this till the paint start to spread on the surface. You may need to shake some paint pens before use.
Step 3: If the color of the paint is not vibrant, repeat the procedure.
What Are the Best Pens for Writing on Wood?
The fact that paint pens for wood allow you to express your creativity without any constraints is their main selling feature. The best pens for writing on wood will enable you to produce stunning works of art that accurately express your vision. In addition, we have created a list of items to look for while looking for a paint pen for wood. What Are the Best Pens for Writing on Wood?
Here are some points to consider before selecting the pen:
Tips of Various Kinds
Most manufacturers have created a fine tip paint pen marker that is between 0.7mm and 1mm broad in order to produce the most effective brush stroke. The tip is also frequently bullet-shaped to allow for unlimited freehand movement. We feel that these fine tip markers are flexible, capable of drawing delicate, complicated lines as well as producing a bright, vibrantly coloured masterpiece.
Versatility
Of course, we’re looking at the best paint pens for wood, but most markers can be used on a variety of surfaces. This means you may use them for the majority of your DIY tasks, particularly those involving wood.
The Ink Type
The primary distinction between a standard marker and a paint marker is that paint pens employ paint rather than ink. These wood paint pens are available in two varieties: oil-based and water-based. Water-based markers are self-explanatory; the paint is created by blending water and different colors. As a result, the paint is able to flow more freely, resulting in a clean, accurate finish with vibrant color.
We recommend using an oil-based paint pen for a long-lasting finish since it provides vibrant color that will not smudge, smear, or wipe off easily. In addition, the color lasts longer and is less prone to fading than water-based paints.
So, follow this guide on how to write on wood and be creative! We hope you find this post helpful. This guide will help you do what you want to do with your wood plants with ease. You can follow different methods at your convenience.
