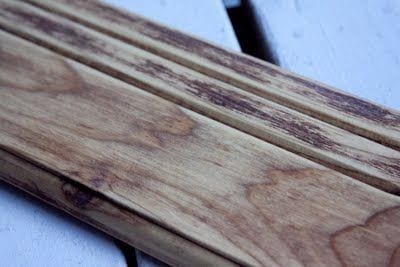
For those of you who love experimenting with all-natural, cheap, easy, and eco-friendly DIY gigs, here’s something we bet you will adore! How to make wood look old with vinegar? That’s what we are talking about!
First things first, there are 2 major ways to utilize vinegar in order to give the wood a beautiful rustic touch.
The first one is to mix a steel wool and vinegar solution which works like charm. However, we decided to focus on the less time- and money-consuming option.
And so below, we are revealing method number 2: aging wood with baking soda and vinegar. Why we love this particular technique? Because you already have everything you need in your household.
However, we do enjoy the steel wool and vinegar method, too. Keep in mind that even though it takes several days before the steel wool reacts with vinegar to let you use the solution, once done it can store for up to a year!
Now, let’s quit any distractions and focus on the awesome tutorial we have compiled for you!
What You Will Need To Follow This Tutorial
- Baking soda and white vinegar
- Wire brush and paint brush
- Bucket, water, and rags
A Quick Pro Tip
Did you know that you can take advantage of balsamic vinegar to make wood look old? Personally, I love making a combination of the 2! Once I go over the surface of the wood with the baking soda and water mixture, I apply a bit of apple cider vinegar to the edges and corners and use balsamic vinegar to make slightly nuanced strokes at the very center.
The difference isn’t too obvious but that’s exactly what I adore about it! Plus, if you try the steel wool and white vinegar distressing wood technique, you can make 2 mixtures by using balsamic vinegar, too!
Step by Step Instructions for Making Wood Look Old With Vinegar
Step 1 – Mix the water and baking soda solution and start applying it
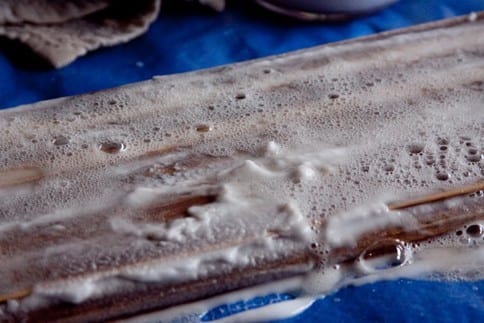
Image Credit: radmegan.com
The solution will work best on bare, untreated wood. However, if you are dealing with finished wood, you will need to sand off the top coat thoroughly using sandpaper with a suitable grit.
The proportions of the solution are pretty straightforward: you want to mix 1 part of water with 1 part of baking soda in a bucket (or any other container you prefer). Stir well but avoid overdoing the whole thing.
At first, you need to go over the surface of the wood by applying predominantly water. This will help to prepare the wood to react better with the layer of soda. Next, you want to apply a thick layer of the undissolved soda at the bottom of the bucket. Leave the excess water behind by pressing the paintbrush against the edge of the container.
Step 2 – Proceed with applying vinegar
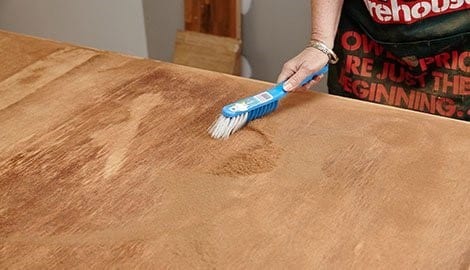
Image Credit: bunnings.com.au
Let the water and soda coat dry out for approximately 10 minutes. Afterward, you can apply the vinegar to speed up and maximize the reaction. You can sprinkle the vinegar directly from the bottle.
However, if you have a spray bottle handy, it will be easier to control the process of spreading the vinegar evenly. Don’t worry if you miss a particular spot, though. One of the best things about aging wood is that you don’t have to strive for perfection!
Allow the reaction to take place for up to 30 minutes (but not more!). Use a wire brush to remove the color of the wood surface which comes off along with the tannins (the natural wood pigments that react with the baking soda solution).
Go over the entire surface carefully with water and a clean rag until no more color remains intact on your rag. If needed, you can repeat the same process the next day to remove more color.
Have you tried the baking soda wood aging technique before? We’re always eager to hear more from our DIY fellows out there. After all, we believe that only together we can make this world a better place.
Don’t you agree we are lucky to live in the era of open communications? Just a century ago, you and I wouldn’t have been able to exchange these awesome tips and tricks if it wasn’t for the miracle of the Internet!
Show us some support by liking and sharing this article to help us spread the good vibes of accessible DIY tutorials.
