Screws are used to join two pieces of wood and this is a basic part of woodwork or carpentry. Doing this task excellently produces a professional looking end result.
It is important to choose the right size of the screw when you are dealing with two different wood pieces. If it’s too long, it’ll come through the wood surface of the second piece, thus ruining the finish.
On the other hand, if it’s too short, it won’t be strong enough.
In this article, we will tackle how to join two pieces of wood with screws to help you gain enough knowledge and apply it to your next woodwork project involving wood joinery using screws.
What You’ll Need to Follow this Tutorial
The important things you’ll need to prepare for this woodwork task includes wood pieces, screws, drill bit, drill, pencil, screwdriver, and carpenter’s measuring tool.
How to Calculate the Length of the Screw
When calculating the correct length of the screw, you need to measure the depth of the wood top piece, and adding the half depth of the bottom wood piece to it. It means that the screw will go through the top wood piece and only halfway through the bottom part.
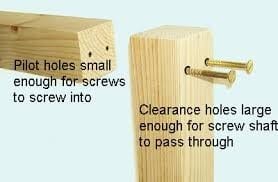
Image Source: http://www.handymanknowhow.co.uk/drillingandfixing/pilotholeswithtext.jpg
How to Join Two Wood Pieces With Screws
Step #1
Using a pencil, make a cross at the center point where you want to screw and fix the two wood pieces together.
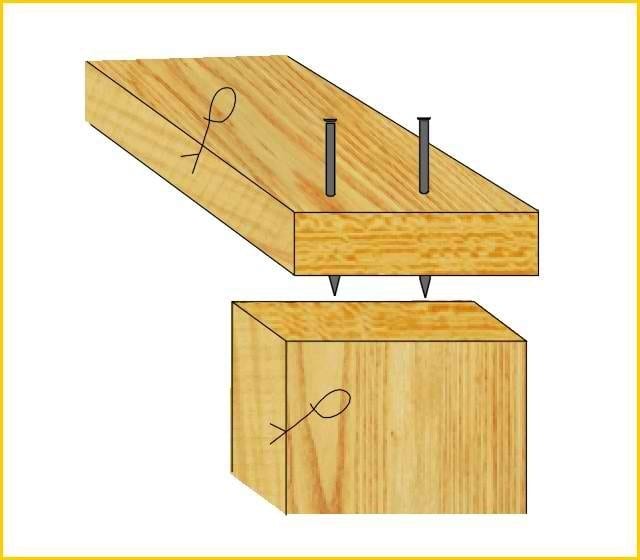
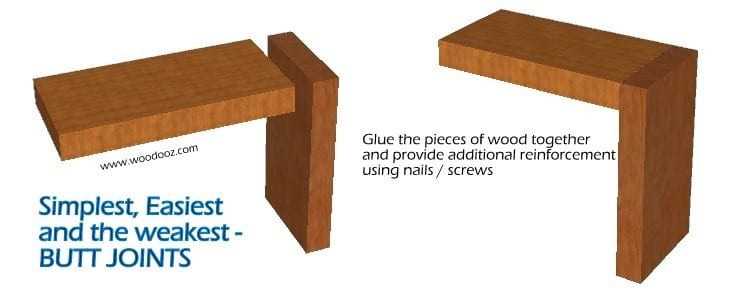
Image Source: http://www.ripsdiy.co.za/graphics/woodbutjoin.jpg
Step #2
Using a drill bit should be of similar size width the screw. It should not be bigger, otherwise, the screw won’t grip hold the wood securely.
The next step is drilling right through the upper piece, beginning at the point you’ve made with your pencil.
For taking the screw, use a smaller drill then make a narrow pilot hole at the bottom wood piece. Drilling too far down is not advisable, just drill far enough to start the screw.
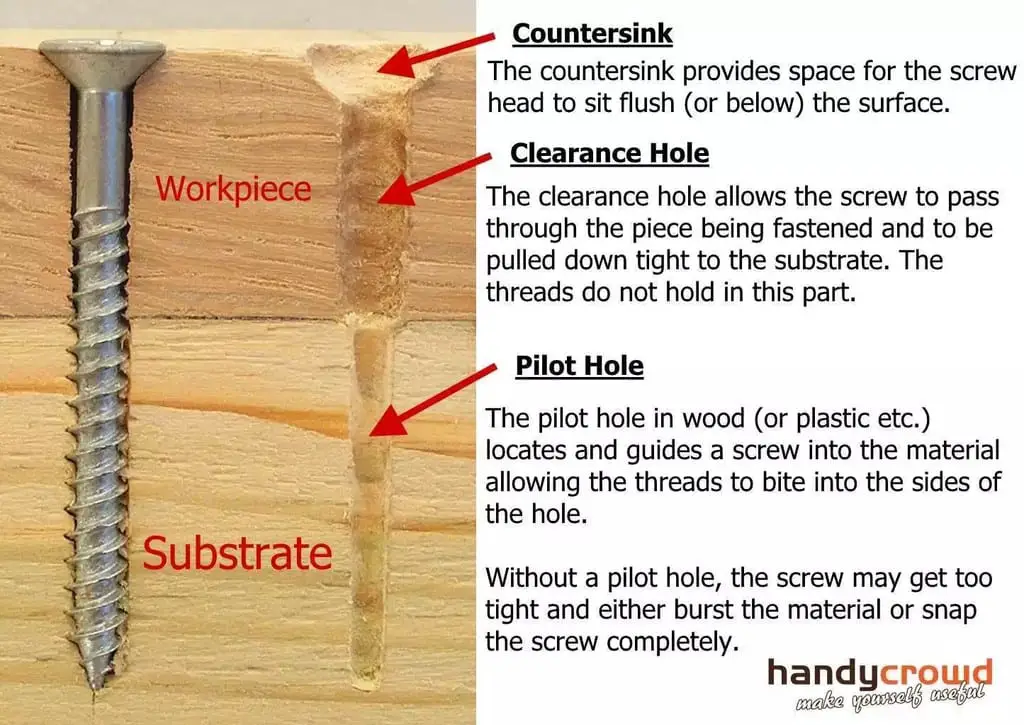
Image Source: https://i0.wp.com/handycrowd.com/wp-content/uploads/2012/06/screw-holes-explained-in-detail.jpg
Step #3
If you are planning to use countersunk screws with shaped head or top that goes down into the wood surface, fitting your drill using a countersunk bit is essential to give you a space to sink the head when the screw is being fixed.
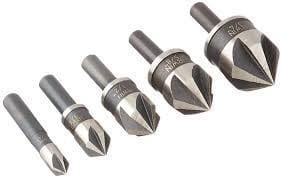
Image Source: https://images-na.ssl-images-amazon.com/images/I/51H9zNxZ0kL.SL1050.jpg
Step #4
It is easy to make pilot holes in the second wood surface. However, if the size of the screw is more than size 6, you need to use a drill bit.
When you’re screwing two wood pieces together, it’s essential that all screws are equally tightened up to prevent twisting due to unevenly spread tension.
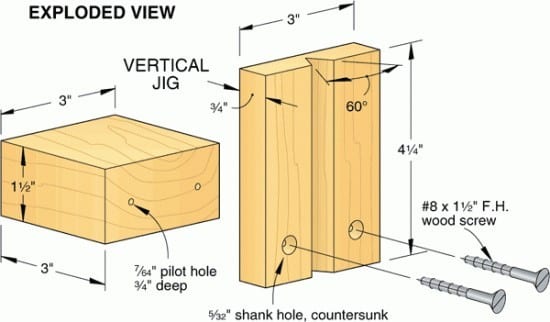
Image Source: https://images.woodmagazine.mdpcdn.com/sites/default/files/styles/width_550/public/image/migrated//wood/images//475_2_1.gif
Tips and Tricks When Joining Two Wood Pieces With Screws
Tip #1
Choosing the right screws for a woodworking job is not easy, most especially if you’re not an expert. Keep in mind that not all screws are compatible with wood.
The most commonly used screw for wood projects is a countersunk screw (cross-slot head), By using the correct screwdriver to fix these screws, it won’t slip and damage wood surface. Pozidriv screws enable you to use 3 sizes of a screwdriver and are usually specially hardened.
Tip #2
If you’re screwing two pieces of chipboard or fiberboard together, you need to use special chipboard screws with deep-cut sharp-edged threads to go all the way down the screw shank, for strength and good grip. You can also use it to fasten wood.
Tip #3
It is important to use pilot holes when you’re using wood screws if you want the screws to go through straight. This is done with the help of a bit which is smaller as compared to the screw diameter, creating a channel so that the wood screw can easily follow.
For hardwood, create pilot holes that are equal to the size of the thread of a screw.
Tip #4
It’s very important to use the correct length of wood screws and they should be up to code.
Tip #5
Coating the wood screws of hardwood with soap or beeswax is a good idea to help the wood screw go into the wood smoother and faster.
Tip #6
Place the wood screws on a flat metal piece and use a hammer to bend the threads slightly down to prevent loose screws.
Conclusion
Wood screws are designed and specially treated for wood pieces, creating a stronger fit for a long-lasting fit as compared to generic nails or screws. It takes some practice using these special wood screws.

