Have you ever wondered how to paint letters on wood? How are sayings on wood made? How do woodworkers paint monograms on wood?
There are actually a number of ways to paint letters on wood and this guide will show you how. By mastering how to paint letters on wood, you will be able to create signage, decorative sayings and other personalized items for you and your family or to give as presents.
Painting letters on wood: how it’s done
There are a number of ways to paint letters on wood. The steps for each method are described here for you
You will need the following
- Wood base you will be working on
- Sandpaper
- Wood Filler
- Stencils
- Adhesive spray
- Primer
- Acrylic paint
- Acrylic polyurethane finish
- Rags
Instructions
1) Prepping the wood

Source: https://www.videoblocks.com/video/housework-housekeeping-and-household-concept—basin-with-soap-water-detergent-and-cleaning-rag-on-wooden-floor-rvtfufjzliw3mu898
Before painting letters on wood, you need to prepare it. Clean the wood with a damp rag and warm water. Remove any hardware on the furniture. If there are any holes or indentations where paint will be applied. Use a wood filler to cover these imperfections.
Sand the wood using light pressure. This will help to create a smooth canvas for painting. Use a 100-grit sandpaper to remove any finish. You can use higher grit sandpaper afterwards. Remove dust from wood.
Use a large, clean paintbrush to brush away any dust. Apply a primer to the wood. This creates the perfect base for paint because this seals the pores of the wood. It will also keep your paint from chipping and fading as time goes by.
2) Using tracing or stencils
Source: http://panjokids.blogspot.com/2008/06/freezer-paper-stencils.html
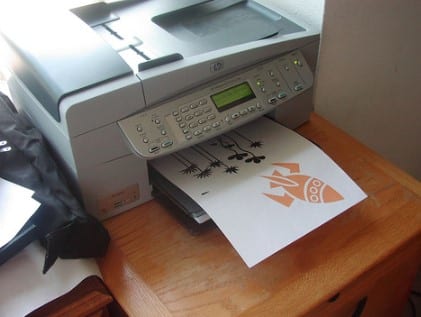
Design your lettering. Using Microsoft Word, you can type in your letters and trace them onto the surface of the wood. Trace your letters on the wood. You may cut out your letters from the paper it was printed on and trace around them. Make sure that your letters are big and are easy to cut. The second method will work for any types of letters.
Flip the printed page over, so that you are using the blank side. Use a pencil to shade everywhere that there is ink. Turn the page back over and place this on the piece of wood. The printed letters should be facing up. Using your pencil trace over every line of every letter.
When you are all done, remove the paper. You will see that the lead that you put on the backside of the paper will have transferred to the wood because of the tracing you applied.
3) Painting the letters on wood
Source: https://themagicbrushinc.com/word-stenciling-on-salvaged-wood/
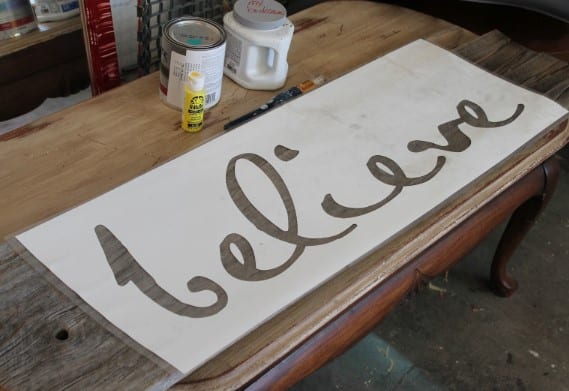
Shake your can of spray adhesive, and then spray a light coat on the stencil. Once the stencil is stuck to the wood, use your stencil brush to dab acrylic paint on the wood, through the stencil. Let y our paint dry for a few minutes before removing the stencil from the wood.
4) Painting letters by freehand
Source: https://www.wikihow.com/Paint-Letters-on-Wood
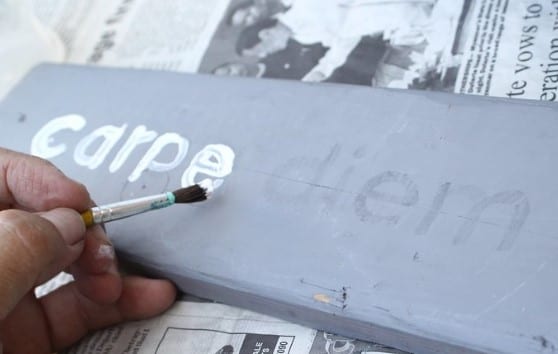
To write letters by freehand, use a variety of brushes. Brushes with firm, square bristles are for creating thick, straight outlines of letters, while small brushes are used for details. You may also use acrylic paint pens found at most craft stores.
Use a ruler to make sure that your letters are even across the wood surface. You can create a top line o you know exactly how large each letter should be. Paint your letters. Use only a bit of paint at a time.
Place your paint on a sheet of paper or paper plate. Keep a cup of water nearby to rinse your paintbrushes. If you make a mistake, wipe it away with a clean and damp rag. This will remove paint if the paint is still wet.
5) Finishing Your Wood
Source: https://www.wikihow.com/Paint-Letters-on-Wood
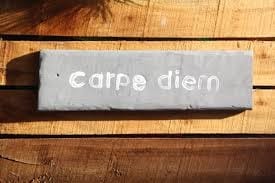
Let your lettering dry completely. Acrylic paint will dry pretty quickly, but give it a few hours to s completely dry. You may apply a second coat but do it after the first coat has completely dried. Apply a clear acrylic polyurethane finish. This is will seal your painted letters onto the wood. It will make sure that your work lasts for a long time.
Conclusion
Painting letters on wood are easy when you use stencils. But if you are talented at writing/painting letters using freehand then you may do so. You must apply gloss to protect your work and to preserve it for years to come.
