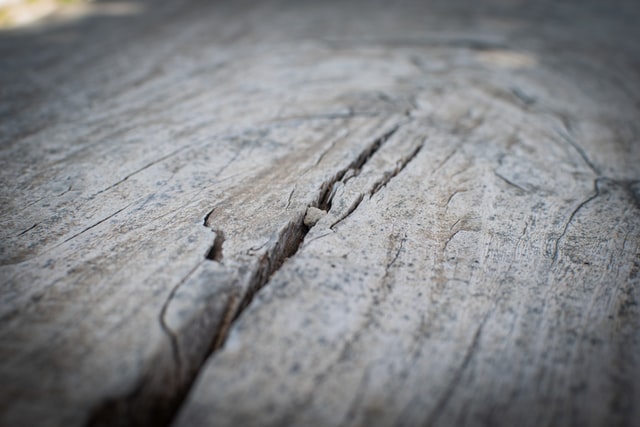
Cracks appearing on wood are common, but that can make wood look unappealing. There are many reasons why cracks appear on wood boards and furniture. If you are wondering how to stop a crack in wood from spreading, there are several ways to achieve your goal.
There are several products you can use to prevent cracks from spreading and to fix cracks on wood during working on a project or later. Epoxy resin, wood putty, a mixture of sawdust and glue are some of the most commonly used solutions for fixing cracks and stopping them from spreading further.
The trick is to take prompt steps once you notice cracks appearing on the wood surface. You do not need to be a pro to use suitable methods once you know the pro-tips and the step-by-step process of how to stop a crack in wood from spreading.
It is important to identify the crack and use the most suitable method as various kinds of cracks require different methods of crack prevention.
How to use wood filler or wood epoxy to prevent further cracking on wood
Wood filler or wood epoxy both work well in preventing the further spreading of cracks on wood. Which one will be suitable for mending a crack depends on certain factors. For narrower, elongated, and deeper cracks liquid epoxy fillers work better as it seeps in and fills even the deepest and the tiniest cracks.
Wood fillers like sawdust and glue work better for broader cracks but take a longer time to dry compared to epoxy. It is better to stick to wood fillers if you have plans of sanding, staining, or painting the wood. Wood fillers bond tightly with wood and will not faze while sanding. Also, sawdust and wood glue work out to be less expensive than epoxy.
Applying wood fillers on cracks is an easy process following these steps.
Step-1

The first step is to decide what will work for the kinds of cracks you plan to mend to stop it from spreading. For slimmer, deeper cracks, or cracks going around the wood select epoxy. Both wood filler and epoxy cannot be used together because the results are quite different. Wood fillers are more suitable for surfaces with broad cracks or cracks with short missing pieces of wood.
Step -2

Before starting to work with epoxy resin or glue, wear protective gear like gloves and respirator. Chemicals may give out hazardous fumes while you work with them. Standard respirators are good enough for guarding your lungs against fumes from wood epoxy. It is better to work outdoors or in a well-ventilated area.
While working with fillers or epoxy, wearing safety goggles is a must. It will protect your eyes from any accidental spills. Long sleeve shirts and gloves can protect your hands from the sticky epoxy.
Step-3

Before applying a filler or epoxy the wood needs to be cleaned. To prepare the wood, wash it with a mild detergent and scrub it gently. Wash off the soap with water and allow the wood to dry completely. Ensure there is no loose dirt or wood chips as that may interfere with the bonding between the filler and the wood. Accumulated debris inside the crack may hinder the epoxy from reaching the deepest end of the crack. If the crack is running around the wood, use masking tape on the lower end to prevent the epoxy from spilling out from the bottom.
Step-4

If using epoxy resin, you need to mix the resin and hardener before applying it to the crack. In case you want to match the color of the epoxy to the shade of the wood, add a bit of color to it before applying. Read instructions on the pack to mix the right amount of resin and hardener to ensure maximum efficiency.
If using a store-bought wood filler, stir it before applying. Wood fillers come in two forms, water-based and petroleum-based. Apply wood filler with a putty knife. Firmly press to force the wood filler into the crack so that it reaches deep into the crack. Scrape off the excess. Do not get tempted to overload the crack with wood filler. Excessive wood filler can leave bumps on the wood. When dry, wood fillers become extremely dry and can be difficult to sand off. It is not enough to know just how to stop a crack in wood from spreading but these pro-tips will help you get more satisfying results.
Step-5

Whether epoxy resin or a wood filler, the next step is to allow it to dry. Epoxy takes less time to dry but wait for at least one day before sanding or applying paint or stain to it. Appropriately filled cracks will keep the wood in good shape preventing it from splitting further. A well-done job will not only mend it and make it long-lasting but will not leave any visible marks of the crack.
How to stop a crack in wood from spreading with sawdust and glue
Using sawdust and glue can be ideal when the crack is broad and shallow. It is one of the most inexpensive ways to prevent cracks from spreading further. Here are the steps to follow.
Step-1

Begin with collecting sawdust in a container where you will mix it with glue. The sawdust can be collected from the work (ideally sanding) done on the same wood to match the color. Finer the dust, better will be the efficiency of it as a filler.
Step-2

Add wood glue to the sawdust and mix it thoroughly till you achieve a putty-like consistency.
Step-3

Use a scraper to apply the prepared filler over the crack and try pushing it as farther as possible into the crack. Gently scrape off the excess DIY filler from the area around the crack. Let it dry and cure.
Step-4

After it dries completely, sand it using fine-grit sandpaper to give it a smooth finish before applying any paint or stain.
Now that you know how to stop a crack in wood from spreading, examine the cracks on your woodwork. Select the method that works best for the kind of cracks you have in hand. Always remember to clean the area around the crack and inside the crack as much as possible to strengthen the bonding when the filler is applied. Always give the wood filler or epoxy resin enough time to dry and cure fully for stronger adhesion and longer life.
