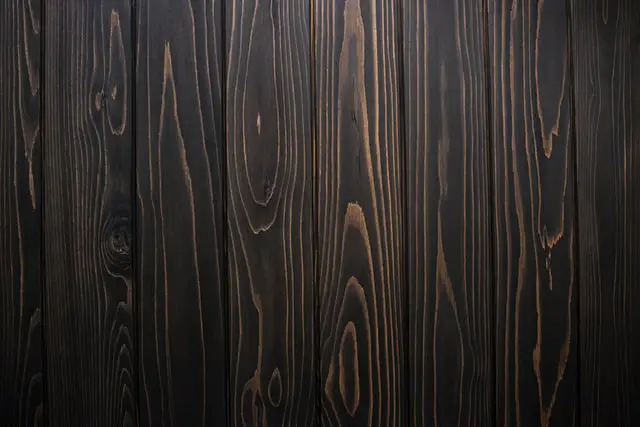
Wood Graining is the process in which an artificial wood grain is created on a non-wood or a fiberboard material or surface. This is done for the pleasing aesthetics this leaves on the surface. This how to use a wood grain tool method transforms your surface into a rich and warm woody texture. This how to use a wood grain tool article will inspire you try wood graining on metal surfaces, drywall etc. too. Wood graining done well on laminated furniture gives it a posh and expensive oak look.
But in order to get that beautiful grained look you will need the right tools and the knowledge of how to use a wood grain tool. In this how to use a wood grain tool article we will discuss, the types of wood graining tools available at our disposal and how to go about doing the actual wood graining.
Types of Wood Graining tools
Check Roller
If you want to replicate the wood grains of mahogany or oak, a check roller is a wonderful tool. Mahogany and Oak are porous woods and in order to replicate the graining of these woods, a check roller has plates which move independent of each other to create a perfect rolling grain. This is one of the most popular tool in the whole how to use a wood grain tool process.
These rollers come in various sizes and you can use one which suits your requirement.
Overgraining Brush
An overgraining brush is seldom used singularly in the wood graining process. It is usually used in conjunction with other wood graining tools. It is ideal if you want to create natural looking imperfections to your coat of glaze. Using this tool takes a certain amount of practice before you can get it right.
Softening Brush
Usually made with animal hair, the softening brush is primarily used to smooth and soften lines created by other wood graining tools. This gives the wood grain a kind of realistic and understated look. The bristles when brushed along the grain level out the grain slightly.
Check Comb
These are very handy and very easy to use. These combs come with triangular teeth which can be run over a wet glaze to get the desired wood graining effect. The check comb comes in different sizes. This enables us to create different patterns. You can use combs of different sizes during a single graining process.
Wood Grain Rocker
How to use a wood grain tool article is not complete without learning about the wood grain rocker. This tool is the one of the most commonly used tools for wood graining. As the name suggests, the tool needs to be rocked back and forth while doing the graining. You can create a multitude of diverse patterns but rocking the grain rocker differently in different angles. The tool itself is mostly made out of durable rubber and the grain teeth is made out of wood. You can also create different patterns by varying the speed at which you pull the Wood Grain rocker over the wet glaze.
Wood Grain Roller
Similar to the Wood Grain Rocker, the roller as the name suggests needs to be rolled over the wet glaze instead of pulling and rocking over it. The wood grain roller comes factory fitted with detachable handles. This modification allows the roller to create significantly greater number of pattern.
Choosing the best tool
When choosing the best tool for creating wood grains, we must remember that each type of wood allows different tools to be used. For example, Check combs works best on oak woods. But if you are going to choose Birch wood for your project then Check combs might be the best choice.
Another thing to understand is that you may need to use more than one tool to achieve a realistic faux wood grain. It also depends on the level of detail you are aspiring for.
But what is common across all types of wood graining tools is that they require practice before you reach a level of expertise.
How to use a wood grain tool:
Below are the steps to use a wood grain tool:
Step 1: Preparing to Paint

This is first step in the how to use a wood grain tool procedure. Cover surfaces you don’t want the paint to stick to with paper or tape so that only the wood board you are using is exposed. Also, as much as possible try to do the painting and graining activity outdoors. If you are planning to give wood grain to a door or something with attachments ensure you unscrew those items. Some common attachments are hinges, knobs etc.
Step 2: Sanding the surface

To achieve maximum receivability, remember to sand the surface you are painting on. Most commonly used sandpaper is the finely grained one. It is always best to sand in straight long strokes in the same direction as the one you are going to paint and grain on. Sanding helps smooth rough areas on the board.
Step 3: Painting the board with the Primer

A primer is nothing but a binding agent for the outer coat of paint. Instead of applying the paint and glaze directly on the wooden surface it is always recommended to give a coat of primer before. A primer can be purpose built paint which is thinner or you can even go for a lighter shade of your normal paint.
When trying to achieve authentic wood grains usage of a primer is a must. We must also allow the coat of primer to dry before giving the second of paint and glaze.
Step 4: Painting the glaze

Now, for the most important part of the wood graining process. Mix your paint and glaze in the desired quantity and even paint it on the surface of the wood. Ensure you paint in long straight strokes. You might need to give two to three coats of glaze. Once the paint and glaze is coated you must immediately start the graining when the glaze is still wet.
Step 5: Wood Graining

Depending on the wood grain tool you have chosen the method will wary. But what will stay constant is each of the above mentioned tools gives us the ability to get multiple effects depending on how they are used. For example if using a wood grain rocker, in each pass of the wood graining you can apply different pressures. You can even simply pull and not rock the tool at all. You can rock differently at different places to get varying results.
Step 6: Varnishing

This is the final step in the how to use a wood grain tool tutorial. Once the graining is complete and the paint has dried apply a coat of varnish. This will act as a layer of protection for the wooden surface.
Now that you know how to use a wood grain tool, it is time to get started on that wood graining project you have had in mind.
