Safety in the woodworking place also includes making sure that you use your saw horse safely. After all, one wrong move can hurt you, or even damage your very own saw horse. If you are a professional woodworker, you may have encountered a lot of times wherein you experience these issues. For beginners, however, knowing about these safety tips can help a lot. This guide is designed for you if you feel that you still lack in knowledge in terms of saw horse safety. Read along to learn more on how to use saw horses safely.
Step By Step Instructions on How to Use Saw Horses Safely
1. Create a 5-Minute Workbench Safely
Sawhorses are primarily used for sawing wood. At least, that’s what we know. However, reality dictates that professional woodworkers use sawhorses in several other uses aside from just serving as cutting assistance. As a matter of fact, with a little amount of creativity, you can even turn your sawhorse as one of the most beneficial tools in your workshop.
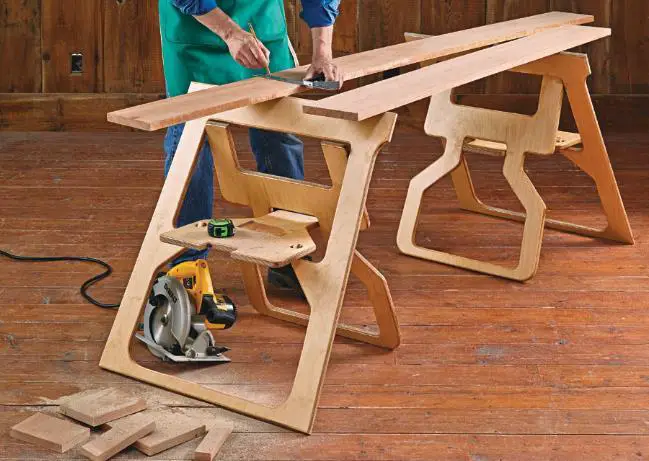
In order to build your workbench safely, prepare a semi-permanent workstation as you frame or trim longer-term or bigger projects. This can be done by screwing 2x4w to its tops, and use a plywood platform to the 2x4s and get ready to start. By letting your 2x4s project just a few inches beyond the plywood, it becomes easier for you to pick up the entire piece, and move it around as necessary. Keep the underfoot clutter free by installing a plywood shelf across its braces.
2. Build an Instant Scaffolding
When using sawhorses, avoid tottering on stepladders in doing work that is less than 10 feet above the ground. Instead, you can create a crude, yet safe scaffolding plank using plywood and 2x4s with length up to 8 feet. Make sure to add the end blocks in order to keep the longer pieces from folding up as you work. Create longer planks if you would like it, but make sure that you use 2x6s for those with lengths that are between 8 and 12 feet.
In doing so, make sure that you set the sawhorse in a way that they sit level, with legs that will not sink or rock into the ground. At the same time, the board should also be stable before you actually stand on it.
3. Create Wider Caps
When installing cap boards, fasten some 2x6s wood pieces to your sawhorse tops using sheet-metal screws. Make sure that you screw right from the underside. Avoid capping metal sawhorses using 2x4s. Rather, use 2x6s.
With this, you can expect to get a bigger working area, and clamp stuff on the overhanging sides. Also, avoid using longer screws, or else, you might break the saw blade teeth once in a while. If you plan to hang your sawhorses up, out of the way, you can simply let the ends run just a few inches longer, drilling holes in them.
4. Build Strong Sawhorses
This can be done by attaching the legs to a 2×4 I-beam with 3 inches screws. This is applicable if you need extra sawhorses right away. A pair can be created by cutting (5) 8-feet 2x4s to (6) 32-inches lengths, and (8) 26-1/4 inches lengths.
Afterwards, screw the 32-inches pieces right into the I-beam shapes, and attach the horses’ legs to the I-beams after drilling pilot hole. These screws, together with the upper I-beam edge, will ensure that the legs of your sawhorse will be stabilized.
Conclusion
Indeed, there is still much to learn when it comes to using saw horses in a safe way. When used the right way, saw horses can help you accomplish task in your woodworking shop effectively. If you have other suggestions on how to use saw horses safely, why not share them in the comments section below? You can also share this article if you found it helpful.
