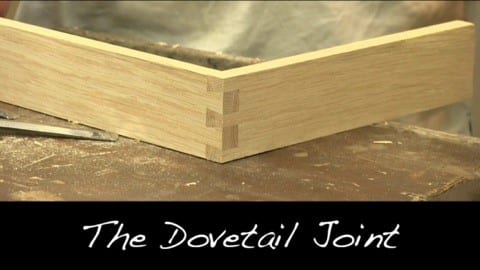
It is widely used as it adds details and intricacies to our cabinets and drawers. The meticulous woodwork and its durable feature are what makes it unique and a standout from the other joinery techniques that are used in woodworking. Hence, making it is a considered a skill to be developed. So now you might be wondering, how to make a dovetail joint? Just like how it is originated thousands of years back by using your hand and simple tool skills, here are the basic steps on how to make one that will add some nice and sophisticated design to your cabinet or any woodworking project.
Materials Needed
For this tutorial, we will only need the following:
Wood
Since the dovetail joint consists of two parts, we will need two cuts of the same size of wood. You can use any type of solid timber such as maple, aspen, plywood or oak, whichever suits you best.
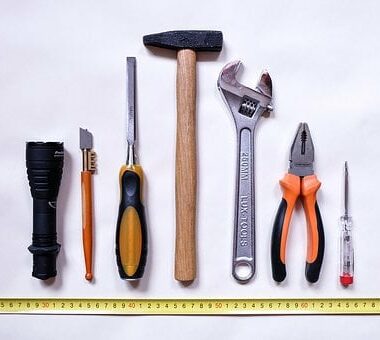
With those pieces of wood only, we can already go ahead and work in making a dovetail joint with the help of these following tools.
- Marking Knife
- Pencil
- Dovetail Saw
- Vice
- Square
- Sliding Bevel
- Plank
- Chisel Set
- Chisel mallet
- Plane
As it has been used for centuries, dovetail joint is a durable and sturdy way of joining pieces of wood together and are commonly used when making drawers and cabinets. It is not only strong and solid, but for many, even those without any interest in woodworking will find its intricate look an attractive design and detail on a project.
Knowing how to make dovetails is considered as the benchmark of woodworking and a skill that beginners should acquire and develop. Before we start on the process, a few things to remember:
Be very precise with the measurement.
Laying out the measurement is a crucial process in making a dovetail joint. It shouldn’t be loose or too tight when joining the two parts together. With the correct measurement, it will just fit all the way through. No need to put wood glue or to screw them together to keep it tight as it just holds by itself.
Choose the right cut of wood
The size of your timber will of course depend on the size of your dovetails. When picking the cut of solid wood, make sure that it is clean and free from checks and any damages.
Step-by-Step Instructions
What makes dovetail joint strong and reliable is the shape, called the “tails and pins” that are joined together. It makes the firm grip and hold, thus virtually impossible to break. It does not generally need any mechanical fasteners to be linked unlike other joinery techniques that woodworkers also use.
The tails are the triangular shape, while the pins are slender projections when tails are inserted. Though machines have been used to make this type of joinery technique, the use of hands still produces better looking and more elaborate dovetails.
Step 1 – Preparing the Timber
Before starting on the cut, first begin with the layout, which is the most critical of the process. Decide on the angle, number of tails, size and measurement of spacing of the dovetails. Typically, the widest part for the pin should be about half the thickness of your wood.
Since dovetails consist of the two parts, the succeeding four steps will first walk you through making of the tails.
Step 2 – Measure the Depth of the Dovetails on both piece
Using one piece (pin board), mark a line on the end of the other piece (tail board) of the timber, which is as wide as its thickness, and vice versa. Make sure to draw the line all the way around the board.
Step 3 – Mark the Tails
Depending on how many tails you will make, measure and mark the angles for the tails using a pencil and marking knife. You can use a bevel angle to ensure the accuracy of the measurement.
Step 4 – Cut the Tails
With the use of your dovetail saw, cut the lines you have marked. It is important that you have to be very accurate about it, and make sure not to cut past it. Place it in a vice so it will be steady and still.
Start with the edges first, use a chisel to give you a recess of where you will position your saw to cut and with your fingers to guide it. Once the saw is in, you can remove your finger and let the saw do its job of cutting it all the way to the curve following your mark. Repeat the same process on the other end. You can use your chisel to remove the fussy bits for a nice and clean inside.
Cutting the wood in the middle of the tails is a bit trickier and harder. To do it, use your chisel and tap it with your chisel hammer. Don’t hit it too hard just yet. Then you can start chiseling the front slowly and surely. You can do this alternately on both sides.
Step 5 – Cleaning the Tails
Apply some finishing touches to the tails by using your chisel to clean up the inside corners to make it smooth and nicely precise.
Now that the tail board is finished, we can move on to work on the other part, which is the pin board.
Step 6 – Measure the Pins
Use the tail board to trace and mark the depth of the pins. You can use a plank or clamp to help with the guesswork. Use a pencil or a knife for some woods to draw the lines and marks. While doing that, be aware of not moving the timber to get the exact measurements. Place an X mark on the sides that you will cut.
Using the marks you made at the top part of the timber, you can use a square to guide you through marking it down on both sides. The use of the square will make sure your parallels are straight and exact.
Step 7 – Cut the Pin Board
Before starting to cut, you may need to put it low in a vice to give you minimum vibration and maximizing the holding. Using your thumb as a guide, place the dovetail saw on the pin board and slowly cut through the vertical line following the mark.
Using your chisel and chisel mallet, you can start shaping the pins. You have to be very careful when doing so as you are cutting through an angle. You can do it alternately on both parts as well.
Step 8 – Clean the Pins
Still using your chisel, trim the pins to clean and remove the rough bits.
Step 9 – Assemble both pieces together
Join the pin and tail board together. With the use of your mallet, tap it slowly to fit it in. If it’s too tight then, you may need to see and check for the variance and cut it using your chisel. Then try joining them together again till it fits properly and accurately. Shoulders should be even.
Step 10 – Finishing
Use plane to smoothen the surface on both sides.
The video below will show you the whole process done clearly and accurately. The master, Paul Seller himself will walk you through each of the steps. He is a woodworker and a furniture maker and has made thousands of pieces already for the last 50 years of woodworking. His channel is devoted to making different kinds of wood work and even sharing some tips and techniques in his tutorials.
Conclusion
How did you find making the dovetail joint by hand? Did you enjoy this tutorial? The process can be overwhelming because of the accuracy and complexity of the steps, however, the result is very rewarding because it is not only pretty to see it in your cabinets and drawers, it is also proven to be very sturdy and durable.
Tell us also what you think about it. If you have any tips or techniques that we can inculcate to make the process at least easier, you can write it in the comments section below. And please share if you like this tutorial.


