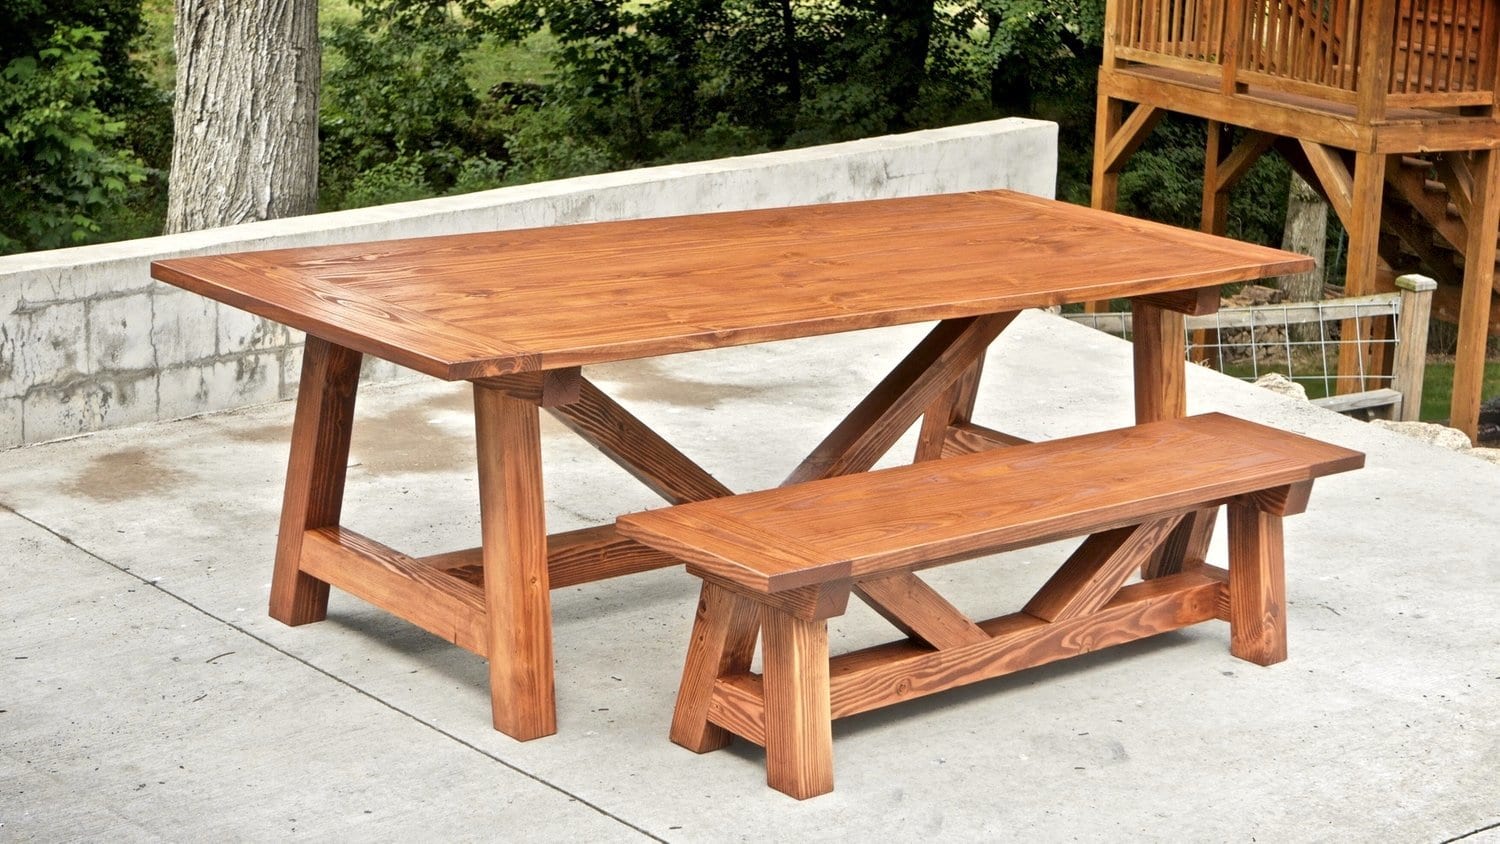
Do you want to have farmhouse bench along with your dining table. Using benches in dining room instead of chairs saves space in your super tight dining room & it will also give the a relaxed and rustic feel. Buying new bench can be a solution but what if you can have a cheaper and better alternative?
Going to buy new bench matching with your dining table can be expensive and a bit hard to find. Therefore don’t worry about that you can make your own bench by yourself. This tutorial explains the step by step details of building your own farmhouse bench in the easiest way. So are you ready to build your own cool farmhouse bench as shown in the picture above?
Building a farmhouse bench is no more a hard task thanks to the easy step by step tutorial.
So let’s get started!
Material Required
You will need following to build this project:
- Lumber
- Two 1” x 8” x 6 ft.
- Three 1” x 4”x 6 ft.
- Two 2”x 3”x 8 ft.
- 2inch finishing nails
- 2inch wood screws
- Wood glue
- Stain
- Polyurethane
- Sanding block
- Screw driver(drilling machine)
- Wood cutter
- Inch tape
- Pencil for marking
- Hammer
- Iron rod(optional)
You can find all these items from a hardware store or online store. To build a strong bench buy only good quality materials for this you can research online about the products needed for your project. Buy only from a trusted seller.
Step by Step Instructions For How To Build a Farmhouse Bench
Once you have got all the materials, you’re ready to start DIY farmhouse bench project. Follow this tutorial step by step a classy to build farmhouse bench.
Step 1: Measure, Mark and Cut the pieces
Use the inch tape to measure the lumber and mark following sizes using a pencil.
- 2”x3”: four pieces 17 ¼” long
- Two pieces 9” long
- One piece 64 ½” long
- 1”x4”:five pieces 12” long
- Two pieces 70” long
- 1”x8”: two pieces 72” long

Use a wood cutter to cut the lumber at marked positions

The 40” pieces also need two holes each, ¾” from one end, and 13 ½” from the other. Then, you need to make two holes on each of the 24” back legs, one ¾” in from the top, and one 10’’ ahead on the same line. See the image.

If you want to give your bench distressed wood feel beat up the wood a little using hammer or iron rod.

Read more tips below or move to the next step.
Pro Tips
- Use a work bench to secure the lumber so that it doesn’t move while cutting.
- Use the drill machine carefully to ensure safety.
- Always wear safety glasses and goggles.
- Wear gloves to protect hands from splinters while cutting wood but not near rotating blades where gloves can catch.
- Use a sharp 2H pencil for proper marking on the wood.
- When marking a line, hold the pencil such that there is no space between the pencil and the measuring device.
- If you are using a tape measure, be sure to hook its one end firmly to the wood’s edge.
- When using a table saw to cut the wood, keep the blade a little high for a cleaner cut.
- Use small teeth blade to achieve a much smoother edge.
- In order to find out the center of the wood board, place the measuring tape across the board width such that each edge of the wood coincides with a whole number. Mark the middle point and that is your center.
- If you are still unable to cut the wood in the perfect size, just cut it a little bit oversize, and then trim to the right dimensions.
Now sand everything down


Step 2: Prepare the Base Frame
Take all your 1”x 4” pieces and arrange them like this

Secure all your pieces using glue and two 2” nail at each connection. The end result will look something like this. Make sure to maintain the symmetry to form rectangle like structure

Now lay the frame flat on one side and put wood glue along all of the edges

Now take 1”x8” boards and center them across the frame. There should be 1” of overhang on the ends and ½” of overhang on the sides.

Secure the boards to the frame using 2” finishing nails.

Turn over the guy it will look like this

Pro Tips
- First, if you are working with hard wood, to prevent splitting of wood drill a pilot hole.
- Before beginning the hammering, grip the hammer firmly by the middle of the handle like you are shaking hands your hammer!
- Holding hammer too much tightly is not advisable.
- Hold the nail between your thumb and forefinger and place it where it is to be driven.
Step 3: Joining legs to the frame
Take the four 2”x3” pieces that are 17 ¼” long and place them in corner of the frame

Now secure the legs to the frame using screws. Using four 2” screws per leg two on each, hold the legs firmly while securing it with the screws so that it is fixed erectly

Now flip it back over. It will look like this

Now we will attach the nine inch 2”x3” as leg braces.
Useful tip: use a leftover 2”x3” piece to prop up the piece you are attaching.
Make sure the piece is centered in the middle of the legs and secure it using the screws.

Now put the 64 ½” 2”x3” piece and pace it by centering it between the nine inches 2”x3” pieces securing it with screws. So our final bench would look like this

Pro Tips
- Use a wood drill bit with a centering tip. You can use a twist drill bit for normal holes with small to medium diameter.
- Always use wood screws. They have a pronounced tip along with higher incline. Their shank is cylindrical or conical.
- Cordless screwdrivers and drills/drivers are ideal for screw driving. For only occasional screw driving you can use drill.
- Make sure that the bit you are using does fits the screw perfectly. Otherwise it can slip out of the screw during screwing.
- You will achieve the best result by drilling along the grain of the wood.
- Fix the work piece with clamps so that it doesn’t slip during drilling. Place a scrap panel underneath the workpiece, so that you can drill into the scrap panel without damaging your worktop. This will also prevent the fibers from being torn out while drilling through the workpiece.
- For connecting any two pieces of wood with screws, always pre-drill a hole that is 0.5 – 1 mm larger than the screw where you want to insert it. And you should always pre-drill a hole that is 1 mm smaller in the piece you are screwing into. That will grip well.
Step 4: Dyeing, and Finishing
Use an old cloth or brush to stain the bench

Now wait for some time until the stain gets dried

Once the stain is dried apply polyurethane for the finishing of bench. Put on a few coats for a more finished look

Now wait for some time until the stain gets dried
Pro Tips
- Use a dust mask or respirator to protect your eyes and skin while staining and finishing the table
- Before applying directly on the furniture test the stain on a scrapwood first.
- So that the stain doesn’t leave blotches on the wood, always apply a thin coat of wood conditioner. Let the conditioner about 15 minutes to dry before applying the stain but don’t sand it.
- Oil-based stains are common, consist of dyes and pigments mixed in with mineral spirits. stir the can thoroughly before staining to bring the dyes and pigments up off of the bottom, so you will get the full color from the stain. While working with oil-based stains, there will be fumes, so always work in a well-ventilated area.
- Apply stain with a brush or a rag, depending on preference. You can work with or against the grain. Applying a coat is necessary rather than neatness
- To avoid fumes, go with a water-based stain. The advantage of is that water-based stains is come in a wide variety of colors, even in more colors than oil-based.you can Apply the water-based stain in the same way as oil-based.
- If the stain needs to be darker, you can apply more layers of stain.
- It is possible to mix stain to make a customized color, but both stains must be of the same manufacturer and both are water or oil-based. Measure the amounts of each stain used and write it down, so it to be duplicated if needed.
- The stain only provides color; you will still have to use the finish for better protection.
- Stir the stain can properly before opening it
- For a darker tone, apply two or more stain coats.
- Use a good quality polyurethane finish material for long lasting protection of your coffee table.
- For protection against water and chemicals, use clear finishes.
YouTube Video:
Here is the link to the source YouTube video that inspired and helped us to write this wonderful step by step tutorial for building a farmhouse bench.
The video was created and uploaded by The Rehab Life. One of their team members narrates the step by step process in the video.
Helpful Tips
- If you have no previous woodworking experience, start with smaller projects like drilling in woods, attaching two wood pieces together, etc.
- Learn as much as you can about the woodworking craft before you start this project.
- Use only good quality tools and materials.
- Be very much careful when using the wood cutter, drilling machine, and other such tools.
As I mentioned above that this tutorial is designed for common peoples who would like to build a farmhouse bench of their own. I hope you enjoyed the tutorial and it was easy and understanding for you. Tell us about your building experience how much you like the project? How it feel like making a bench by yourself rather buying it?
I enjoyed a lot writing this article hope you also feel the same let us know your views in the comments, share this with your friends and on social sites to help as many people as we can ,so it saves their money also . Click on the share button below to share the tutorial.
