How to Remove Paint from Wood Trim

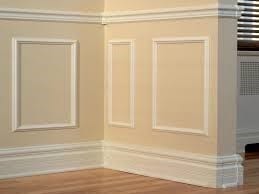
Wood trims are decorative pieces of wood that are mostly attached to the upper and lower sections of walls and may also be used on cabinets, shelves, and windows. Wood trims add style and dimension to any room.
You can use wood trims for any home improvement or construction project. And when it comes to using trims, you need to learn how to paint trims to match adjoining wall, flooring or furniture. This guide will show you how.
Painting wood trim basics
The wood surface near a wood trim should be carefully considered when painting. The wood used to make trims is most likely different from wood used for constructing walls and floors of a room. This is why you need to carefully consider the following steps for painting wood trims.
You will need the following
- Protective attire (goggles, respirator mask, and splinter-resistant gloves)
- Drop cloth
- Chemical paint stripper
- Natural bristle paint brush
- Contour scraper
- Sandpaper or sanding block 80 to 120 grit
- Rotary tool with sanding bit (optional)
- Wood bleach (optional)
- Soft rags
- Track cloth
Instructions
Step #1
Wear your protective gear like goggles, respirator mask, and glove and then start preparing your workspace as well as the wood trim you will be working on.
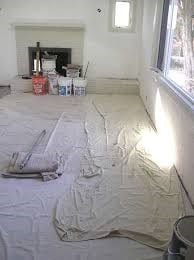
Use a chemical-resistant tarp or drop cloth to cover the floor and any other large furniture pieces that cannot be moved out of the room. You can also use this to drape areas to avoid splashes and spills.
Read More: How To's For Cleaning & Removing Residue [List 1]
- How to Remove Heat Marks from Wood
- How to Get Oil Stains Out of Wood
- How to Remove Hair Dye from Wood
- How to Get Wood Stains Out of Clothes
- How to Get Pen Off Wood
- How to Get the Smell Out of Wood
- How to Get Stickers Off Wood
- How to Get Smoke Smell Out of Wood
- How to Get Hair Dye off Wood
- How to Clean Wood Table
- How To Remove Wood Stain From Clothes
- How to Remove Linoleum from Wood Floor
Read More: How To's & Woodworking Techniques [List 1]
Improve ventilation further by opening a window. Use fans to remove toxic air that may accumulate inside the room. Cordon the room to prevent people from moving inside and disturbing your work.
Source: https://www.house-painting-info.com/articles/dropcloths/
Read More: How To's, Techniques and Tips [List 1]
- How To Stop Sap Coming Out Of Wood
- How To Seal Wood Without Changing Color
- How to Make Cardboard Hard Like Wood
- How To Round Wood Edges Without Router
- How to Bend Wood Without Steam
- How to Transition Between Two Different Wood Floors
- How To Make Wood Drawers Slide Easier
- How To Stencil On Wood Without Bleeding
- How to Flatten a Workbench
- How To Make a Wood Table Top Smooth
- How To Age Wood With Baking Soda
- How to Whitewash Dark Wood Furniture
- How To Make Slime With Wood Glue
- How to Burn Wood with Electricity
- How To Apply Water Based Polyurethane To Wood Floors
Step #2
Choose strippers which are low-VOC, which means these contain fewer volatile organic compounds which may emit toxic fumes therefore adequate ventilation is very important.

Source: http://m.dumondchemicals.com/pro-peel-away-smart-strip-pro.html
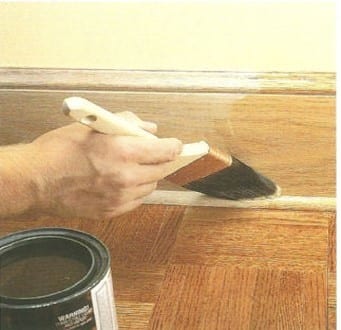
Apply paint stripper to the trim using a natural-bristle paintbrush. Use natural brushes because plastic ones can melt when dipped in the stripper.
Step #3
Follow manufacturer’s instructions completely to be able to dissolve old paint for any surface. Not all paint strippers work the same way; some products soften paint quickly while some need hours of wait time and repeated applications to perform well.
Read More: How To's & Woodworking Techniques [List 2]
Some paint strippers are in liquid form while some are in gel form. But no matter what type of stripper you’re using, make sure to apply it to all the creases and folds found a detailed trim using the tips of the brush.

MUST SEE: Make 16,000 Projects With Step By Step Plans
Ted's Woodworking Plans contains complete instructions from start to finish, leaving absolutely no guesswork. Here is what you get:
- Step-By-Step Instructions
- Cutting & Materials List
- Detailed Schematics
- Views From All Angles
- Suitable For Beginners & Professionals
Read More: How To's, Techniques and Tips [List 2]
- How to Remove Nails From Wood
- How to Resharpen a Japanese Ryoba’s Rip Teeth
- How to Sharpen Woodworking Tools
- How to Whitewash Pine Wood
- How To Modge Podge Pictures To Wood
- How To Apply Shellac To Wood
- How To Take Apart A Wood Pallet
- How To Install A Wood Accent Wall
- How to Do String Art on Wood
- How to Remove a Stripped Screw from Wood
- How To Upgrade Wood Frame
- How to Get Nails Out of Wood
- How to Refinish a Wood Table
- How To Make Vinyl Letters Stick To Wood
- How To Measure A Cord Of Wood
Brush as much stripper as you have the time to scrape. If the stripper dries before you start to scrape it you need to reapply it.
Source: http://ehowdiy.com/refinishing_wood_trim_1.htm
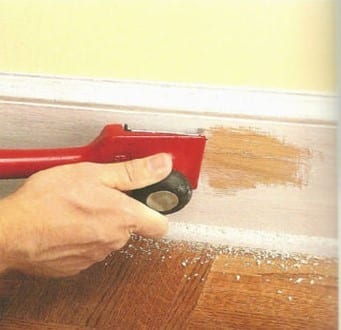
Let the solvent set for its required amount of time. When the allotted time is over, scrape away softened paint using a contour scraper. This tool will be able to scrape stripped paint even in hard to reach curves of wood trimming.
Step #4
The most updated contour scraper is a separate scraping device with swappable stainless steel blades with distinct scraping tips that will fit virtually every size curve and contour on wood trim.
If the trim you are working on has multiple layers of old paint, you have to apply and reapply the paint stripper and scrape each layer until you reach wood.
Source: https://www.thewoodwhisperer.com/videos/rubbing-out-a-high-gloss-finish/
Read More: How To's, Techniques and Tips [List 3]
- How To Start A Fire With Wet Wood
- How To Stencil On Wood
- How to Finish Wood With Polyurethane
- How to Refinish Wood Dresser
- How To Age Wood Grey
- How To Apply Gold Leaf To Wood
- How To Apply Polyurethane To Wood
- How To Bend Wood With Water
- How to Burn Designs Into Wood
- How to Carve a Face In Wood
- How to Carve Wood By Hand
- How To Replace Wood Siding
- How To Split Wood With A Wedge
- How To Transfer Pictures To Wood
- How To Treat Pallet Wood For Indoor Use
Read More: How To's & Woodworking Techniques [List 3]
- How To Sand Wood
- How To Season Wood
- How To Spray Paint Wood
- How To Stack Wood
- How To Stain And Seal Wood
- How To Stain Wood
- How to Carve Wood
- How to Hand Plane Wood
- How to Paint Wood
- How to Cure Wood
- How to Petrify Wood
- How to Pickle Wood
- How to Preserve Wood
- How To Screw Into Wood
- How To Split Wood
- How to Find Wood Studs
Step #5
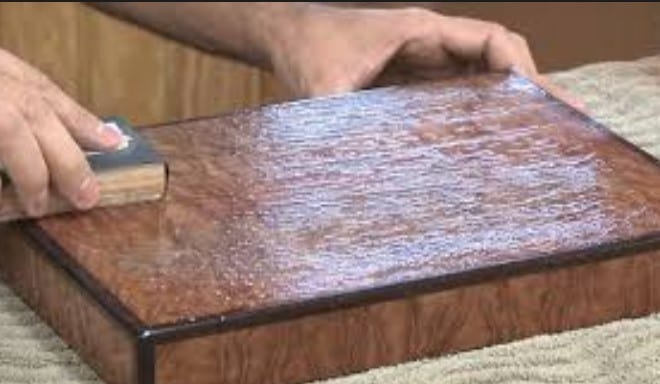
Use an 80-grit sandpaper or an 80-grit foam sanding block to sand off the wood you are working on. Always sand in the direction of the wood grain to prevent splinters due to cross-sanding marks. Switch to 120-grit sandpaper when the wood is no longer rough and the dried bits of old paint have been rubbed off.
Read More: How To's For Cleaning & Removing Residue [List 2]
- How to Clean and Preserve Old Barn Wood
- How To Clean Reclaimed Wood
- How to Clean Wood After Stripping
- How to Remove Water Stains from Unfinished Wood
- How to Get White Heat Marks Off Wood Table
- How to Dissolve Wood Glue
- How to Remove Polyurethane from Wood
- How to Remove Sap from Wood
- How to Remove Lacquer from Wood
- How to Remove Scratches from Wood with Vinegar, Lemon or Toothpaste
- How to Remove Silicone Caulk from Wood
- How to Remove Adhesive from Wood
- How to Get Rid Of White Mold on Wood
- How to Remove Spray Paint from Wood
- How to Remove Varnish from Wood

Source: http://ehowdiy.com/refinishing_wood_trim_1.htm
Most likely you will encounter trims with intricate wood patterns like flowers, rosettes or detailed ornaments that would be impossible to sand using a sanding block or sandpaper. For these, you can use a handheld rotary tool with a pointed sanding bit.
Work slowly but surely. Work with extremely light pressure and consider working in a well-lighted area until you are done.
Conclusion
To remove paint from wood trim, you need to carefully use paint stripper and sand the trim. Most wood trims are intricately designed but this is no reason to not remove paint. Special tools can help you sand and finish trims with hard to reach crevices and nooks as well.
Read More: How To's For Cleaning & Removing Residue [List 3]
- How to Remove Gorilla Glue from Wood
- How To Clean Unfinished Wood
- How to Remove Wax from Wood
- How to Remove Duct Tape Residue from Wood
- How to Get Permanent Marker Off Wood
- How to Remove Paint from Wood
- How to Remove Latex Paint from Wood
- How to Clean Barn Wood
- How to Get Rid Of Water Stains On Wood
- How to Get Sticky Residue Off Wood
- How to Get Tape Residue Off Wood
- How to Remove Dried Paint from Wood
- How to Remove Veneer from Wood
- How to Take Stickers Off Wood
- How to Get Black Stains Out Of Wood
Read More: How To's For Cleaning & Removing Residue [List 4]
- How to Get Candle Wax off Wood
- How to Get Ink off Wood
- How to Get Super Glue Off Wood
- How to Remove Lead Paint from Wood
- How to Remove Dried Glue from Wood
- How to Remove Linoleum Glue from Wood
- How to Remove Oil Based Stain from Wood
- How to Remove Paint from Wood Trim
- How to Remove Stain From Wood
- How To Remove White Stains From Wood
- How To Remove Wood Glue
- How To Remove Wood Paneling
- How To Remove Wood Stain From Carpet
- How To Remove Wood Stain From Skin