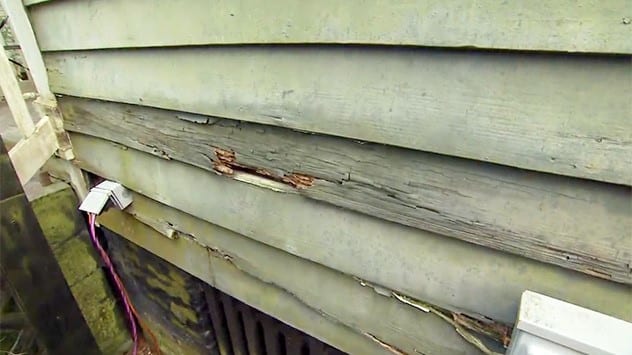
If you are faced with damaged wood siding, then this is not one of those tasks you can simply leave behind. The more you keep delaying the repair, the worse things can get. A single rainstorm can cause severe damage due to leaking water.
Nevertheless, the rotted or cracked wood siding will keep ruining the appearance of your house, even though beauty is only a secondary concern on that note.
But how to replace wood siding without breaking the surrounding clipboards?
The truth is, you just need to be very precise and know how to act like a pro. Cheers up because even a beginner can make it with the right set of friendly and professional advice. And that’s exactly what we have included in the step by step tutorial below.
What You Will Need To Follow This Tutorial
- Utility knife
- Pry bar
- Set square
- Stainless steel ring-shank nails for sliding (7d or 8d work best but in some cases a 5d can also work fine)
- Drill bit
- Hammer
- Saw (optional)
- Nail gun (optional)
Pro Tips
1 – Use the old clapboard to size the replacement
As simple as this smart tip sounds, you can use the old clapboard as a template. Thus, you will save yourself much efforts and time for sizing the replacement. That’s a technique I learned from an old woodworking master, who was generous enough to share this invaluable hack with me.
2 – The fewer power tools, the better
The difficulty with patching old wood siding hides in the delicacy of this process. Too much vibration and you risk ending up replacing much more of the surrounding siding than the damage you were actually fighting to fix. Be patient and precise, and don’t rely on quick fixes with the help of power tools to get the job done.
3 – Determine the sheeting’s thickness accurately
The final stage of replacing the damaged wood siding is to nail the new one at a place. But for this purpose, you need to know the size of the nails you are about to use. A quick and easy tip for determining the thickness of a sheeting precisely is to poke a drill bit into the vertical seam. The seams inevitably land at a stud, so once you notice how far the drill bit goes, you will know the accurate sheeting’s thickness.
Step by Step Instructions for Replacing Wood Siding
Step 1 – Remove the wood siding with the help of a utility knife and a pry bar
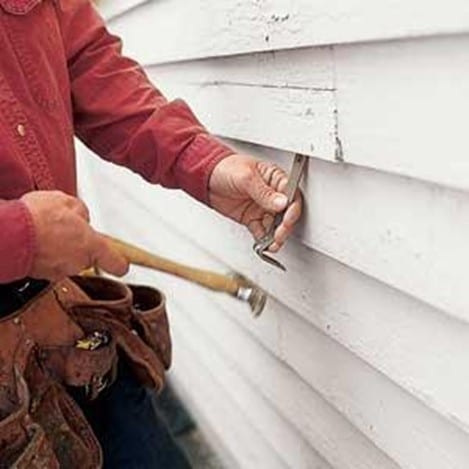
Image Credit: Pinterest [Photo by Webb Chapell]
Once you identify the damaged wood siding, it’s time to get rid of it. You can use a utility knife or a saw to cut the damaged clapboard after marking the exact spots with the help of a set square. Be careful when cutting because you may accidentally cut the builder’s felt underneath. Thus, don’t rush or apply too much pressure. Instead, use the pry bar precisely to break the loose part of the siding.
Hammer the pry bar but aim for tapping gently. Instead of pushing it aggressively, pull the bar towards you. Doing so will prevent damaging the rest of the clapboards.
Step 2 – Replace the damaged wood siding with a new one
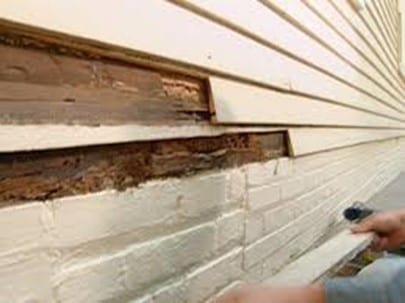
Image Credit: poemsrom.co
You are half way through! All that’s left to do is to replace the damaged wood siding which you have just removed. Attach the new siding by using stainless steel ring-shank nails for siding. Other types of nails may work, too, but the nails for siding are best suited for this particular task.
After all, you want to get this job done accurately. For nailing the new wood siding, you can use a hammer or a nail gun. In any case, make sure you avoid putting too much pressure while nailing. Then again, the neighboring wood siding is delicate and easy to get damaged.
Did this tutorial help you in learning how to replace wood siding? If so, then our mission is successful! But before you leave (and get down to work), don’t forget to give us your thumbs ups and shares.
That’s the only way we can reach to more people out there and be of assistance to the DIY community.
What’s more, if you have any questions, valuable suggestions, personal experience or tips which might be useful, we’re always open for your feedback.
Join us in the comment section below and let’s spread the good vibes together.
