Mostly, the decoration of your room and its look depends upon the placement and arrangement of your little things in the room. Often times we concentrate on the décor of our rooms but forget to arrange those little things because of which it looks pretty boring. We may also have the most expensive and elegant décor items that we brought from the market at some cost, but that is not comfortable enough to place the things and give some extra look.
Wall shelves actually, plays an important role in the decoration of any room or home. Building and adding shelves to your room or anywhere In your home can enhance the beauty of your home or room. These are also helpful in arranging the items those were the cause of boredom because of their bad arrangement.
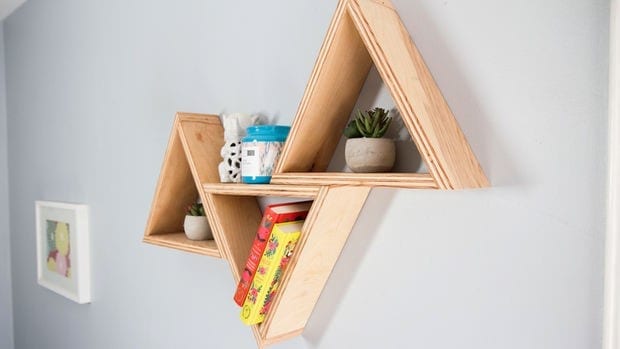
When you think about decorating your room, surely, you are looking for something more creative and unique. Building Shelves for your room can work best to make your room more creative and awesome. You can also put some different types of shelves on the wall of your room, but we are taking you to the idea of triangle wall shelving that you can build in cost less than $20.
DIY Triangle Shelves
Shelves play most important roles in the decoration and storage of any home/room. So in this idea, we are going to present you an amazing triangle shelves building. This pallet triangle shelf will look adorable in the room.
DIY triangle shelves are usually easy to build, inexpensive, crazy by their look, and also easy to detach and remodel as well. You can build them by using some pallets wood that you can get free of cost from any store. These handmade shelves are very handy to put in your home. These shelves can either be used as a décor piece or as a storage facility in your room. You would surely be surprised at the final product of your work because of its elegant look.
Turning some wood scraps into these triangle wall shelves is a really easy thing to do.
It’s a pretty easy project. If you think you can decorate any wall of your home with this triangle shelf project, it will be a fun to build this little project. I will not take more than a day to build this project.
In this project, we are going to show you that how can you build these triangle shelves. As like all other woodworking projects, building this project will also need some tools and materials. We are including the list of those tools and materials below. Collect all those supplies to your working place before starting the work on it. Have a look at the materials and tools list:
Items Needed for this Project
Here is the list of materials and tools you will need to complete this DIY woodworking project.
- A sheet of 2′ x 4′ 3/4″ plywood (This can be a Baltic ply or a walnut ply)
- Circular saw
- Handsaw
- Measuring tape
- Wood pencil
- Miter saw
- Wood Glue
- Screws
- Screwdriver
- Drill
- 1 1/4″ paddle drill bit
- Impact Driver
- Sandpaper
- Stain
- Chop saw
Take these tools and materials and let’s start the project.
Step by Step Instructions For How To Make Triangle Shelves
Step 1: Cutting and Furnishing the Plywood
I have ripped the plywood that I had over the table saw to make cuts to the desired measurement. Before cutting the plywood, you have to figure out and mark the measurements and dimensions that you want for the triangle shelf. I have decided to make cuts of 4″ by its width and 12″ by its length. And, I think so, this cut is, of course, big enough to place a few small items like books, candles, and some other tiny items.
The bigger cut you make out of the plywood the lesser you will be able to make out of that single piece. So, you should have to be creative and think about all these things.
Mark the dimensions of the plywood board and ripped it over the table saw to make a cut. Be sure to follow the pro tips that are given below. I have ripped 4-inch pieces out of that Birch plywood by using a table saw.

After ripping out these plywood pieces, I have taken them over to the chop saw to cut the miters and to cut every piece to its desired length. Before mitering these pieces, make sure that you have set the chop saw’s blade at the angle of 30 degrees.
Pro Tips
- Be careful while cutting the boards. Here, one thing you should remember that never use gloves when you are using a table saw in any woodworking project. And also you should make sure that you are wearing short sleeves, if not then make your sleeves folded up.
- Hold the board on the table with clamps, while cutting on the table saw.
- Before cutting, check twice the measurement of all the boards if they are same.
Step 2: Mitering of the Pieces
Bring all your pieces to the mitering, use your chop saw or miter saw for it. Set the chop saw blade at the 30-degree angle. Or, you can also use this by hand with a miter box, or a crosscut sled can also be used with the table saw for this purpose, but it is little difficult to do so. Also, there will be more chances of miss cutting the angle. I have used the chop saw for this.

Here, I want to recommend you that use some painters tape on the ends of the plywood boards where you are going to make the cut so that you can minimize the tear out that happens as the blade passes through it. If you are not using painters tape there are chances of chipping of plywood and also it will go to leave a lot of tears out as shown in the image below, and you don’t want that. So, use some painters tape to cut it out cleanly.

I have cut a bunch of pieces at the same length as I want to make a bunch of shelves.
I am using just a simple trigger clamp and a piece of scrap wood to act as a stop block on my chop saw.

I have cut a bunch of pieces at 12 inches and then the chop saw is set up. I can just cut a bunch of pieces and slide a piece down cut it with it over 180 degrees. Slide it down again and then continue the process over and over again.

Pro Tips
- While mitering the wood boards, make sure you have mitered all the boards at the same angle. Otherwise, it will cause issues further in the project.
- Dropping your miter saw blade quickly on the wood piece can be dangerous and it can likely result in a rough cut. So, give more few extra second to reach its full speed, and then lower the blade slowly.
Step 3: Assembling and Gluing
With these pieces I have cut, you can see in the image below how it’s going to assemble them. Now, I just cleaned them up a little bit with some 120 grit sandpaper. You can also use sanding blocks or sander to sand them.


After doing that, it was time to move forward for gluing the boards. I have a bunch of pieces and want to create a bunch of shelves in the short period of time. Without wasting the time, I want to move forward for glue and set up. Here, you have to use the glue that can dry faster, the product I have used, have the ability to dry out in 30 minutes only.
Place all the pieces in a line on the painter tape or you can use the masking tape, and put some glue on the mitered edges of these plywood boards. The purpose of the masking or painter taps is to use instead of using clamps. In short, the tape works as clamping for the shelves.

Set up the boards in a triangular shape as I did. Let it dry now.

After a few hours, when it gets dry, remove the tape. Be careful while removing the tapes because it tears up the board if you remove them carelessly
Pro Tips
- While making the cut with the miter saw, make sure that you have placed the board securely and don’t let it move.
- Hold the front edge of the miter saw and bend it down firmly.
- Make sure that you are using a sharp blade in your chop saw or miter saw.
Step 4: Finishing
Once you have built a triangular shape, now it’s time to sand and finish the shelves. I have used a 20 grit sandpaper for this. You can use a sander or sanding blocks too.

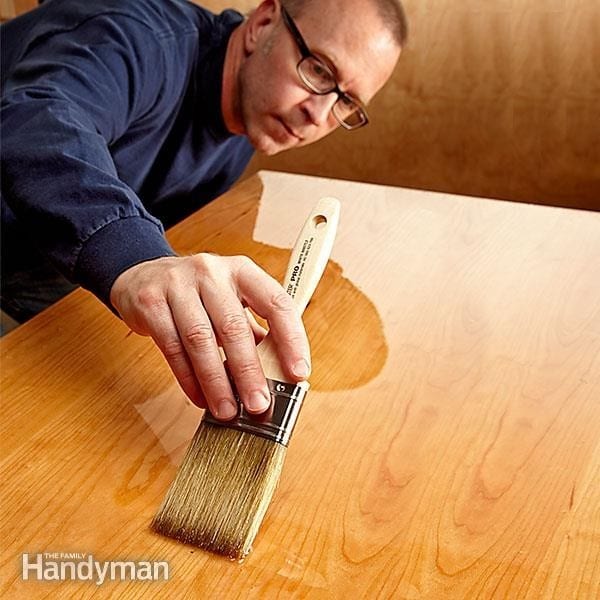
I am not going to paint these shelves nor using stain. This is because I have built them out of a little bit nicer Baltic plywood. I am going to give them a little bit of a tung oil finish. It helps you to kind of bring out some of the grain that you made them out of pine or if you made them out of MDF board or something like that. You can paint them, stain them, polyurethane them or whatever you want you can do.

The tung oil adds a contrast on the plywood boards which looks pretty awesome. You can also add a transparent varnish finish on them.
Now, here is the final product I have had.

To attach them to the wall, I just used some nails that I have put them downward at an angle. You can also use screws here instead of using nails. But it needs more effort and time.
Pro Tips
- If you are using clamps instead of tapes, you should use wax paper barrier while clamping. The strip of wax paper helps to separate the ply surface and clamps and prevents staining.
- Choose clamps that apply sufficient pressure to close the joint.
- Make sure you have placed the clams so tightly that can squeeze out surplus glue.
Youtube Video
These shelves are really awesome to add as a décor piece in your room. The unique thing about them is their versatility once built. You can modify these shelves with the design you want. You can build more than three shelves and consolidate all of them together. Instead of buying some expensive shelves, try to make something with your hand. And these shelves are obviously a nice add to your room.
If you didn’t get any point or understand any step of this process, you can watch a video tutorial of this project. A video tutorial can help in a better way to understand every step fairly and in detail. Also, some people prefer watching the video tutorial instead of having a written tutorial, if you are one of them, we are including a YouTube video tutorial for this project in the link given below. This will help you to illustrate all the steps and the process of building these shelves.
If you have any questing or queries regarding this project, you can ask us all of them in the comment section of this post. And if you have completed the project of building these triangle shelves, do share the pictures of your final products in the comment section of this post. You are always welcome to post comments about anything that is regarding this project.
