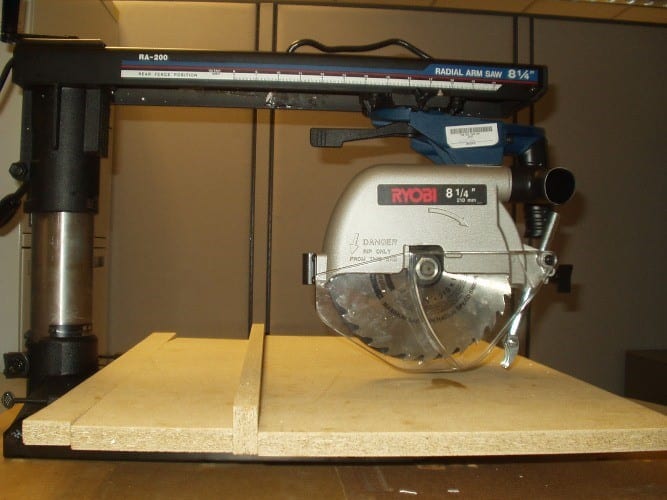
Woodworking is known to be much simpler to do when using a radial arm saw. A radial arm saw is one of those safe equipment that can provide you more accurate cutouts on your wood. It’s one of those equipment that woodworkers and some hobbyists have on their garage and backyard areas. It’s an extremely handy tool that can provide versatility when it comes to your tasks in cutting, as well as providing you an ease of means in creating any cutouts that you want.
But still, little do others know how to do the proper way of woodworking using the radial arm saw. Gladly, we are here to help you out when it comes to the proper usage of the equipment. For sure you will learn a lot when it comes to creating nice wood works for your craft or for your construction needs once you learn how to properly use the radial arm saw. Rest assured that after this lesson, you’re going to notice that it’s an easy task to use the equipment after all.
What will You Need?
What you will be needing for this lesson are not just materials. So be sure to take note of the following requirements before you go ahead and prepare for the steps that we will teach you:
- Radial Arm Saw – The radial arm saw is the top priority that you should always keep in mind when you start the lesson. Obviously, this is the main focus of the lesson. There are different brands out there, and each are set at different prices and specifications. Be sure to look carefully for the right one that suits your preference and budget.
- Wooden Hardware – Whether it’s a slab of wood or a huge piece of lumber, any type of wood is perfect. Just make sure that the wood is fit to be placed on the radial arm saw once it’s time to make some wood works out of it. So be sure to carefully look for a piece of wood that suits your preferences.
- A Wide Area – Lastly, a wide area is crucially needed once you start woodworking using the radial arm saw. The equipment is said to require a wide area such as a garage or a backyard as the equipment itself is large. This may be a disadvantage to some people out there, but you have to follow this crucial requirement for your task to be done in an efficient way.
Step by Step Instructions on How To Use a Radial Arm Saw
Here are the main steps that you need to follow when properly using the radial arm saw:
Step 1: Study the Product

The safety procedures of using a radial arm saw is very important as injuries can still happen if you have a lack of knowledge about the product. The radial arm saw is known to have a lot of complicated setups, along with various accessory attachments that you might want or need to add to accomplish your task. This means that you need to learn everything when it comes to the safety procedures of the product first before you proceed with the actual work. Doing this is actually simple since you just need to rely on the product’s manual to gain full understanding about the product’s features, specifications and accessory installations.
Step 2: Wearing Safety Gear

Safety procedures when cutting is also needed, aside from learning how to be safe when the product is being installed. You need to wear some safety glasses/goggles to protect your eyes from the saw dust. You also need some ear muffs or any other hearing protection as the cutting procedure can cause a sharp and loud noise. The right clothing for cutting wood is also needed for you to feel at ease when cleaning yourself afterwards.
Step 3: Difference Between Pushing and Pulling

The saw blade of the equipment is made to cut through the wood with ease. But you have to learn the fact that you need to do a forward motion once you align the wood to the teeth of the saw. However, the physics of the equipment and the wood shows that the sawdust will spread throughout the area due to the fast speed of the machine once it cuts down the wood. This means that if you push the wood to the teeth, the friction will cause the sawdust to go to you. So be sure to wear some mask and goggles if you’re comfortable with pushing the wood. Otherwise, be sure to pull the wood instead. However, it will take a bit of practice for you to do it comfortably.
Step 4: Table Replacements
The surface, or the table of the radial arm saw is replaceable. This is actually inexpensive, and is guaranteed to be very durable. However, if you’re going to leave some spare tables on the garage, make sure that it’s always kept dry to prevent damage. These tables don’t splinter when the saw blade cuts through it as well. To replace it with your spare surfaces, be sure to remove the bolts located on the metal base of the equipment in order to remove the table. Afterwards, place the new table, and attach the bolts once again.
Step 5: The Correct Depth of Cut

When making a decent cut, make sure that you set the depth at less than or equal to 1/4 of an inch below the edge of the cutting table. This will provide you the right way to cut down the wood, and at the same time protect the table from getting damaged. Following this tip can also create a cleaner cut for an excellent finish.
Step 6: Cutting Safely
To cut safely, you need to lean over the saw in order to properly see the line that will be used to cut the wood down. However, it depends on the machine and what your dominant hand is as some machines are built for right-handed or for lefties. So be sure to decide well on the right equipment that you’re going to buy.
For a safer and more accurate way to cut, you can also use a combination square or a straight edge as a guide in order to determine the result that you really want to accomplish upon cutting the wood.
Step 7: Cutting Dadoes
Dadoes are excellent for connecting two pieces together. It’s perfect for creating shelves and closets, too. Dado cutting has different methods, but the best one is the stacked dado method. All you need to do is to avoid cutting any deeper than 1/3 of the area where the dado will be received. Also, there is no need for the dado to cut the entire length of the stock wood. That’s why a table is needed for this purpose, aside from using a radial arm saw. Dadoes are essential in the radial arm saw methods. So that means you must always study how to cut dadoes.
Step 8: Cutting Half Lap Joints
A half lap joint is known to be the most basic type of woodworking that you can ever encounter. Half lap joints require a two inch thick stock of wood, and is excellent to apply for desks, tables, and drawers. You will need a dado set on the radial arm saw in order to successfully. If you have the right height setting on your radial arm saw, cutting half lap joints can be quicker than you expected it to be. Some say that mastery of cutting half lap joints can help you create very tough drawers that are fail-proof.
Step 9: Double Stacked Dado
A stacked dado blade set is one of the most versatile equipment that you can use on your radial arm saw. It’s made of two saw blades and some chippers that are fitted between the two blades. It’s perfect for creating various furniture, and is a recommended tip for everyone. Thus, this is not just an option. When positioning the stacked dado set on the arbor. Make sure that the arbor is long enough for the blades to be properly installed. Thus, a longer length is needed for the arbor.
Conclusion
Enough practice is also the best tip that you need to consider when using your radial arm saw along with these tips that we mentioned. We do hope that you learned a lot from this so then you can finally go to your backyard or garage in order to get the job done. If you’re still confused about the tips, you can always leave a comment for us to help you ever further.
