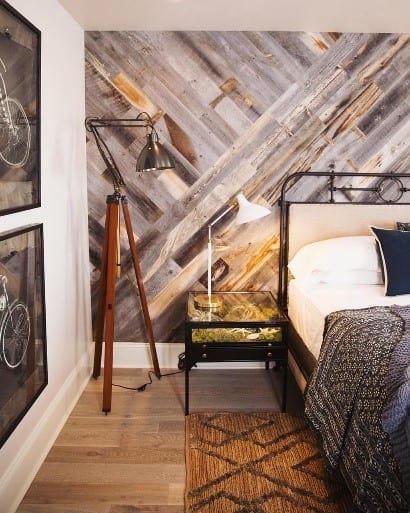
If you have been thinking about installing a wood accent wall, then you are at the right place! We are sharing a step by step tutorial which will show you how to install a wood accent wall easy and confidently. Personally, I must admit I was strictly against opting for a wood accented wall.
Thankfully, my husband is stubborn, smart, and creative. Plus, he knows me so well that he was perfectly aware how much I would fall in love with the new wood wall in the living room once I get to see it face-to-face as opposed to browsing the web.
What You Will Need To Follow This Tutorial
Advanced level: Installing a wood wall
- Wood Planks
- Stain
- Rags
- Paintbrush
- Polyurethane (optional for a smooth and durable finish)
- Stud finder
- Carpenter’s level
- Tape measure
- Pencil
- Miter saw
- Nail gun
Beginner-friendly level: Installing a wood accent wall
- Wood adhesive
- Caulk gun
- Hammer
- 2” finish nails
- Saw
- Pencil
- Level
- Rag
- Wood Planks
A Quick Tip
Although both of these 2 ways to install a wood accent wall are easy to accomplish, the advanced version will require a set of power tools and it aims to give you an idea of how you can cover a full wall.
The latter version is better-suited for accentuating a medium-sized wall by using only simple tools.
Step By Step Instructions: Installing A Wood Accent Wall
Advanced Version
Step 1 – Prep the wood planks and the wall for the installation
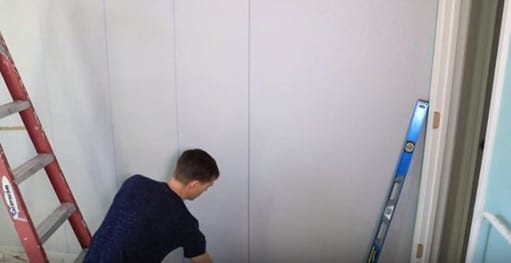
Image Credit: Handyman Startup [youtube]
If your wood planks are not already stained, start by applying a good base coat by yourself. Go over the surface of the wood planks with a paint brush. Quickly wipe off the excess quantity of stain with a clean rag and repeat the same step for the rest of the wood planks. You may need to apply a second coat of stain depending on the effect you want to achieve.
Mind that it’s best to protect the finish. Seal the coat of stain with polyurethane. Let it dry out completely.
Meanwhile, proceed with measuring the walls. With the help of a stud finder, mark the wall from the top to the bottom.
Next, measure the wood planks by leveling these against the wall. Afterward, cut the excess parts of the wood planks on a miter saw.
Step 2 – Start placing the wood planks by nailing them to the wall
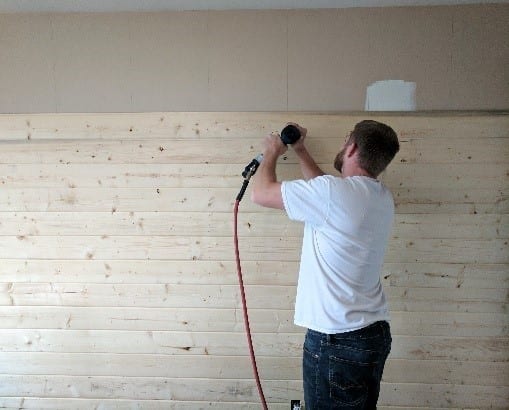
Image Credit: joyfullygrowingblog.com
You are almost done! All that’s left to do is to position and secure the wood planks with the help of a nail gun. You need to tack at least 1 nail for each stud. Depending on the surface you want to cover, you may need to equip yourself with a healthy dose of patience.
Beginner-friendly Version
Step 1 – Acclimate the wood planks and prep the surface of the wall

Image Credit: Centennial Woods [youtube]
For a start, acclimate the wood planks by taking these out of the boxes and letting the wood to rest for 3-5 days. Clean the surface of the wall with a clean rag. Mark the area where you are about to attach the planks with the help of a pencil and a level.
Step 2 – Attach the wood planks to accentuate the wall

Image Credit: ed.pngtree.com
Apply a layer of glue on the wood plank you are about to install. Place the board on the reference line you marked with your pencil. Afterward, secure the wood plank by hammering at least 2 finish nails at each corner. Proceed with the rest of the planks until you achieve the design you want.
How do you feel at the end of this tutorial? Did we help you learn how to install a wood accent wall? Hopefully, we did! After all, if we managed to inspire you to install the wood wall by yourself, then we have managed to fulfill our purpose.
We want to help people master the best techniques when it comes to DIY working with wood (and not only!). Help us spread the positive vibes by liking and sharing this article. We’ll be happy to hear more from you in the comment section below.
