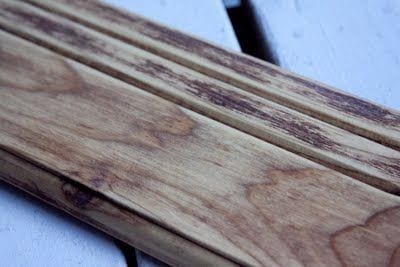
Staining stripes can sound like an impossible task to do if you’ve never done it before. However, anyone who has done it before will tell you that it’s quite easy once you get the gist of it. With a couple of tutorials and blogs like these, you will know how to stain stripes on wood in no time. However, you will also have to practice in real-time too. But having proper information beforehand will allow you to get everything right as much as possible in the first go.
Tools You Will Need
Starting any project without the right tools can waste a lot of your time. Therefore, it is important to make sure that you have all the relevant tools handy before you roll your sleeves up. For staining stripes on any piece of wood, you will definitely require the following basic materials and tools.
- A panel of wood (Oak Plywood or anything)
- Wood Stains (Colors may vary)
- Blue Painter’s Tape or Frog Tape
- A Pencil
- Straight-edge tool or a ruler
- Sandpapers
- A cutting tool (Saw)
- Sponge Brush
When gathering these tools, you will also get a good idea of how to stain stripes on wood. The kind of wood stain that you want to use is up to you. However, you should make sure that the wood stain is compatible with the wood that you will be using. Here, let’s suppose that you will be using a species of plywood for this project. Then, you can make use of Rust Oleum’s Ultimate Wood Stain. The colors can be up to your aesthetic preferences. There are a lot of them available from Sunbleach to Special Walnut.
Step 1:
Before staining stripes, you will need to finalize the panel. First, cut the portion of the wood that you need to stain. After that, you will have to use sandpapers to get a very smooth surface. However, this step is optional as you don’t necessarily have to stain a neat and tidy panel. Or, you might already have a panel with you.

Step 2:
Now that you have the panel ready, you can use the pencil and the ruler to draw neat lines of stripes. If you don’t care about symmetry or getting a particular shape with the stain, then you wouldn’t have to take this step. However, most people go for lined stripes. And thus, you will have to draw the stripes with a pencil on the wood with proper measurement. Make use of the ruler or a straight-edge tool to get accurate lines. The width or the length of the stripes can be decided by you. It’s about how creative you can get. Although, if it’s your first time, try to stick to wide narrow stripes, so that you can easily complete the project as neatly as possible.

Step 3:
Tape off the area that you don’t want to stain using Painter’s tape or Frog tape. Many people have complained of bleeding when using frog tape or similar tapes. Some of you who will be doing this for the first time may be wondering, what actually is bleeding? Bleeding is when the paint or stain leaches outside the boundaries set by you. This ruins the shape of the panel that you are staining. To prevent this, you should not stain directly on the tape. Stain the areas that are bare and leave some margin near the tape. After you take off the tape, you can use a soft brush to stain the areas that were left.
If you are going for multiple stains or shades, you should use tapes of multiple colors. That way, you won’t get confused about the color of stains that you will be using at different spots.

Step 4:
Once the aforementioned process is done, you can wipe the stain off. After that, take the tape off. After the first stain that you applied dries, you can tape off more stripes. The number of stains that you want to use will depend upon your expertise and skill. Once you get acquainted with staining stripes and painting wood, you will be able to get better aesthetic looks. Moreover, it will be easier for you to use multiple stains as you complete more and more similar projects.

Step 5:

Once you are all done with the staining process, you can let the stains dry overnight. Make sure that the panel is dried in a place where moisture doesn’t reach it. If the conditions are overcast, it’s better to let the panel dry inside your home. Also, make sure that you do not touch the stains when they are wet. That way, the aesthetic look can be ruined.
Stain striped wood can be used for many purposes. After all, it’s nothing less than art. You can make stained striped wood panels for the treehouse that you are building for your kids. Alternatively, you can make chairs or tables from it. The things that you can do with stained wood are endless. Moreover, as it is an art, it can be therapeutic for you. It’s an activity that will require you to use your motor skills and get a breath of fresh air. How to stain stripes on wood is not about learning but the experience of it. It will also allow you the opportunity to work outdoors – a decent change in the scenery for those who are constantly staring at screens.
Conclusion
You don’t really have to stain stripes on wood for utilitarian purposes. However, you can still do so. But it’s also a nice hobby that you can pick up. All in all, learning about how to stain stripes on wood will help you gain the confidence to actually do it physically. Yet, it’s important that you make sure to keep yourself safe while handling all the tools. While using the saw, wear gloves and all the protective gear that you can find. Moreover, make use of wood stains that do not give out toxic fumes.

