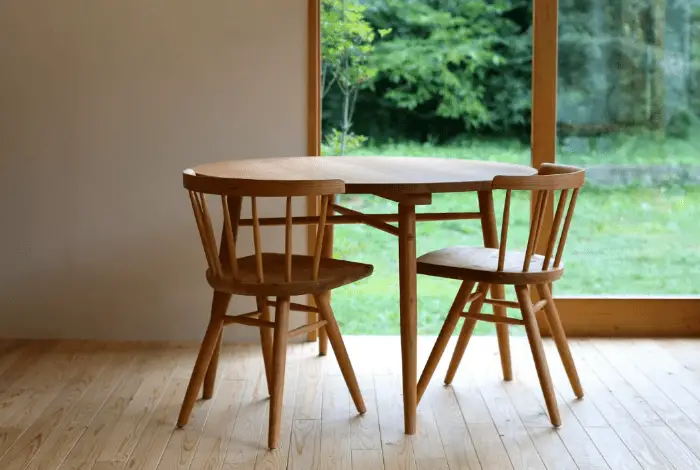
Wood crafting an amazing art that takes a lot of hard work, continuous practice and great creative mind to master. Ishitani furniture is a furniture house, which is famous for its beautiful and elegant furniture and crafts work. This tutorial is based on the making of a round table.
This sophisticated, stylish looking roundtable can be a perfect match for the dining room, cafes, restaurants and many places. So the demand of these is much in the market.
If you are an amateur in wood crafting and want to make stylish and beautiful furniture and arts and crafts items and make your place in the market for furniture making this tutorial can be a great help to you.
This tutorial is of professional level and for this, you must have wood crafting machinery and carpentry tools and a separate workshop or space and you must have experience in working with the machines and of furniture making.
The design is the private property of the company so mention credits to the company and doesn’t market it with your own name.
Take the best quality wood for the table to ensure strong and reliable item which will be beneficial for customer trust.
Step By Step Instruction For How To Make A Wooden Round Table
Please follow the tutorial with full attention to make a perfectly professional looking round table
Step 1: Cutting the wood slabs
First, we have to cut 4 rectangle boards
Now align the boards as shown, find center and then by using pencil scale and screw draw a 70-degree circle

Drill 2 to 3 pocket holes on each side of the board, make sure pocket holes and screws will end up inside the circle.

Now cut a board wider than your router, you can use plywood for this now drill a hole in this jig screw it in the center and place the router at the circular end of the jig to cut the circular top shape


Pro Tips
- For having straight, smooth cut using two feather boards is a better option. and also make the molding extra long for serving as a handle and easy cutting and when you have cut through the router you can cut the extra wood from the end.
- thin and narrow stock can easily chatter so when cutting it put it on a wide board cut it with router and then cut the final shape in the end by table saw
- for smoother ,accurate and perfectly even cut its better to use spiral bits rather than straight bits so use up cut spiral bit is best suited while cutting solid wood and down cut spiral wood is best suited for cutting plywood and melamine and for making chip free dados
Step 2: Making the base frames
Once the top is ready we will work on the base frames which will hold the top of the table
We will make two crosses like frames a bigger one on which the top will be placed and a shorter one below it giving support to hold the legs firmly together
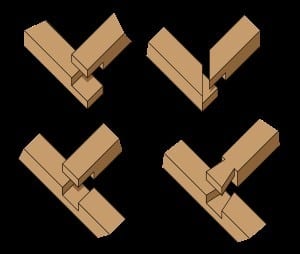
For this, we will take two wood beams and from center of them make a cavity like this

Check them that they completely fit into each other in a cross manner
Do the same process to make a similar frame but smaller in size
These will be your two frames

The center of beams must be precisely measured and then cut the cavity from the center of both beams to join together, if all the sides of the cross formation are not equal then the table will not be in symmetry
Drilling holes should not be a tough task, but it can be when you need to drill so many. Precision is the key here. Remember to setup the stop blocks properly to make the exact holes in the first attempt. Read more tips below to be able to do this task smoothly.
Pro Tips
- Chisels have long blades squared off at the cutting end. Some chisels have capped handles along with metal, so that can be driven with the hammer, others should be driven with a mallet or with hand pressure alone. U can move the bevel of chisel up and down for the kind of cuts you want to make like deep or shallow.
- Chisels are used for making grooves or notches. In shelf assembly. They are most often used in for the cutting of joints. Sold individually or in sets, chisels commonly come in 0.25,0.5,0.75.1 inch sizes.
- For controlled depth and width slicing of wood, planes use chisel blade set put into a metal base. While the block plane is small enough and can be easily held with single and is for fine shaping cutting and shaving end grain.
Step 3: Making and shaping the legs
Now take 4 beams for legs and drill holes into them for placing the lower frame and drill holes in your main frame where you will fix the top of your legs
For the legs to be circular first shape them by drawing and circle and making a circular beam and then shape them in your desired way
Shape your legs like this

Pro Tips
- Before we can assemble the pieces we have to do scraping, shaving, grooving and smoothing which is necessary so for that shaping tools and techniques are used.
- Use short and smooth strokes to remove end grain. To avoid splitting board edges, move the plane inward from the edges to the center of the board. Using Short planes for large surfaces is not a suitable choice.
- The shorter planes have greater tendency to ride up and down with the irregularities of the surfaces rather than shearing them off.
- By bridging the small bumps, a larger plane can easily smooth the entire surface. The jack plane is about double the size of a block plane. for smoothing longer surfaces use jack plane as it, always cut with the grain.
- Files and rasps are abrasive tools that remove even the small amounts of material, they are best for smoothing and shaping cuts or edges. Very fine-toothed files are usually used for filing any metal and smoothing of the wood.
- Coarser rasps are specially designed for rapid abrading of the wood. They are Available in several shapes and are useful for planning end grain and convex surfaces. They are very good on the hardboard and particle board.
- The electric router can perform as an electric chisel or a woodcarving knife or a plane. It can cut all kinds of grooves such as dadoes, V-grooves, rounded grooves.
- The router can round and bevel even the edge of a board or finish the edge of plastic laminate in a single pass. If it is used with proper cutter and template, it can easily whisk out hinge mortises within a minutes.
- You’ll need a router with at least one hp if you want to make dadoes like deep cuts.
- Because it’s a powerful, high-speed cutting tool, the router must be carefully set-up and practiced. Using one properly can be demanding you must strictly follow the manufacturer’s instructions and guidelines.
Step 4: Making the main structure
Once the legs are shaped shape your smaller frame also like this, now place all the legs on the four holes on each side of the bigger cross or bigger frame and then fix the shorter frame below placing it in the holes in legs
The structure would look like this

Hammer each connection so that each connection is perfectly screwed with each other and fixed.
Once the structure is perfectly and strongly fixed cut out the overhang edges from each side

Pro Tips
- Wood is very strong in one direction than other materials so can’t be compressed easily. Wood is also very resisting to pulling tensions, but it can be bent and twisted. To make a wooden building strong and rigid as much as possible is by arranging the wood to be used in its strongest dimensions.
- For rafters to be strong a longer lumber is required but it can be expensive so engineers discovered that by inserting compression members within the strength can be achieved
- Trusses like that are not hard to make. But the main difficulty is to cut precise angles on the ends of the members so they can perfectly fit together tightly. A miter saw or motorized chop saw will be very efficient to use in this case.
- The rule of thumb for designing a truss is to keep the area contained within each of the triangles equal.
- All the buildings even the largest buildings, using 2×6 for rafters and center post, and 2×4 for cross-tie and other compression members. They can be Fasten with plywood gussets, glue, and screw.
- Do not use mending plates of sheet metal, although they look like plates that hold commercial trusses together but they are incapable of holding. Commercial truss plates are usually pressed into place by a 30,000 psi press. They cannot be placed by hammering them into the place. The ones available in the hardware stores are weak enough to be hammered in, but they won’t hold against the compressive strain that is on a roof.
- Gussets are good working and can be cut from ordinary exterior grade plywood. Gussets must be made big enough to cover at least eight inches of each frame member at each joint. They can be Glued in place with or some other construction adhesive and can be fastened in place with 3d or 4d box nails, two inches apart, in a manner of wiggly lines down along the edges of each truss member.
- Opposing gussets should be nailed in an opposite pattern, to keep nails from opposite sides separated from each other. Box nails are thin enough so they don’t split the wood.
- If you are using common nails, set them at least three inches apart, and make the gusset large enough to accept the same number of nails.
- Do not use drywall screws. They will not hold and will snap if the glue doesn’t hold them
- Let the glue to dry completely overnight before mounting the truss. Firstly make one truss, then after that make a jig of plywood so all your trusses will be identical. The jig can be made of plywood that you will be using for roof sheathing, so it will cost nothing.
Step 5: Staining and Painting
Now fixed the top on the structure and secure it completely after that sand the table completely and finely smooth each and every portion of the table and check that there are no splinters or uneven plane on the table
Once the table is completely smoothen apply stain on it and then finish it completely

So finally your table is ready to be packed and delivered to the market
Pro Tips
- Use a dust mask or respirator to protect your eyes and skin while staining and finishing the table
- Always test stain on a piece of scrap wood before starting on the furniture.
- So that the stain doesn’t leave blotches on the wood, apply a thin coat of wood conditioner by using an inexpensive brush. Let the conditioner about 15 minutes to dry before applying the stain and don’t do sanding on it as there will be no need.
- Apply the stain using a brush or rag, depending on preference. When using a staining brush, working both with the grain and against it is ok. Neatness is not required just coat it nicely and evenly.
- If the stain needs to be darker, go back over and apply more stain.
- The stain only provides color; you will still have to use the finish for better protection.
- Stir the stain can properly before opening it
- For a darker tone, apply two or more stain coats.
- Use a good quality polyurethane finish material for long lasting protection of your coffee table.
- For protection against water and chemicals, use clear finishes.
Conclusion
I hope this tutorial is helpful for you, you can share your views in comments also recommend this tutorial to friends and your professional contacts on social media by clicking the share button below
