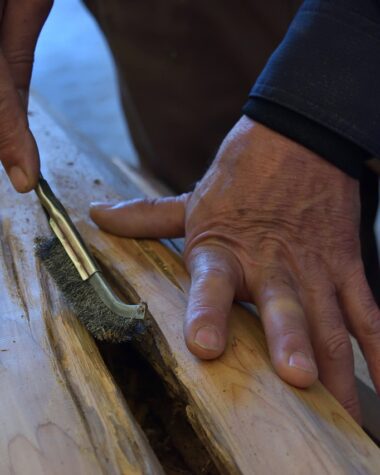
Nobody appreciates rough wood edges. They are dangerous and ugly to look at. But do not worry. There are many options available to round off these pesky edges. Some of these options include – using sandpaper, using a woodworking file, using a chisel and many more. In this article you will learn how to round wood edges with a Dremel.
But first, you should understand the hazards of rough edges.
The Need to Round Wood Edges
Before learning how to round wood edges with a Dremel, you should understand the reason why we need to round the edges. There are many reasons why you should round the edges of wood. Some of them have been discussed below for your consideration –
- If the wood edge is uneven, it can come in contact with skin and scrape the flesh. This will lead to injuries, especially among children who tend to run or bump into things.
- When it comes to painting or varnishing, the rough edges become a problem area. In most cases, this leads to an uneven paint or varnish job.
- The durability and reliability of rounded edges is more than rough edges, which tend to chip away over a period of time.
- Rounding the rough edges protects wooden equipment and tools from getting stuck or damaged.
- If the edges of wood are rough, they can get stuck in your clothes and cause them to tear.
- The aesthetics of your finished product will suffer due to the roughness of edges. Smooth and evened out surfaces are more appealing to sight and touch. Rough edges reflect shoddily executed work, which no one will like.
Since you understand the requirement for rounding wood edges, it is time to learn how to round wood edges with a Dremel.
How to Round Wood Edges with a Dremel – Instructions
Using a Dremel to round off the edges of wood is an effective method. However, this method will round off wood edges in an aggressive manner. It will still work though.
For this example, Dremel’s Plunge Router has been used. To learn how to round wood edges with a Dremel, please read the steps mentioned below –
Step 1: Collect all the Materials you will need

First, you should have your essential tools and equipment with you. Keep your wood in place. If it is a wooden sheet, then lay it out flat with proper support. If it is a furniture item, then place it carefully to ensure it does not topple over. Also, bring in your Dremel and connect it for use.
Step 2: Select the Router Suited for the Job

There are different types of routs. One type allows you to create grooves, for rounded cuts and smoothening. Another kind, called a cove, is used to round off surfaces. Choose the one that suits your requirement (in this case, rounding the wood edges). An important point to note here is, different routs need different routing bits to work effectively.
There are many routing bits available. You have the straight bit, the piloted bit, the v-groove bit, the keyhole bit and many more. For the purpose of rounding off wood edges, the piloted rounding over bit is the right tool to use. Attach it to your Dremel rout.
Step 3: Get your Dremel equipment together

To transform your Dremel tool into a tool used for plunging, attach the plunge router to the Dremel. This will turn the Dremel into your plunge router. Now you will not require an additional plunge router to do the job as your Dremel can now perform the same task. This attachment allows the Dremel to be used for routing circles, cut symbols and signs and also round off edges.
Step 4: The Proper Method of Holding the Dremel Router

Your Dremel router setup is ready with the correct rout and routing bits. Your attachment is in place. It is now time for you to learn how to round wood edges with a Dremel.
Hold the Dremel slanted slightly, when you turn the tool on. The reason for this is, the router bits tip is not what actually cuts the wood. It is the bits’ side part which does all the cutting work. When you hold the Dremel with a slight angle (a tilt), you form a slide in the wooden sheet. After you cut through the wood all the way in, the router can then be held upright.
Step 5: Take it Slow and Steady

A common problem with using tools like the Dremel is wood burning. The friction of the tool against the wood (caused by the cutting, chaffing and rounding action) heats up the surface. To prevent this from occurring, you should pause from time to time and check if the wood is burning. Try to go slowly. A slow speed is particularly necessary for hardwoods- take the Oak wood for example.
Another thing to consider is RPM (Rotations Per Minute). Calibrate the RPM of your Dremel tool before commencing work. Different materials require different RPM. Check the instructions manual in the packaging to learn recommended RPM for various materials. Also, before you begin rounding the wood edges, try to practice on a piece of scrap wood. This will prepare you for the real task.
Important Precautions
Now that you have learned how to round wood edges with a Dremel, it is necessary to know about the precautions before you get to work. Please follow these safety instructions –
- Wear a pair of gloves to protect your hands. These gloves will ensure that your hands remain clean. They will also protect your skin from splinter-related injuries.
- If you are working at home, ensure that your children and/or pets are safely way from your work station. Not only can they get injured by the sharp objects around, they can also distract you. Any distraction during woodwork can lead to accidents.
- Wear a pair of protective goggles. Any kind of woodwork, be it cutting or rounding, involves the release of saw dust into the air. You need to keep your eyes protected at all times.
Hope you now understand how to round wood edges with a Dremel. Please follow the safety precautions before getting to work. Happy woodworking!


