11) Reclaimed Wood Pallet Wall
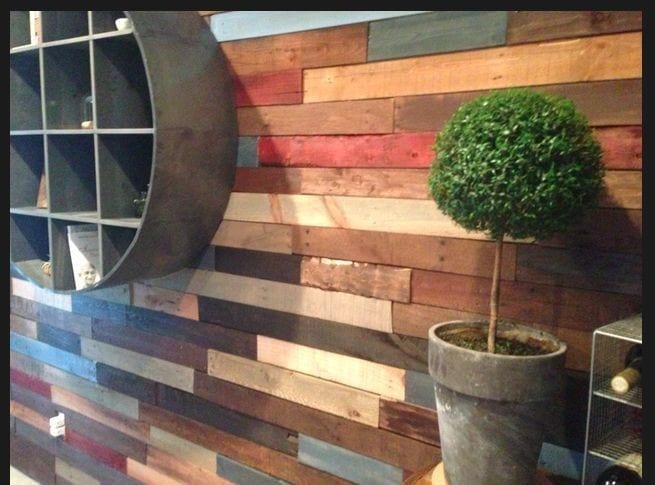
Image source: https://www.hometalk.com/1998234/pallet-wall
I had since been in love with home upgrade ideas even before I first ventured into the real deal. What is great about this DIY project is the fast output yield. With the idea laid in, put up and plastered, your kitchen and living room are sure to liven up. This necessitates, even more, the involvement of repurposed wood pallets, not newly purchased ones.
The stain color is a most organic element in facilitating a rustic, modern finish in your wood wall. You can even improvise from this one by involving red to brown transitioning colors. Whether you are cutting the wood into tiles or planks, it should all work. The stain color grounds the whole décor tone into an earthy, organic feel.
Most wood qualities are believed to be determined through time. So, the effort of using reclaimed wood should tell you if the wood has passed the test of time. A basketful of factors- molds, termites, stains potentially act as determinants of the wood’s resisting power. In certain cases, too, stains brought by mold add a significant artistic statement to the wood. The reclaimed wood pallet wall DIY project is bound to impress you with economic wow and an accurate heads-up on used wood pallet qualities.
Pallet wall designs can come in many sizes, textures, shapes, patterns, figures, hues, etc. But a most recommended toning for this rustic material is light to cool colors. Apparently, such tone can brilliantly justify the essence of rustic decor. Using bright colors, on the other hand, may also work well if combined.
https://www.hometalk.com/1998234/pallet-wall
12) Star-Shaped Wood Wall Art
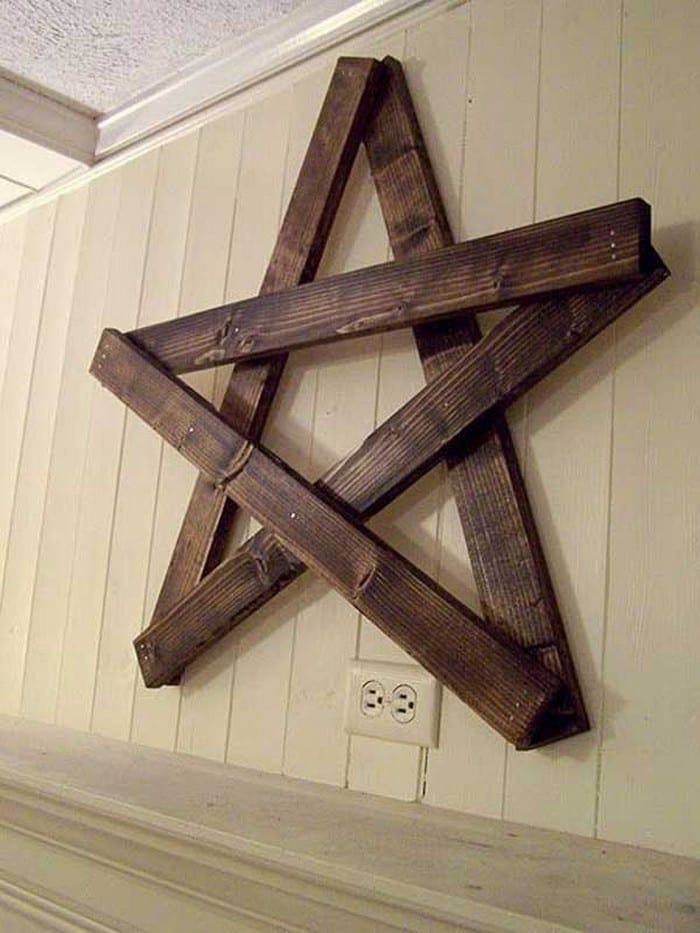
Image source: https://www.diys.com/pallet-wall-art-ideas/
The star-shaped wood wall art competes with being the trendiest, catchiest, most-sought partition design in your home corners. And as was expected to turn out, the star-shaped wood wall art proves to be a convenient design structure. You can even do it all by yourself without the DIY pros. Imagination and the courage to try are the forces needed to give life and light to this project!
Besides functioning as a partition, the star-shaped wood wall design can serve as a shelf for light props/materials. If you are using thick lumbers, then it can likely serve as a shelf for any light materials. Some pens, toys, paper pads, books, etc. find their peace in the unit. By all means, you can either beef up or simplify the star structure depending on how you shape it in your mind.
Wood planks for the DIY project can be any used wood. This wood lumbers should be able to withstand nailing pressure and sawing. If you are lucky enough to find a sturdier wood, you can even rework the star model to certain variations. There are endless possibilities for this one. As long as the artistic passion is intact within, you are bound to come up with even better results; better than the star.
The first benefit of the star design is uniqueness. It is indeed so unique that it can instantly warm up areas in your home. Your kids should be the first admirers of the star pallet design. Other benefits of the DIY item include- convenient template designing during holidays, movable frame style, light item weight, a natural wood color that need not any enhancements.
13) Arrow Wood Pallet Shapes
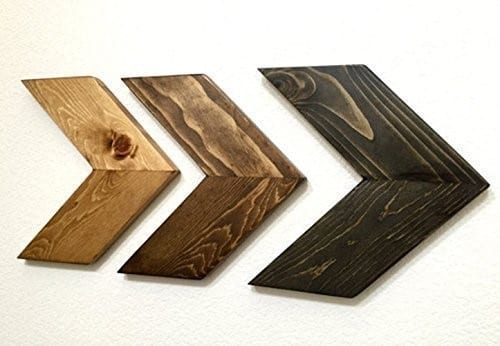
Image source: https://www.amazon.com/Arrow-Chevron-Rustic-Wooden-Shabby/dp/B075RS8SW8
Shaping wood pallet for wall placement is undeniably fun, economic and practical. Wood wall shapes add so much lightness and thickness in your space- may it be a home or office. The chic arrow shape design creates an illusion of depth, weight, and story in your space. This particular design is sheer simplicity, beautified.
This DIY project is particularly customizable. Cut in bricks, tiles, planks or lumbers, the wood source can be any abandoned platform outside your home. The size, symmetry, and blocking of the arrows will highly depend on your artistic judgment. As mentioned earlier, you can customize the arrow designs at par with the general tone in your home.
What home décor should best match the wood pallet arrows? It actually fits all décors. Common décor staples for the arrow design include- Modern (Rustic), Scandinavian, Minimalist and the Mid-Century Modern. These are the best décor statements that justify the arrow design. But it does not mean the rest of the decors do not. With artistic confidence, you can still apply the arrow design in your home whatever its décor.
Realizing the DIY project is basic and simple. That is the reason why the design is popular across the web. Builder bloggers are the first to attest to its wood work’s simplicity. Subject-wise, the arrows can be treated as a focus in an area or, vice-versa. Your decision on this is best guided by the home section’s overall narrative. Narrative, in this case, refers to your space’s singular thematic feel.
https://cherishedbliss.com/diy-wooden-arrow-tutorial/
14) Wood Pallet Wall Paint
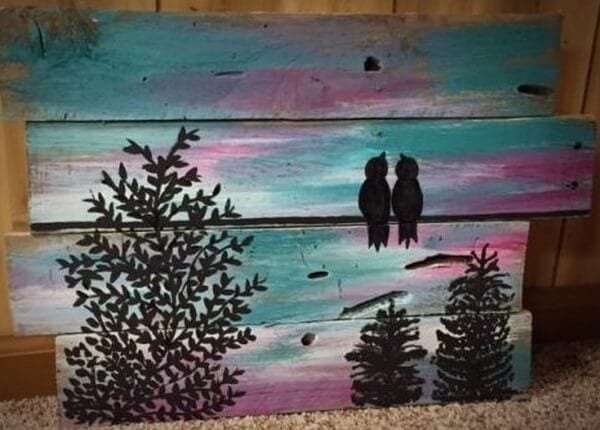
Image source: https://www.palletsdesigns.com/pallet-decorations/diy-pallet-painting-ideas-with-unique-decor/
A great blast of color on the center, a shade of blue on the side and voila- you’ve got a painting! No. You’re not buying anything. You are doing it on your own. What have you got in there? A blank space in the room, a piece of wood you think you have no use of, a few spray paints, a brush of creativity and a wild imagination. With these, I’m telling you: you can come up with a brilliant wood pallet wall paint!
Cleaning the wood surface is pre-requisite to painting. Applying leather finish after holds your color to an intact quality. Leather finish initially acts as the wood’s protecting layer. Besides this, the coating also makes way for a smooth color-application process. You may have to tone down the coating application a bit though since nobody is exactly sure as to how these chemicals react to each other.
What is great about wood pallet is that it can serve as a canvas. It works even better than an actual canvas in a certain circumstance. Hanging the artwork outdoor for instance should require the particular strength and durability only a wood can provide. Coated with a protective layer, your painting on wood is guaranteed to survive heat, rain, and humidity.
Wood painting requires an isolated attention for learning and development, especially if you are a novice painter. On the other, it should be easiest if you are an experienced painter. The wood painting craft covers many DIY outputs like wood signs, wood letter blocks, etc.
https://www.completely-coastal.com/2014/07/diy-abstract-sea-painting.html
15) Headboard
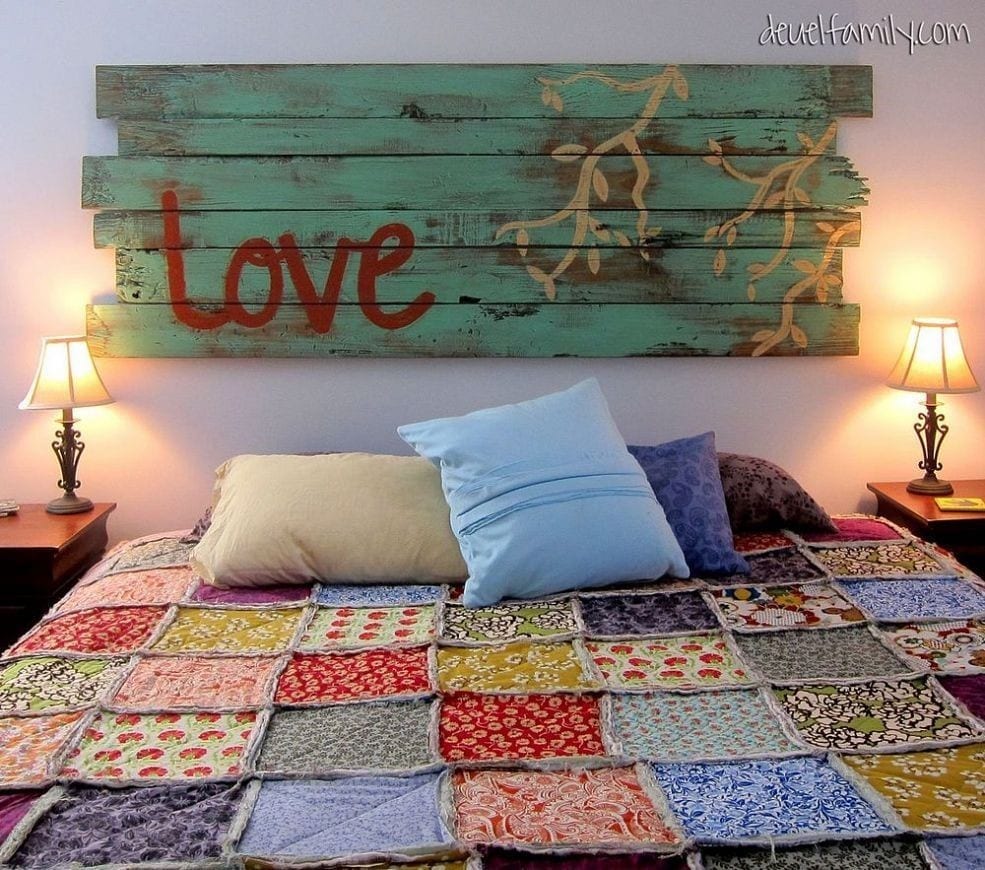
Image source: https://www.pinterest.com/pin/141652350752679603/?lp=true
While this particular DIY project does not actually yield a wall design, it still deserves a good look into. This is the type of bedroom romantic touch-up you do not know you need until you have. Suppose your bed already has a built-in headboard, you can still push through with a small wood piece instead. Small wood pieces/block can be attached into the built-in headboard. On the other hand, a bed without a built-in headboard requires a different effort altogether. The DIY options will brief you with the basic steps in completing the headboard.
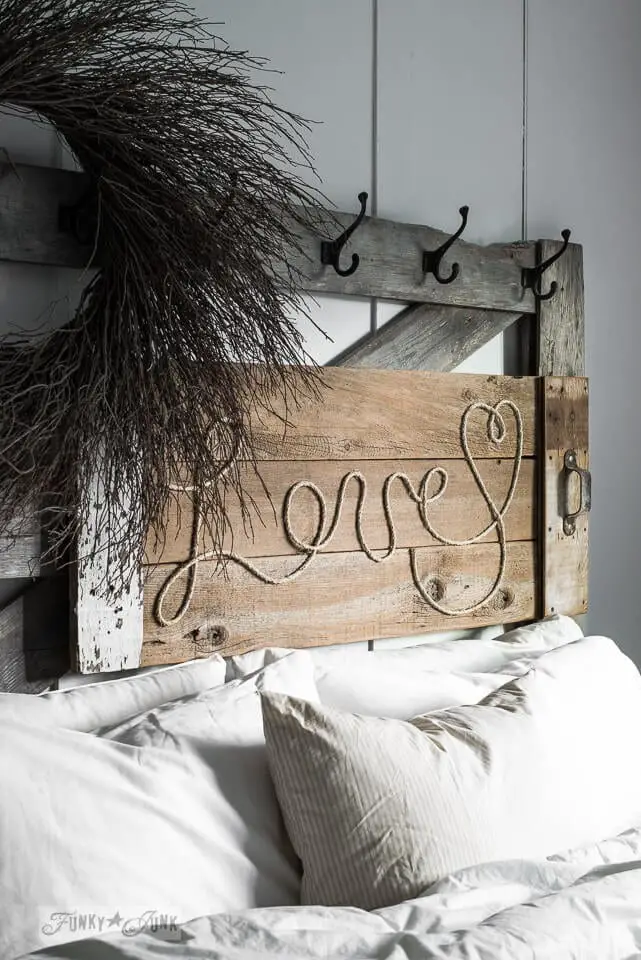
One particular headboard has a sign that reads “love”. Designed headboards of this type are elemental in a couple’s room. Whether you are newlyweds having your honeymoon, or a mature couple- revisiting your flare, this simple DIY project should be fun, both process and product-wise.
Wood types play a great part in putting up the headboard. Using recycled wood is never an issue. In fact, it is highly encouraged that you recycle materials for this project. The candidate wood types for this project include Mahogany, Pine, Cedar, Maple, Fibreboard and many others. You can look up other wood types on the internet. I personally selected these 5 candidates for their strong wood scent, fine texture, and durability. The wood scent should also play a great part in weaving magic in the bedroom- whether it is for romance, fancifulness, fantasy adventure, etc.
With only a $45-50-budget, you can already buy the complete materials for building this DIY project. Expect also some extras in your pocket. Preparing the DIY material is cheaper than buying it. Why spend on manpower when you, your partner and everyone in the family can help in the construction. Nonetheless, you also get to bond and have fun together.
https://www.1001pallets.com/2014/05/pallet-headboard-8/
16) Whitewashed Pallet Wall
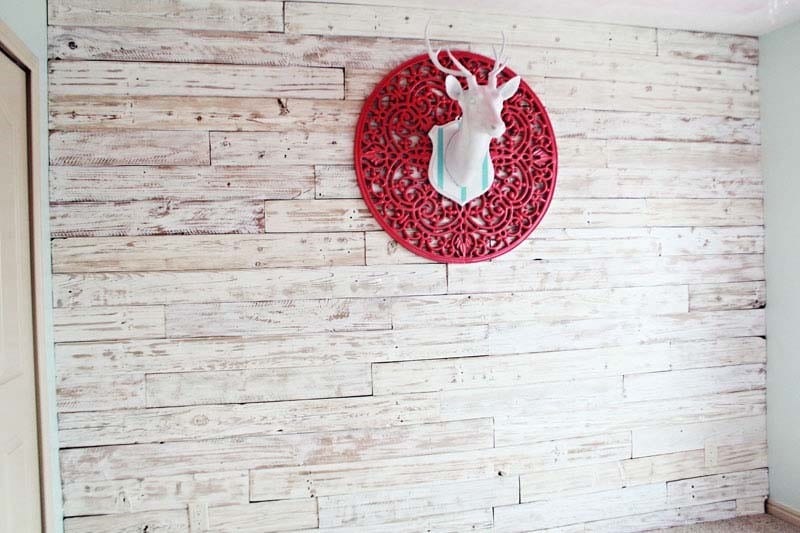
Image source: http://insidetherobinsnest.com/diy-whitewash-wood-wall/
Like the wood wall DIY’s basic construction method, this project can be realized under a very short time. The only part in this project that demands time is painting. Why paint white then? White-washing your wall creates a softer, gentler environment. It should reflect enough a cooler hue of light from the outside. As a result, it builds a farm-like, earthy mood.
White-washing the pallet wood comes with three easy methods- white paint dilution, paint scraping for achieved texture, and the candle method for old effect. These three methods do not necessarily have to be applied. You can only choose one method that works well for the wood, the paint quality, and other circumstances.
The scraper method involves a scraper, of course. The point here is not to let the white-wash finish go too clean. After all, white-washed walls almost always work for a rustic décor. The act of scraping the paint across the wood surface ultimately leads to a layered and textured white color. Take that off the picture, and what you will end up with is a monotonic, flat white covering. Now, that should be boring.
The last method, the candle method involves rubbing the candle across the wood surface. Again, this method leaves particles that if painted, would eventually protrude all over the surface. Now, this should be a brilliant trick, especially if you look at the finished output at a distance to behold a chic white-washed wood finish.
17) Honeycomb Hexagon Wall Treatment
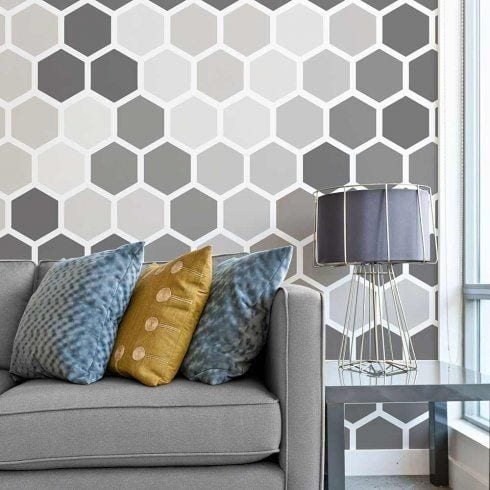
Image source: https://www.pinterest.com/pin/36169603238971132/?lp=true
If you are looking for a bright wood wall idea, the honeycomb hexagon design delivers well! Highly unique with intent depth and dimensionality, this DIY design can easily transform your flat wall into an adventure land. All its greatness only requires very thin wood sticks to the least. This wall finish can blend well with bright colors- yellow, orange, red, etc.
Hexagon patterns create a chic to upbeat atmosphere. The overall design gives weight to the modern, formal finish in your home or office décor. Putting this up also promises a lot of fun. Interestingly so, many indoor designers have now considered the honeycomb hexagon design as an important accent to the generic wall statement. It works more like an exercise to the eyes.
While this project is basic and practical, it still requires multiple procedures to be realized. Procedures here include sawing, wood painting, and the eventual mounting. The mounting part of this DIY project proves to be the more challenging effort. So, working with a team helps speed up the project’s turnabout.
Another time-consuming process from this DIY project is called the taping. This involves taping the hexagon’s corners after leveling it. This particular process is crucial since it ensures the hexagon frame’s precise placement on the wall. Following the taping process is the nail gun shooting. With all these on hand, plus the rest of the DIY options, you can expect the project to be completed within 1-3 days.
18) Birch Wall Panel
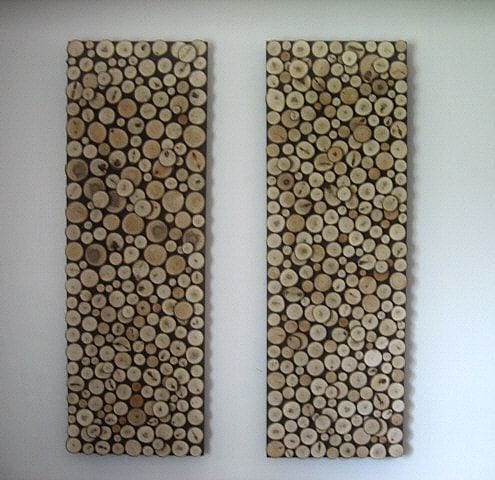
Image source: https://www.shelterness.com/wood-slice-decor-ideas/
This DIY project is a brilliant example of organic sleekness. The highlight of the design is the fertility of nature, plastered on your wall. This is further realized by a number of birch tree discs tightly clumped together against the wall. The overall image/feel should yield a neat, singular theme. For a smoother effect, you can coat the overall wall design with leather finishing.
Another notable effect achieved by the birch design is a mosaic-like capture. Thus, such a project can be time-consuming due to its detailed nature. While acquiring the birch may take a totally different set of effort here, it is still worth your time and money. But if you happen to have birch poles near your home, then this must be your lucky day. There are certain requirements for the dimension ranges as per cutting of the birch pole. The DIY pointers should brace you with its details. Putting up the birch disks for the mosaic pattern should be easy.
https://www.marthastewart.com/271916/birch-wall-panel
To ensure a fine finish with sturdy support, you ought to nail or fix the discs on a plywood flake. If you have not noticed, birch discs can be heavy. So, you will need to keep it standing via the plywood. There is a particular limit to the clump of discs that are to be put up. Looking into the DIY details shall help you determine. To fully utilize the birch cuts, in case of excess, you can turn them into hooks for wardrobes, hanging planters, etc.
The mosaic-like effect and organic sleekness provided by the birch wall panel design is sure to give your home an earth-bound feel. This design should work well in modern, rustic, minimalistic and even Scandinavian home decors. All-in-all, the birch wood design is nothing but a full-bodied texture to your rather lazy wall.
19) Wood Diamond Wall
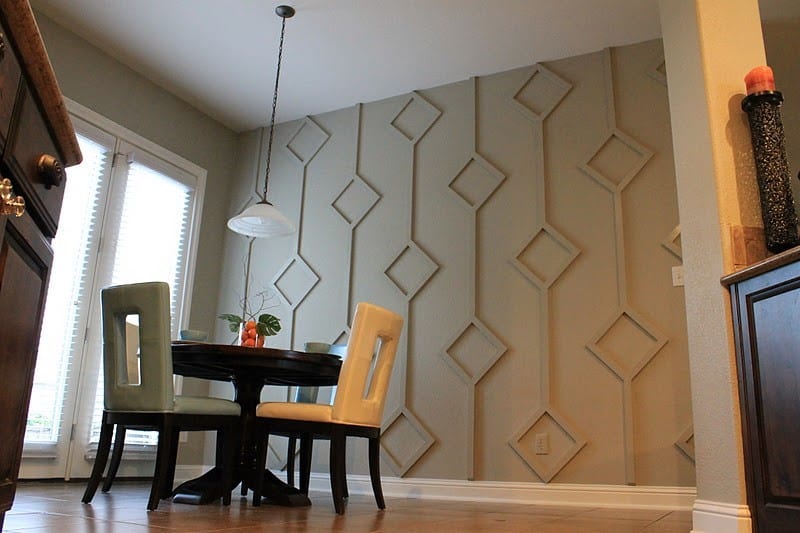
Image source: http://makethemwonderblog.blogspot.com/2012/01/diy-diamond-wall-treatment-how-to-guide.html
The almost sleazy and eruptive pattern of the diamond wall design is something to be truly reckoned with. It is naturally tricky for starters. It can be a challenge to realize but it is definitely worth every single effort. For that very reason, DIY builders are now trying their hands on the DIY project.
The diamond design’s structural pattern may appear sporadic at one glance, but if you look closely, you will realize how intricate the design is. Accordingly, every diamond set in this structure is being linked by very thin wood lines. The wood lines divide the columns into completion. You can temporarily set its form through a taping process.
Despite its almost erratic pattern, the diamond design actually breaks expectations by being the most methodized design ever shared in the DIY circle. This means that it is highly scientific so that accuracy is its mantra. To respond well to its highly scientific details, you can utilize the graphing plan/method.
The ruling formula for the wood diamond wall design acts firstly on getting the length of the wall. Next, the formula concludes by dividing the length of the wall by the size of the diamond. This ruling formula ensures that the number of diamonds accord with the length of the wall. The dimensional sum of it all determines the sheer beauty and balance in the design.
http://makethemwonderblog.blogspot.com/2012/01/diy-diamond-wall-treatment-how-to-guide.html
20) Shutter Wall
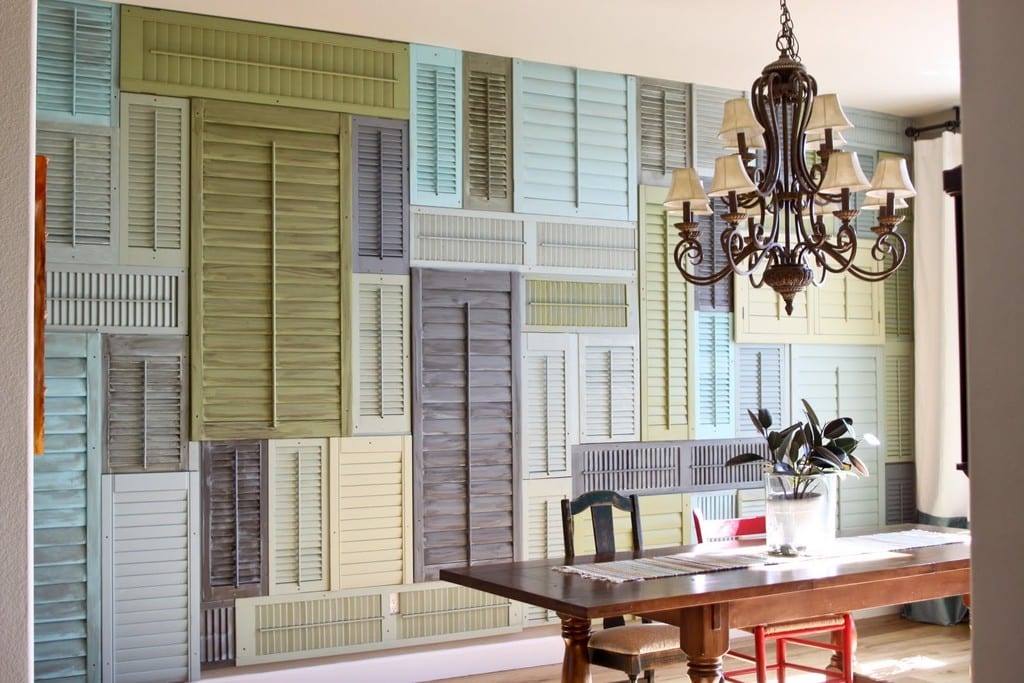
Image source: http://scraphacker.com/upcycled-shutters/
Are you having trouble disposing of those old shutters in your home? No, wait! Do not throw them away! You are in for a big discovery with these old shutters! The DIY shutter wall project proves to be one of the most genius hacks there are on the internet today! Just take this into view: all your old shutters arranged to cover all wall areas in a portion of your home! If that does not impress you, then, you must not be out of this world!
The thing about this project is that it is easy to assemble. You can finish putting them all up in not more than a day. Well, that entirely depends on how much area you want to be covered. But ultimately, completing this project guarantees a very rewarding feeling after. So, with just a few available woodworking tools on hand, plus the recycled shutter sections, you can easily assemble this.
http://www.oliveandlove.com/2013/04/shutter-wall-tutorial.html
A shutter-filled space (considering that it has various colors with singular tone) is anything but airy, Mediterranean-like and shabby. All-in-all, it resembles the classic beach house décor. Consequently, the shabbier it is, the better!
With a cool tone, its colors can vary from blue, light green, pale yellow, light gray, off-white, off-white to gray, white-washed gray, etc. All these colors share the same cool tone. Now, when all these variants combine via shutter symmetry, a definite calm and relaxing atmosphere is achieved.
DIY options for this project vary per shutter size and design. But you need to remember that this DIY effort is highly improvised. So, you can actually go ahead with its layers, structures patterns and not worry about how it should fit the whole DIY formula. I suggest that you do not limit your design to the formula. By all means, the formulas can only give you ideas, not dictate you.
