The most interesting thing about woodworking is that it enlarges to different generations. No matter you are old, young, or somewhere in between, there are always some woodworking projects you can build that will fit your skill level.
Boys today, love to make something new and crazy for entertainment in their free times. A lot of youngsters already know what a fun it can be when you are educating, and having useful hobby woodworking. However, they may not all know that it also can be a great activity for the entire family, including the kids.
1) Tripod Stool Plan
Have you ever seen modern folding tripod stools? They might look ugly as sin and also your grandpa may be ASHAMED if you bought one. With the help of a little hardware, some hefty dowels, and heavy canvas or a piece of leather – you will be sitting by the campfire in style.

This folding tripod stool is a very nice project for those boys who are beginners at their work, and it’s a piece of furniture that you will get as a very useful after it is built. Actually, this stool is designed for outdoor plans, hang out, and picnic plans as you can carry this light weighted tripod stool easily.
The construction of this stool is both durable and simple, and it requires little space in the yard or room where you want to place it. You can get all the instructions about this simple tripod stool plan in the source tutorial link below. Everything in the source tutorial is explained in detail so that you will get help from this tutorial.
This plan does not need a detailed list of tools and materials to build. Only some necessary basic woodworking tools will be enough to go on.
The final product of this project will look like the one in the image above. You can also ask for queries if you have, in the comment section below. Also feel free to share the pictures of the final product you have.
2) DIY Tree Stump Side Tables

Have you ever seen tree stump side tables somewhere in home decor store and said: “Hey, I bet I could make that!” I did that too — so I made the one!
And today I’m going to show you how we build our very own Tree Stump Side Table! As I have been obsessed with some natural wood textures and was also lusting after a side table which was very similar to this one. I always prefer everyone to make things yourself rather than buying them, because what is the meaning of spending some money when you are able to build exactly the look you saw in home décor or somewhere else at a fraction of the cost. I promise that it is a simple plan to do and you can make it in a day or half (seriously!).
Some tools that are required for this project are a hammer, chisels, sanding sponges, tack cloth, stain brushes and face mask etc. You can make one of this side tables and put into your bedroom. You can also take some different ideas to build side tree stump table from the internet, we are also providing a link, select the one design from the link and start building your very own tree side stump table.
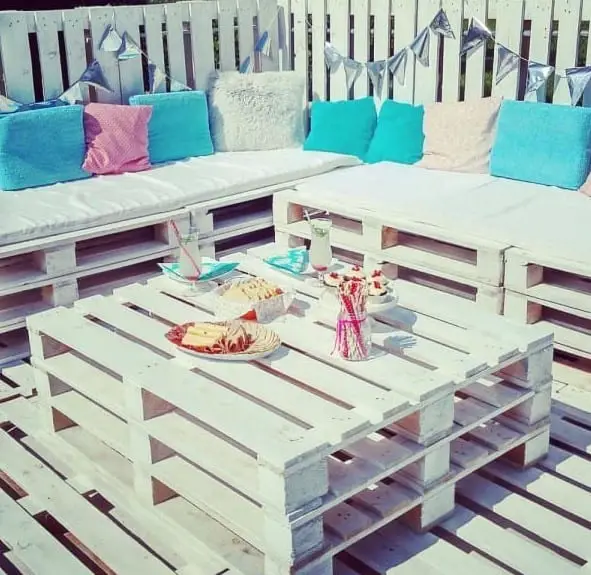
3) Pallet Patio Bar with Concrete Top

Use this plan to put together a patio bar that is having a concrete top. This patio bar details a 40-inch high bar that is around 6 feet long.
Because of the desired size of this particular patio bar, two wood pallets attached together can be used for the front, and another one could be split into two pieces for both of the sides of patio bar. There is also a middle support fitted for the concrete top, and two shelves are built down the middle of the bar. A full tools and materials list are included in source tutorial so you can be sure to have exactly what you require to build this patio pallet bar.
You can place the patio bar at your yard, loan or somewhere else in your house. If you are not comfortable with this design of patio bar you can browse for more designs of patio bar and select one with keeping the space limit where you are going to place your patio bar.
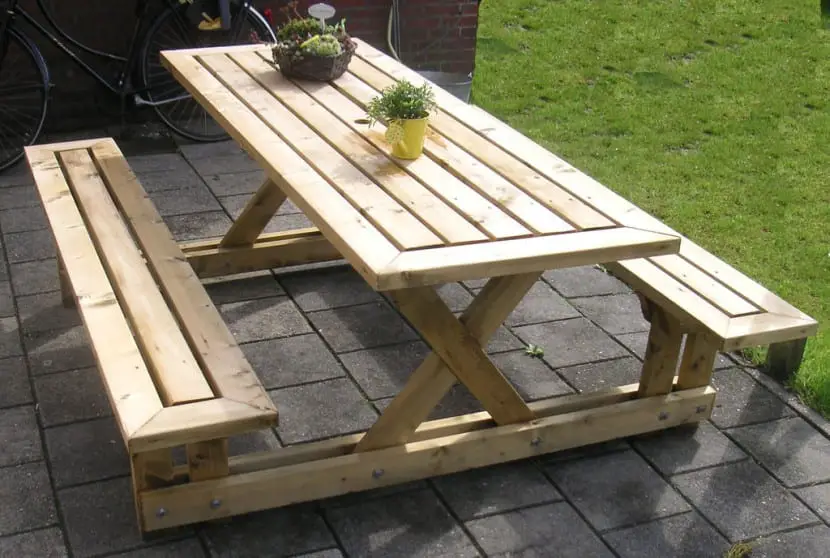
4) Picnic Table Plan DIY

Summer’s almost here and I am ready for it. I have got four ground-shaking speakers and a new seven burner gas grill for my outdoor sound system, and I have built a crazy picnic table to replace the old one I had. This durable picnic table is made unique and affordable in the easy to build instructions of its plan. A sturdy top and featuring ample seating, paint your table a bold bright color and get brighten up any outdoor space.
The new picnic table took a weekend to build, including a trip tour to a home center to buy fasteners and hand-pick the lumber. One of the project’s best features is that the top and bench seats are created from composite decking and a material fashioned from sawdust and plastic resin. The table is easy to clean, it’s impermeable to wood-boring insects, and it never splinters.
If you are not comfortable with the design of this table, you can also browse the internet for more designs. Also, we are providing a link where you can find more design to the picnic table.
5) Guitar Stand Plan DIY

Musical instruments mostly made out of some honest materials like copper and wood which are often beautiful and created with awesome craftsmanship. So why should the stuff that we use to display those instruments on is made of flimsy ugly plastic pieces? This term — and the truth that I didn’t have a place to put the new guitar I have brought — drove me to create this wooden guitar stand.
With just two boards, two holes, and some cuts you will have an elegant looking, sturdy guitar stand to display your guitar. You can disassemble it very easily to take it with you. I personally like its design because of the simplicity, effectiveness, and symmetry. And also above all the creating process is really simple, quick and a lot of fun. Because there is a very little waste and also there are just two nearly identical board pieces.
The most important thing to this process is that it doesn’t need a long list of tools and materials. Only two wood boards, a cabinet saw and measuring tape can be enough for this project, but you need some other tools to decorate your guitar stand. Find more designs of guitar stand in from the link given below.
6) DIY Glass Bottles and Wooden Vase

Sometimes, you are just willing to do something a little different and interesting, perhaps as a break from your some regular activities, or perhaps it’s just to exercise a bit of creativity. So, one day I decided to create a wooden vase. I can’t claim that I have any particular use for this bottle vase. So I don’t even remember why I decided to make this one. One thing is to confirm that it did it to take a break from my regular schedule of shop work and house renovation.
You can also turn small glass bottles into a charmingly rustic wooden grouped vase for your favorite flowers by building this wooden bottle vase holder. I love that how the simple addition of a wooden board can turn old extra bottles into a striking centerpiece.
Wouldn’t this be a beautiful gift? Especially, when if the wood came from somewhere significant. Don’t forget to share your final product’s images with us in the comment section below.
7) Phone Stand DIY

Looking for a stylish but unique gift that can be used on daily basis for many years? We are this handmade smartphone stand as a great mix of nature and craftsmanship. Smartphone stands can be pretty pricey, and many of them only designed for a few devices, in fact, they are designed so their manufacturers can sell different models of stands for different phones. This DIY phone stand version looks elegant and pretty simple.
Here is a great DIY tutorial that will help you to create a cool stand for your tablet or smartphone. A cell phone stand is a convenient place to keep it when it’s being charged or not in use.
This source tutorial is having a PDF file to download, in that file; you will get all instructions to build a stand for your cell phone. The source tutorial will result in a different cell phone stand from the one shown in the image above but that will be also pretty similar to this one.
You can also search the internet for more designs and tutorials to build a new cell phone stand or you can ask an experienced woodworker to help you in choosing a design.
8) DIY Wine Caddy Plan

As it’s picnic season coming up! And summers in different areas are always filled with hangouts, outdoor festivals and concerts, encouraging attendees and guests to lounge and being ready for these fabulous picnic plans, eating all sorts of delectable drink and food with LOTS of wine. I myself also like and enjoy going to outdoor festivals and concerts with friends in the summer season and bringing some food and wine.
If you are also a wine lover and you too enjoy going to these outdoor events as well or like to simply lounge on your patio with a friend or guests and enjoying your favorite glass of wine, then my friend, this is the perfect DIY project for you.
This DIY plan makes it super easy to carry your bottle of wine with two wine glasses to any outdoor event or outside to your patio. It also looks elegant on display. And while wine caddies are perfect for entertaining, these also make the great handmade gifts. This is also inexpensive DIY piece can build with pallet wood pieces.
9) Stackable Sawhorses Plan

A sawhorse is an essential construction tool, and in this article, we are going to highlight the best DIY saw house design, with complete plan instructions.
Every workshop must have at least one pair of sawhorses. These sawhorses can be used as support for holding wood scrap or lumber or painting a board, with the help of some plywood these sawhorses can become an instant table. We have highlighted a sawhorses pair plan, which might be our favorite project so far.
This pair of sawhorses needs nothing to build but two 2 x 4s and it’s design allows you to stack it conveniently out of the way when you are not using them.
You can use a miter saw to trim the wood or any other saw can also be used. A measuring tape, pencil, drill/driver, and some deck screws are the only tools you will need for its assembly. These sawhorses will not take longer than 3 hours to build but they much durable. If the top of them gets damaged or cut-up, just replace the top with another 2×4.
10) Arbor Bench Project

You can add a little romance to your patio, yard or garden with this incredible arbor bench project. The freestanding arbor bench structure has a number of subtle features that add to its appearance, comfort, and strength.
The structure of the arbor is broad and also stable enough to stand on its own, but if you want it to install permanently, you can anchor it to concrete its footings with having metal brackets embedded in them.
You can put the arbor together in a workshop, then carry it assembled to its final destination, but make sure to hire some helpers while you are taking it out to the final destination. However, since this project built in four main sections and it can also be broken down and reassembled again on the site.
In case, if you are not comfortable with this design then you can browse the internet for some more designs for your project. Be sure to choose the one that matches your skills and can be built easily.
11) Build a patio cooler

As summer is my favorite season of the year and also I love the projects that spruce up my patio. One of my friends, a woodworker, sent me a picture of an ice chest cooler and said he would love to see a detailed tutorial on how to build something similar to it.
This is going to be a perfect wooden piece for summer outings and some trip/picnic tours to have for my friend’s parties this summer. This was a fun and practical project and that I know you will have fun tackling.
This patio wooden cooler helps you keep your drinks bottles and ice-creams cold during outdoor parties and events. It is also a durable wooden piece. And also, if you didn’t like this one, you can search for more Patio cooler designs on the internet or by the help of any experienced woodworker.
12) Address Number Wall Planter
Sure, you can adhere a couple of number packs and stickers to your mailbox so your friends can find your house easily. Or you can welcome your friends and guests in a different style by building a stunning wall-mounted planter box with having your house number on it.

Looking so gorgeous, Right? This modern shaped pairs effectively with the more traditional house number… and the lush look so pretty! And if you live in a cold climate, trade them out for goblin evergreens or other hardy winter plants.
Like other projects, this project also needs some tools and materials to work on, some of the tools are a fence, hand saw, wood glue, screws or nails, hammer, and drill etc. Some more designs of address number wall planter can be found on the internet.
13) DIY Entryway Shoe Storage Bench

An entryway bench is a must have furniture in almost every home, that can be in many designs. It gives you a place to sit on and you can put your shoes on its shelves and also set many other items when coming back into the home. One of the greatest things about building your own entryway shoe bench is that you can customize the height and length of your bench to your liking!
Means it’s the best way to capture all the shoes in your house entryway and also has been a welcome addition to the house. This bench is made out of wood from the home center and has easy construction steps.
However, if you are from those who love to keep your things neat and tidy, so this plan is pretty good for you. Here, we are including a DIY bench idea that will increase storage capacity at your home as well as will also look wonderful in your mudroom.
14) Learning Ladder Wall Bookshelf Project

If you have ever had the opportunity to do some work from your home, you know how influential your home furniture can be with regard to your productivity. The computer ladder desk having some extra shelves, in particular, plays a critical role in any home space. It should be comfortable and functional as well.
Although having a customized incredible computer desk which was built to fit your specific location at home can be pretty costly, but the good news is that there are also many DIY ideas out there for building a computer desk. These can be made into a closet desk, a corner desk, or really any shape or size that your home office/room space requires. And, best of all, since you have built it yourself, this will be completely original.
Here, we are going to show you a tutorial to build an inspiring DIY computer desk for you. The one shown in the image above can be a perfect shelved computer desk for any room. You should try that yourself, that’s also very simple and easy to build. So, what are you waiting for boy? Go ahead and make it yourself this weekend!
15) Sofa Snack Table Project

Use your sofa or couch snack table as a place to conveniently rest the remote control or for serving food and drinks. You can make a sofa snack table with the help of this free sofa snack table plan. This free accent table plan is for the intermediate to expert woodworker.
Building a Wooden sofa snack table is an easy task for an intermediate woodworker, but not so much for the people who are new to woodworking like you and me. But that never ever means you can’t do this. It was almost two years ago, when I had almost no woodworking experience, but now I can build most of my household and office wooden items by myself. This saves me a lot of money. And believe me when I say this; you can also manage to make wonderful wood items with a little practice and some woodworking experience.
For those, who are not comfortable with this sofa snack table design, we are including a link that will help you to find more designs. Select one of them or any other while browsing on the internet, and build on the upcoming weekend. This plan will hardly take 2 or 3 hours to complete.
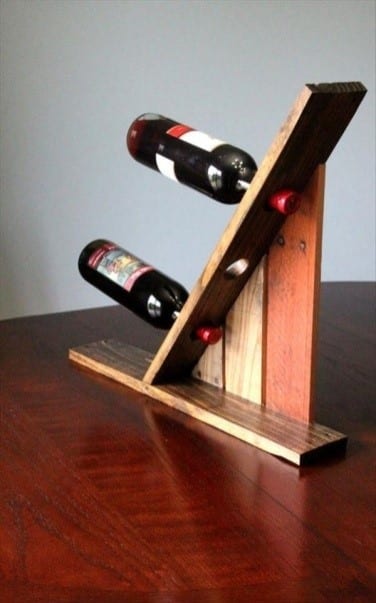
16) Countertop Wine Rack Project

Building a wine rack for your room is a super easy project that can be completed maximum in a day or two, which depends on how large and detailed wine rack you would like to build. And the good news is that the wine rack project we are going to share with you will build you a good looking countertop wine rack for much less than it would cost to go buy one.
This free wine rack plan includes everything that you need to create a wine rack that is stylish and functional. Written building directions, diagrams, videos, photos, cut lists, and shopping lists will provide you everything that you need to build this a successful wine rack woodworking project.
This free countertop wine rack plan is perfect for the beginner woodworkers and anyone who is on a budget. You will be able to finish this inexpensive wine rack project in just a few hours.
Although, this one is quite different from the countertop wine rack shown in source tutorial. Both the tutorials help you to create two different wine racks.
17) Wooden Bottle Opener Project

This easy DIY bottle opener is sure to be a hit with any recipient, as it is useful, unique, and artful. This bottle opener uses a US quarter as the mechanism to open the cap of a bottle. You should avoid using softwoods for any project as these softwood boards would likely get damaged when an item is being used.
Obviously, this bottle opener is a simple but a cool project to do for the outdoors or for those woodworkers who actually have a man cave. This wooden bottle opener makes opening the bottles a lot easier, also it stores the bottle caps, as well.
There are many more bottle opener designs on the internet; you just have to search the one for you, if you don’t like this one. As mentioned before this tutorial is a simple DIY, so you don’t need a long list of supplies to complete this project. Just some basic woodworking tools will be enough. Some tools which are required are a wood board, a fence, hand saw, wood glue, nails etc.
18) DIY Wall Planter Project

Indoor gardens and planters are an excellent way that allows us to add some green plants to our homes. Planters can be designed and displayed in a lot of different ways. The big planters usually occupy the floor while the other ones that are small offer more freedom. Wall planters are space-efficient, great looking, also allow us to free up some floor space and to decorate our room the walls, creating eye-catching and interesting focal points.
This wall planter garden design featured on Rogue Engineer is an incredible wall planter. This one is made of wood boards and the idea is wonderful and stunning. You can make something similar out of your pallet. This planter project would be pretty simple and only need a few modifications.
This project requires a saw, a drill, cedar boards, nails, and screws. Its design is simple. You just need a large wood board for the back side, three boards for the fronts of the pockets and cut out six small triangles for their sides. Then secure all the pieces together and you will be able to add soil and plants inside. You can also use a liner inside the planter pockets to protect your planter’s wood. The link to the source tutorial is mentioned below.
19) DIY Corbel Sconce light

Have you ever seen a beautiful DIY corbel light sconce at somewhere at someone’s home and thought “Hey, I can do it myself”? I am saying that because I did that when I saw a corbel light scone when I was hanging out with friends at a market. At that time, I had no light sconce at my home like that one. But now, I too have one at my home. And yes, I have built it myself. You too can make a nice corbel light sconce if you have basic woodworking skill.
After searching some high and low for the perfect bedroom lamps to make pair with my new DIY Modern Rustic King Bed and my Sliding Barn Door DIY Nightstands, for some moment I had a lightbulb moment when I decided to combine our favorite a DIY Rustic Corbel with an elegant cage light to build this DIY Rustic Corbel Light Sconce! This rustic light is such an easy and fun having project for you guys to tackle this weekend!
This corbel light sconce can also be made in different sizes and designs as you can find while searching on the internet. Some of the items you will need for this project are a light cage, Pendant light, screws, wood glue etc.
20) DIY Wooden Door Mat

Need a way to spruce up front porch of your home or room? How about a handmade DIY Wooden Doormat! This wooden doormat is very easy to build and is also made with too much inexpensive pressure-treated 2×2 balusters and a sisal rope. Build this in an afternoon and have a great conversation piece in the form of wooden door mat at your front door.
Doormats are not just used to wipe your feet. They should provide you with a functional and stylish entry into your house; can be a pleasant welcome to anyone who visits your home. Instead of placing down a cheap rectangle piece of mat that’s bound to get torn apart, you should think about building an elegant, beautiful, high-quality piece of a doormat.
This DIY doormat design made from 10 pressure-treated 2x2s and a length of sisal rope. Here, you can use any type of saw to cut the wood blocks to length, and obviously, a drill press will be more helpful to make consistent straight holes in blocks for the rope to weave through. The original final product looked like the one in the image above. Every time you should be prepared to build more, as once the word spreads that you made this mat yourself, you will be inundated with requests. And as you’ll see from the steps…it’s so easy!
21) DIY Wooden Door Mat

If you want to build great looking double chairs for your patio then you have come to the right place. I bought one patio chair home late last year and at that time I did not have any patio furniture whatsoever. As my dad had built a beautiful chair piece for their home and so I will credit him with the design help and for giving the inspiration to build my own. However, this setup is pretty great for enjoying a relaxing afternoon out on the deck with family or friends. I built my patio chairs with the help of cedar because cedar doesn’t rot and always stands up against the outdoor things quite well. You can use some fine as long as it is coated or painted with a thick finish of poly.
You need to learn some basics of woodworking to build this project as this is somehow a little difficult task for those who are new at woodworking, but it never ever means that they can’t do this; with a little hard work, they can also make a perfect patio double chair project.
Some tools that are required to do this project are a handsaw, a jigsaw, a circular saw, screws, screwdriver, wood glue etc.
22) Console Table Project

Placing a console table along with a couch or wall in your room can really shine the beauty of your bedroom; no matter you place it as a storage piece in your entryway or as an additional storage for your entertainment and TV in your living room. But finding one that will suit all your needs and you are your space’s dimensions can be a tough challenge.
You can’t get more affordable and customized handmade console table, so we have rounded up one of the best console table plan to get you started. But all you need is a weekend to build this one and put it together.
A professional woodworker can build this console table in a half day or maybe 2 or 3 more hours than a half day but for beginners it a tough task to build. But it doesn’t mean that they can’t do it, some care tips and knowledge about some basics of woodworking can help them to complete this project.
23) DIY Command Center

Speaking of this year, have you made any resolutions or goals? I don’t remember when the last time I actually made a really “new year’s resolution,” but I actually find a renewed motivation for different things in the first month as it always does feel like a great time to make a “fresh start” mostly when it comes to organizing and cleaning around the home! In fact, it was last January when I began building a “command center” for our home and family – and it served us very nicely over the past year. No doubt, that I am just trying to encourage you to build your own command center by putting together a list of awesome command center ideas and designs that are sure to get some general inspiration flowing.
This project is easy enough for even beginners to understand and follow. So we are not going to explain each and every step. We just want to assure you that if you are following the exact same process, you will surely manage to make an incredible command center yourself.
If you are not comfortable with this command center design, you can always browse the internet for some more design ideas. We are also including a link where you can find some design to command center plan.
24) DIY Holder for Wine Bottle and Glasses

So many of us live in smaller spaces and that is the reason why we don’t always have a dedicated space for some entertaining things. With having a few tools and some simple woodworking materials, you can create a charming your favorite wine bottle holder that even has a space for your glasses. This simple wooden piece is a masterpiece when you are out at any summer event with friends or at a trip tour.
We are also including a source tutorial to this small project below that will help you to understand each and every step. Some tools that are required for this project are a handsaw, a fence, drill etc. This project will take only 2 or 3 hours to complete as it is simplest ever project added in the article till now. Take a look at the source tutorial and start building your own wine bottle holder.
This is not a difficult task at all, anyone with the basic knowledge of woodworking can build this project, and he just needs some instructions on this project and some basic wood building tools. You can also ask queries in the comment section below this post.
25) Large Rustic X-Bench Project

Some call it an X-bench, cross stool, Faldistorium, or Savonarola. No matter what name you give it, this easily created yet cleverly designed chair/bench has one real function that is giving you time off your feet.
The stylish yet project design of the X-bench inspired lots of furniture builders and woodworkers to create their own unique versions.
Today, this X-bench can be found everywhere from cramped efficiency apartments to haughty castles. Thanks to the one who created this nearly endless way of designing this great easy-to-build chair, this bench has almost become a furniture fundamental around the globe.
While my X-bench design has more of an awesome feel with clean crisp lines, a plush leather seat, and solid dark oak legs, you can create your own Rustic X-bench design using the basic outline from the following plan. One thing, just keeps in mind that is No matter how simple or extravagant you make your Rustic X-bench, there is always going to be a super struggle to usurp you from your new throne.
Like other woodworking projects, this plan also needs some tools and materials. Some of the needy tools in this tutorial are screws, sand paper, a handsaw, circular saw, screwdriver, sandpaper etc.
This is not a difficult task at all, anyone with the basic knowledge of woodworking can build this project, and he just needs some instructions on this project and some basic wood building tools. You can also ask queries in the comment section below this post.
26) Bathtub Shelf DIY

As summers are there, and the season when everyone wants to take a bath after every nap. You might have a bathtub in your bathroom. Want to add an adorable piece to your bathtub? Follow this simple but elegant DIY plan to add a Shelf to your bathtub. You can put your books, smartphone, wrist watch and other necessary things while bathing.
A bathtub Shelf is also very useful for you if you like reading while taking a bath. This is supposed to be a very relaxing and soothing activity, so why not combine it with something just as pleasant and relaxing?
The shelf allows you to lay back relax and comfortable without worrying that your book will get wet and even without your hand getting tired. A bath is always more soothing and relaxing when you have a glass of wine and a book during the bath. You can also give a romantic vibe by adding some candles and scents to your bathroom. A wooden shelf on bathtub gives the bathroom a more rustic and casual vibe. So, just set your mood and start relaxing with some candles vibes, a book, and hot drink.
27) Wooden Triangle Shelves DIY

If you are anything like me, then you are also always looking for some cute shelving ideas to display your tiny collectibles and plants. Then, these DIY triangle shelves are the best way to display those little photos and trinkets that clutter up your space, but now you can arrange them on your walls in a great way you like. These DIY triangle shelves are a quick little building project for those who are new to woodworking that you can whip up on a weekend. I had zero carpentry skills when I made these shelves, so if I can do it, so can you!
I saw these wooden triangle shelves on one of the online furniture selling sites. These shelves were quite expensive though for only two shelves, but instead of buying those shelves I was like, duh DIY! And why not! I knew that Pinterest is not going to disappoint me with a tutorial on how to make them myself!
Only some necessary tools are required to create these triangle shelves. Some of the supplies are a circular saw, wood glue, tape measure, nails, miter saw etc. Anyone who has some basic woodworking understandings can build these shelves in almost 2 hours without taking breaks like me.
The video tutorial explains the procedure for building these beautiful triangle shelves. Make sure to use only high-quality items for any woodworking project.
28) DIY Rustic Crate Centerpiece

Looking for some unique rustic decor centerpiece ideas? Use this wooden rustic planter for displaying a flower arrangement in your room. It makes a great addition to a barn wedding or rustic wedding when used as a table centerpiece.
No matter how it is used, this simple centerpiece square wood box will add some character to your home or wedding decor.
Our groom contest, build this charming wooden flower box centerpiece setup. Who would not want to keep them after the wedding? I visualize these wooden planters centerpiece decorating their home for years to come. Take note, gentlemen.
This rustic centerpiece can be a great add to your room. Also, it is not much expensive; it only needs some pallets to build. I have also built the one for my bedroom; it’s not that difficult as it looks. Anyone who has some basic woodworking understandings can build this rustic centerpiece.
Always remember one thing in any project that measures you pieces twice before making a cut. Sometimes you marked on the wrong place on your wood pieces and cut it, after that you realize that you did wrong. So check it twice before cutting if you have marked exact point.
29) DIY Mason Jar Caddy

Does anyone else have a hobby with mason jars? We don’t know what it is about them…but the mason jars are just so freaking adorable. Some of us imagine ourselves with a different life when we hold one. Mason Jars are all the temper right now and also I have to admit, I am a huge fan of these adorable pieces. I use these jars all over the house; from using as vases for flowers to organizing craft supplies.
One day, while at patio dinner, I thought it would be fun to have a little caddy that could hold some Mason Jars for different purposes. I am already using other pieces of the organ in different places of our home.
30) DIY Cedar Planter

When we want to add decorative plants to our household, rooms or patio, mostly planter boxes could be used effectively for this purpose. Making a planter box from your own is always better idea than buying one from the shop. If you want to bring about a lively look to your household, patio or deck, you could build a square sized DIY planter box. You need a few pieces of lumber, some wooden board pieces, and some nails. A handsaw, a hammer, and some nails are the tools you need. Buying these won’t cost you a lot but when finished your planter box will be a beauty.
These wood planters can take the place of decoration pieces in our house. Wood planters are available in different designs on the internet. In case, if you are not comfortable with this one, you can always browse the internet for more designs. Be sure to select the one who matches your woodworking skills.
These wooden planters don’t often need a long list of supplies, only some pallets, nails, screws, a screwdriver, measuring tape, pencil and a hand saw can be enough to build one. You can also watch the video tutorial by shanty2chic to this tutorial in the link given below.
We hope you boys get these woodworking plans as the best thirties. Our aim of this post is to provide you some ideas of woodworking. Take these ideas, build projects, and add some new incredible things to your furniture.
Conclusion
If you want to discuss something or having some queries, feel free to ask all those in the comment section of this post below. And obviously, we will be very pleased if you share the photos of your final products of the projects you have completed. If you like our article, do share it with your friends on social sites.
