Sawhorses are important tools used in construction. In this article, we’ll present several sawhorses ideas you can use for your next woodworking project. There are different designs available online and we have compiled them for your convenience.
You don’t have to look anywhere else because we got them all for you, complete plans with clear photos you can use in building your very own sawhorses.
Rather than spending hundreds of dollars on purchasing ready-made sawhorses, you may want to create your own using your carpentry knowledge and skills. Let’s find out what is in store for you!
1) Rock-solid Sawhorse Plan by Mark of Family Handyman
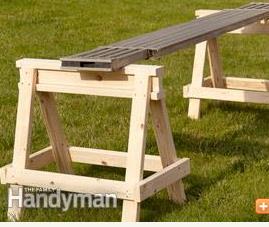
Framing carpenters are usually building sawhorses whenever they show up at a construction job site. These sawhorses are usually left behind for the contractors and subcontractors to use. They build new ones for the next job. In fact, it is not unusual for a new homeowner to get a free pair of sawhorses and hold on to them for years. But of course, if you want to upgrade yours or you don’t have one, you can use the Family Handyman Rock-solid Sawhorse Plans for a sturdy and long-lasting sawhorse.
These are easy to build, inexpensive, and super strong sawhorse plans that only cost $12.00 each. The amount of time you’ll spend to build these sawhorses is about 15 minutes with the use of pneumatic nail gun. It is a good starter for beginners. Family Handyman features the work of Mark Petersen using two 12 feet 2x4s lumber and one 10 feet 2×4 lumber. He also used 3 inches screws and 16d nails for assembly. He attached the legs with the use of a framing square, attaching the rails last.
Reference: FamilyHandyman.com
2) Classic Sawhorse Plan by Ken of Family Handyman
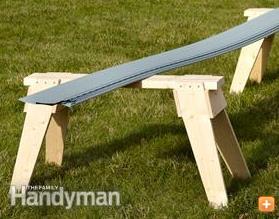
Ken still has the first pair of sawhorses he built 30 years ago. He copied the sawhorse design from his grandfather who built the design 30 years before he built his. Now, we can consider this design as classic or traditional that has been probably around for hundreds of years. The design is low in order for you to be on your knees while holding down your task.
With the compound miters, you can make this a little trickier to construct over the others. In just a couple of hours, you will have a pair of sawhorses if you take one part at a time then labeling them as you go. Who knows? You will be able to build a pair of sawhorses that your grandchildren will surely be proud to replicate in the future too. This sawhorse design was simplified. The features are elegant, stackable, light, strong, and inexpensive. The cost of this sawhorse is $12 each, only requiring one hour for each, and the skill level required is intermediate.
Helpful Link: Family Handyman
3) Foldable Sawhorse by Jeb of Family Handyman
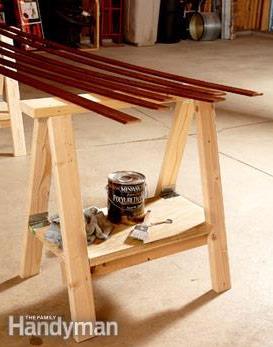
Foldable sawhorses have shelves that can also add stability. Jeb’s sawhorse design combines the folding and stability features. His sawhorse designs are really fun to build. For making a pair, you will need a 4 by 4 feet sheet of 3/4-inch plywood, one 8-foot 2 by 6, one 8-foot 2 by 4, two 12-foot 2 by 4 and 8 hinges. The cost for this sawhorse project is worth $40 each.
The time needed to construct this sawhorse is one hour each. The skill level needed for building this sawhorse is from beginner to intermediate level. For the construction process, after you cut the top which is 2 by 6 to length, you can cut both sides of the legs at an angle of 15 degrees. Just make sure the angles are parallel. You need to fasten the hinges to the ends of the two legs and attaching those legs to the top piece by fastening the hinges and the other two legs using 3 inches screws. For the shelf, cut the 2 by 4 to support the sides of the shelf.
4) Feature-packed Sawhorse Plan by Steve of Family Handyman
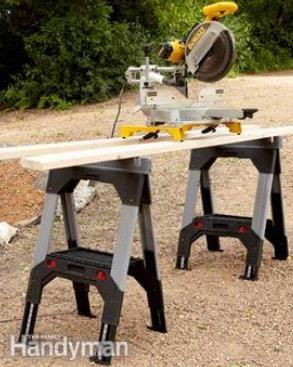
These sawhorses are foldable, light, with adjustable height, and have notches to hold the two by cross braces. These are called FatMax with notches. FatMax is a great place for holding sacrificial 2 by 4 lumber when you are cutting up plywood as well as another sheet of goods. One of the best features is the adjustable leg, which is handy when you are working even on uneven ground. They also have a built-in shelf that can be folded relatively flat, thus making them perfect for wall storage.
The cost of each sawhorse is $37. The tools you need in building this project are a circular saw, air compressor, hammer, framing, square, miter saw, hearing protection, safety glasses, and air hose. The materials needed include lumber (2 by 4, 2 by 6, and 1 x 6), plywood, common nails (16d), and screws (2 inches). Always be ready with the things you need to save time.
5) Space-saving Sawhorse by Travis of Family Handyman
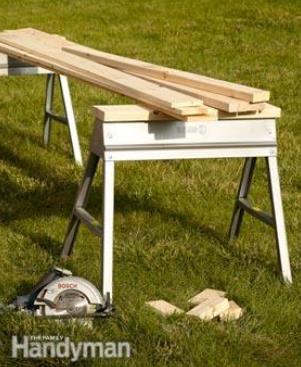
These sawhorses are cheap and very. The best features are their portability and space-saving feature. It means that they are compact, hardly taking up any room when they are folded up. Just simply screw a 2 by 6 on the top and it is all set and good to go. You can hang these metal-folding sawhorses on a wall or you can stack them in a corner. If you need to drag sawhorses from one job site to another, then these are perfect for you. Just be careful not pinching a finger when you’re holding them up.
Travis is fond of the famous EBCO brand and he said that he owns a dozen of them. His portable and space-saving sawhorse design is inexpensive with $18 each in addition to the price of the top board. The skill level required in building this plan is from beginner to intermediate. Now, you can build your own sawhorses driven by this design with adorable and practical features.
Helpful Link: FamilyHandyman
6) Popular Mechanics Saw Horse
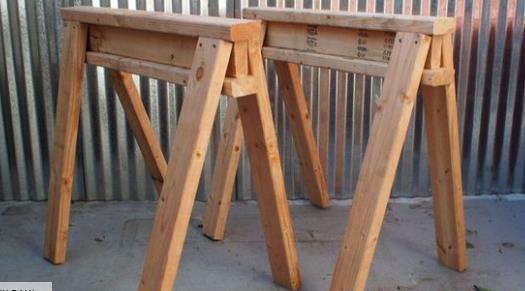
If you have a workshop, you definitely need at least one pair of durable and reliable sawhorses. Sawhorses are used in supporting lumber for construction or when you are painting a door. You can use it as an instant table by adding plywood. You only need 2×4 and you can easily store them when not they’re not being used. If ever you do not have enough 2 by 4, you can buy the things you need by only spending $20 for the wood and screws.
The style of this sawhorse is very popular in different construction sites. You can build them with the use of screws and nails. This design was used by Mark Clement and it was updated by Jay Bates, allowing for clamps to be used on the sawhorse ends. In constructing this sawhorse, the builder used a miter saw, trimming the wood. You can also use any saw if you don’t have a miter saw. You will need a measuring tape, drill or screwdriver, pencil, and 3 inches deck screws.
Reference: PopularMechanics
7) The Ultimate Sawhorse Plan by The Spruce Crafts
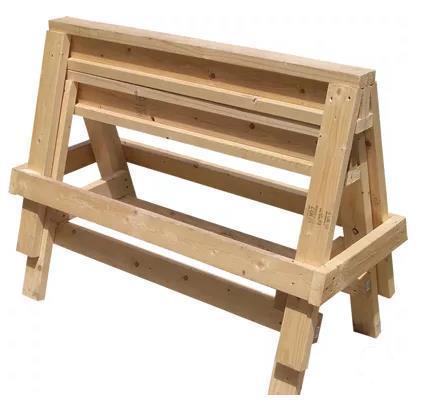
Sawhorses are normally something you think of when working on a construction job site. If you have a workshop, these sawhorses can be especially useful. A good pair of sawhorses is also used as a reliable and stable base for a temporary table, holding a portable table saw and for stacking lumber. The stands are sturdy, versatile, and easy to build. These are perfect for a workshop.
The difficulty level in building this sawhorse is easy. You can paint it as desired. The time to complete takes only 30 minutes. The tools needed are a circular saw, miter saw, cordless drill, corded power drill, tape measure, layout square, and pencil. The materials you need are nine 2 by 4 lumber 8 foot long and 3-inch deck screws. When it comes to building the beams, the 2 by 4 are cut into two pieces, one at 47 and one at 49 inches, repeating the process twice, having three of each size.
8) Simple Sawhorse Design by Art of Manliness
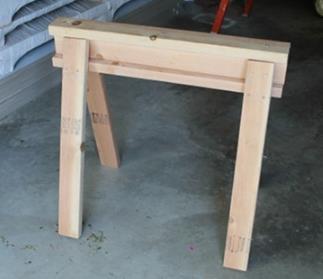
This is a very simple sawhorse plan that is recommended for beginners. The materials you’ll need in building this plan include six 2 by 4 inches lumber (32 ½ inch thick) for the I-beams, eight 2 by 4 inches (30 inches thick) for the legs, wood screws (3-inch twelve), and 32 galvanized nails (16D). Building this sawhorse is super easy, making a good starter project for anyone who has never tried working with tools.
The procedure in building this sawhorse plan include measuring and cutting the timber, building the I-beams, and nailing the legs to the I-beam. Repeat the entire procedure for the next sawhorse. These are just stored by stacking them. It is a good idea building your very own sawhorse that you can hand to your grandchildren for future use. Learn carpentry skills using this sawhorse project today!
Helpful Link: https://www.artofmanliness.com/articles/how-to-build-a-quick-and-easy-sawhorse/
9) Simple and Strong Sawhorse Plan by Construction Pro Tips
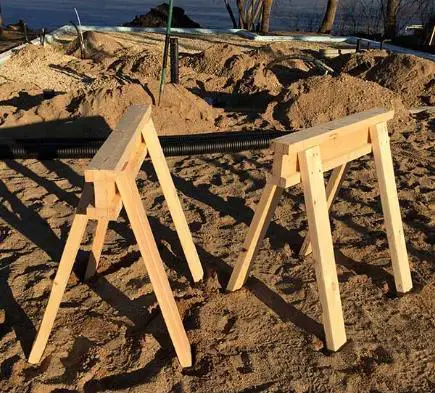
This pair of sawhorses is simple yet strong consisting of an I-beam as well as 4 legs that are made from 8 feet 2 by 4s (five). Do not make any mistake of purchasing pre-cut studs because they are several inches shorter than eight feet. The sawhorses measure under 32 inches high and 32 inches wide. You can build yours on your desired height and length. You have to do some computations and rework on the list of materials. You can use 10 feet 2 by 4 if you want longer and taller sawhorses. If you are 6 feet tall, taller sawhorses are better.
The procedure in building this project includes marking the boards, cutting the boards, marking the I-beam location, building the I-beam, marking the leg locations, and installing the legs. If you want to test your carpentry skills, this is a good sawhorse plan for you.
Helpful Link: https://www.constructionprotips.com/tools-materials/hands-on/how-to-build-a-sawhorse-in-15-minutes/
10) Rock-solid Sawhorse Plan by Mark of Family Handyman

This homemade sawhorse plan is very simple and easy to construct. The materials needed include five 2 x 4 x 8 inches and one 2 x 6 x 8 inches, 1.5-inch screws (16), and 2.5 inches screws (20). You will need a circular saw, miter saw, jigsaw, screw gun, screwdriver or impact driver, safety glasses, and tape measure. The steps in building this sawhorse plan include cutting the boards to size, cutting the legs, assembling the beam (top), and legs assembly, adding side braces.
Using a small level ensures that the board is even, making two marks when it comes to cutting on the edge inside of the boards. Use your saw for cutting the boards and screw the legs in place using the screws. Building your own sawhorse is a great idea most especially if you have a regular home DIY construction project.
