11) Simple and Sturdy Sawhorse Plan by Woodgears
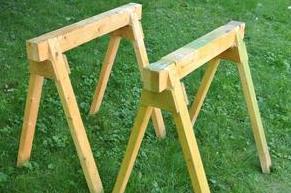
Sawhorse designs have variations and this plan is simple and sturdy. The emphasis of this sawhorse plan is lightweight, durability, and stackable design. While this is easy to assemble and disassemble sawhorse design, it may compromise the sturdiness. If you want something that can be folded it is important to purchase high-quality metal sawhorse brackets.
You can build a sawhorse plan just using a circular saw. The materials you will need include 2 in x 3 in x 8 ft for the legs, 2x3s or 2x4s, plywood scrap, 12 nails (2.5 inches), 50 nails (2 inches) for the legs and braces, and 2 in x 4 in x 7 feet for the cross beams. The tricky part to make is the 18 degrees bevel cut. You can mark the bevel on all legs and clamp them together so that the cuts are aligned altogether. After which, you can cut through using a circular saw.
Reference: https://woodgears.ca/sawhorse/
12) Stackable Sawhorses by Timothy Dahl of Lifehacker
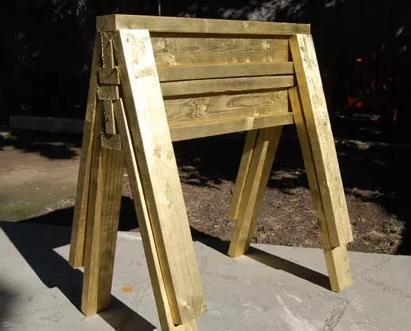
This is a sawhorse design that can be seen as a staple on most workshops. While this sawhorse plan is not fancy, using these sawhorses can get the job done cheaply and quickly. You can build this sawhorse using materials that can easily be seen on job sites and workshops. You need a few 2x4s boards and some screws or nails. In particular, you will need eight 2 by 4s for the legs and six 2x4s for the I-beam.
You can adjust the lengths according to your preference, provided the height of the legs are matched. For greater stability, you can use 3-inch galvanized deck screws or you can churn fast using a nail gun. The center point and base of your sawhorse are the I-beam. You can begin assembling using 4 screws for attaching each section. Using the square pattern, place the legs under the top directly. You can decorate the sawhorse as desired as painting it or stapling carpet pieces for a smoother surface.
Helpful Link:
https://lifehacker.com/build-stackable-sawhorses-from-scrap-lumber-in-under-1-1665063507
13) Adjustable Sawhorse Plans by Ana White
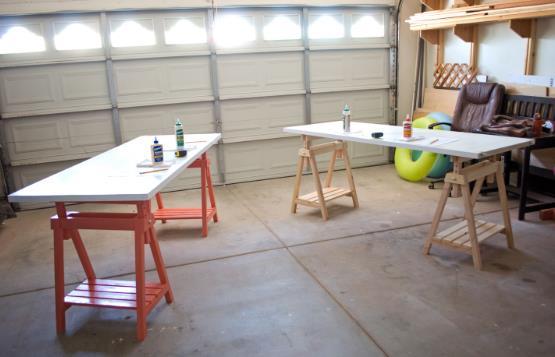
This sawhorse plan has an adjustable height which is versatile and durable. For the preparation instructions, you can fill the holes with wood filler, letting them dry. Apply extra coats as necessary. For removing the sanding issue, you can vacuum sand your sawhorses on all surfaces. Wiping them using dry cloth is important for a clean surface. The builder advises applying a test coat on a concealed area or any scrap piece to make sure of the adhesion and evenness. You can use a wood conditioner or primer as required.
The steps in building this sawhorse include building the legs, nailing and gluing the pieces, and building the upper portion. You can save almost $100 by building your own adjustable sawhorses. Start planning and building based on this plan today!
Helpful Link:
http://www.ana-white.com/2015/04/free_plans/adjustable-height-sawhorses
14) Quick, Light, and Strong Sawhorse Plan by Instructables
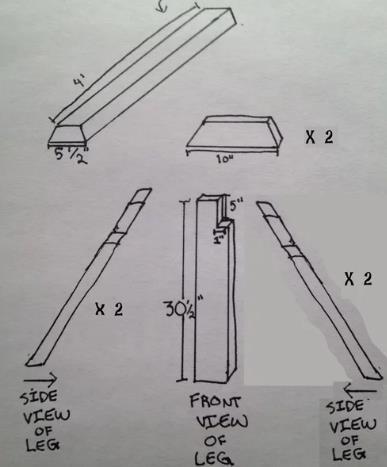
The sawhorses made of this plan are extremely strong. They are quick to make. These are cheap to build yet can carry hundreds of pounds without wobbling. The tools you’ll need in building this project include miter saw, table saw, hand saw, hammer, chisel, and reciprocating saw for notching the 2 by 4. The materials used are 8-ft 2x4s (8), 8-ft. 2X6 (1), and some scraps.
You might have been disappointed by many DIY sawhorse plans, but this plan won’t put you down because it is practical and affordable. You can build this in 30 minutes to one hour depending on your carpentry skills. The level of difficulty is easy. Save money by building your very own sawhorses now. Who knows? Your grandchildren will still be using them in the future and will be their basis for building their own sawhorses!
Helpful Link:
https://www.instructables.com/id/Strong-Light-Quick-Build-Sawhorse/
15) I-Beam Sawhorse Plan by My Outdoor Plans
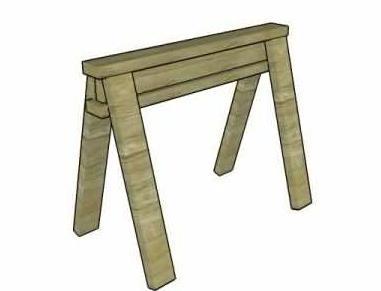
This is a step-by-step do-it-yourself woodworking project I-beam sawhorse plan. If you like to build a stackable sawhorse using 2x4s, this sawhorse plan will ease your job. The size can be adjusted or scaled to suit your needs and preference. You can already set a basic workbench in any location if you build a couple of sawhorses based on this plan. Make sure that you check the rest of these plans to see your options.
Work with great attention and do not forget about proper planning to save you from any issues, keeping the costs within your budget. You can invest in high-quality materials, like pine, cedar, or redwood. Drill the pocket holes prior to the insertion of galvanized screws, thus preventing the wood from splitting. You can also add waterproof glue to the sawhorse joints to enhance its rigidity.
Helpful Link:
http://myoutdoorplans.com/workshop/i-beam-sawhorse-plans/
16) Cottage Sawhorse Plan by Cottage Life
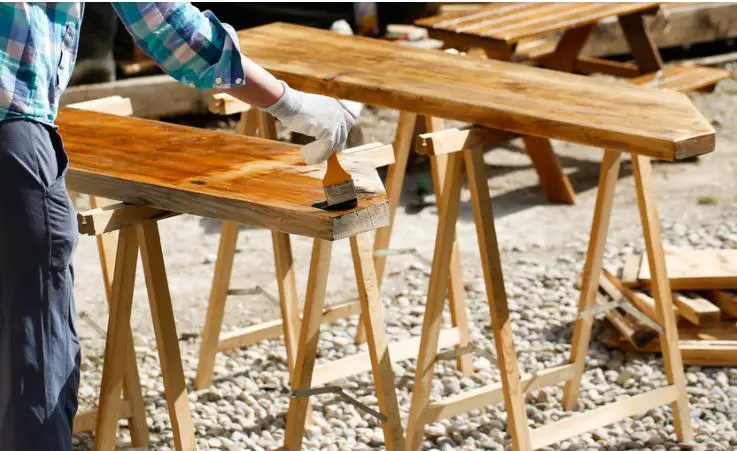
This cottage sawhorse is sturdy, versatile, reasonably lightweight, and inexpensive. It is somewhat attractive. Clamping stuff to it, cut or put stuff on it, routing or sanding stuff on it, then painting on it are the jobs you can accomplish. You can build this sawhorse plan by throwing a plywood sheet or a couple of 2 by 10s on a pair. Then you’ll have a reliable, sturdy, and instant workbench. Just add a tablecloth then you’ll have an extra table for an enjoyable cottage party.
This design can meet the above criteria. The plywood deck stows your construction tools while you work. You can get fancy by using cedar, but you can also use pine. The materials needed include 2×4 x 12′ lumber (2), 1 1⁄2 inch plywood sheet cut into 9×36 inches, and wood screws. Screw the struts, brace, and center block by assembling the top work surface.
Helpful Link:
https://cottagelife.com/design-diy/how-to-build-the-perfect-cottage-sawhorse/
17) Folding Plywood Sawhorse Plan by Makendo of Instructables
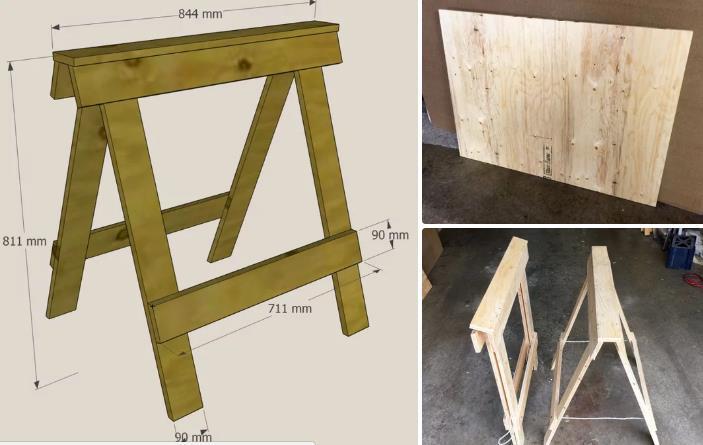
The builder wants a sturdy and space-saving sawhorse and these ones are easy to make, light, and you can hang on the wall. One of them can even support 500 pounds or 3 people which feel rock solid.
Sawhorses are meant for a workshop or building site. With this design, it is strongly influenced by the using a 3× 4 feet sheet of plywood that was a left over from a deck. This design is strong and foldable flat.
The builder redesigned the sawhorses slightly smaller so that four are cut out of a single sheet of plywood, just enough to build two sets of hangers. Aside from using ¾ inch construction plywood, the builder used 4 recycled 3 ½ inches door hinges, 1 ¼ inch drywall screws, 2 inches deck screws, some ¼ inch (6mm) polypropylene rope, and wood glue. These sawhorses are strong enough for most purposes if they are built with 5/8 inch or even ½ inch thick plywood. The tools used were miter saw and table saw.
Helpful Link:
https://www.instructables.com/id/Folding-Plywood-Sawhorses/
18) DIY Sawhorse by Kane of This Sort of Old Life
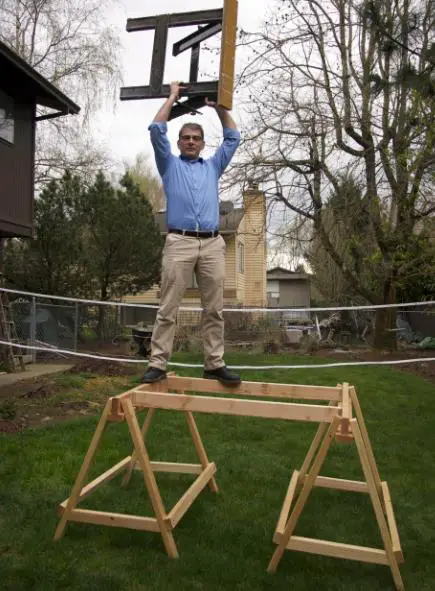
This sawhorse design is made as simple as possible to maximize function. This sawhorse is constructed using a minimum of expense and basic tools. The builder used 2 x 3 inches and 2 x 4 inches lumber. The 2 x 3 inches lumber can save some weight yet very strong. The other materials and tools used were one box of screws (2 1/2 inches), 4 metal 2×4 inches, a compound miter saw to make all cuts, a hand saw, and handy compound miter saw.
For the construction process, cut the 2×4 lumber in a half, making the widest sawhorse you can from the lumber. It will give you a sawhorse which measures 4 foot wide. The top portion is made of 2×4 cut in half and screwed together in an upside down. You certainly do not have to make the size this big. The normal size is 32 inches and these sawhorses are 48 inches.
Helpful Link:
http://www.thissortaoldlife.com/2013/04/11/diy-sawhorse/
19) Foldable Plywood Sawhorse by Woodsmith Plans
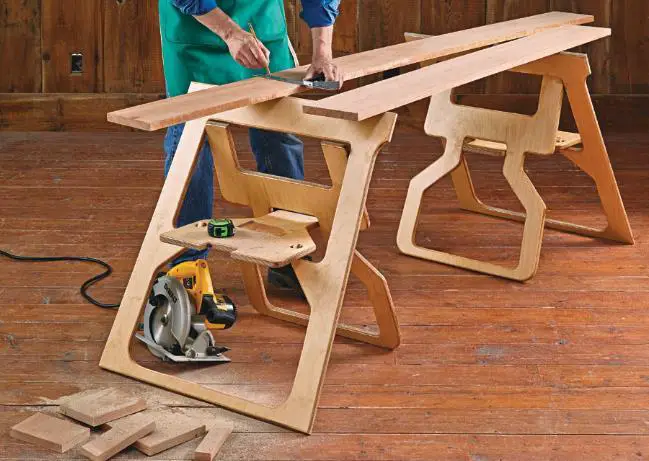
This is a unique design transforming one piece of plywood into versatile and sturdy shop helpers. It does not take so much space because it is compact yet rugged for heavy use. This design is tough to beat because the idea was adopted from a folding chair design that is space-saving. Each sawhorse is cut from a single piece of ¾ inch plywood, folding out into a solid A-frame shape. For setting these sawhorses, swing out the short leg, flipping up the shelf that locks onto horns in the long leg.
This do-it-yourself sawhorse plan is worth $7.95 and you’ll get 4 pages of sawhorse step-by-step instructions, 11 full-color photos and illustrations, and cutting patterns and diagram. The skills level required in building this sawhorse is intermediate. Now, you can build your very own compact and space-saving sawhorses that can be folded and easily stored.
Helpful Link:
https://www.woodsmithplans.com/plan/fold-flat-sawhorses/
20) Stackable Sawhorses by Woodgears
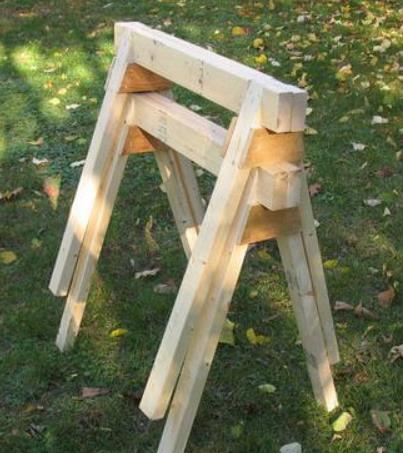
Sawhorses are an essential part of every construction job. These sawhorses are stackable which are perfect for workshops and construction job sites. The materials used by the builder include three 2″x3″x8′ for the legs, two 2″x4″x7′ for the cross beams, one 3.5″x2’x.75″ plywood for leg braces, and fifty 2 inches nails.
For the construction of these sawhorses, it involves cutting 3 feet long cross beams, building the legs, plates, and assembly. The plates are made from ¾ inch plywood. For the assembly, glue and nail the pieces together using 2.5 inches long nails. The plates are also glued and nailed to the legs using 2 inches long nails. Now, you are more confident building a stackable sawhorse design. Building your own sawhorses can save you money and also a good starter if you want to create other woodworking projects.
Helpful Link:
https://woodgears.ca/sawhorse/plans.html
